


The [Modify data] element  updates existing section/detail/lookup records during campaign execution. With the [Modify data] element, you can use data from the participant’s contact record, as well as its connected objects to set the corresponding values in the modified record.
Example
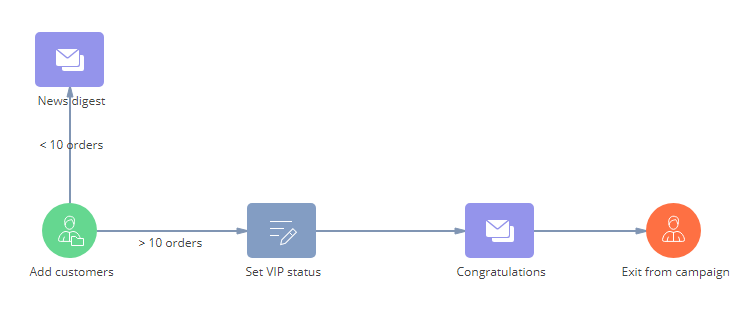
As part of a campaign (Fig. 1), change the contact type to “VIP” if they have more than 10 orders.
Fig. 1 Using the “Modify data” element in a campaign
Select the necessary object in the [Which object to modify data of?] field. Creatio modifies the data in a record of the selected object. For all objects, except the “Contact” object, the record must be connected to the participant’s contact. For example, if you select the “Lead” object, the element will modify the data of the lead, connected to the participant’s contact record.
Note
The “Lead” object is not available for selection by default. For more information, see the “Available objects” part of this article.
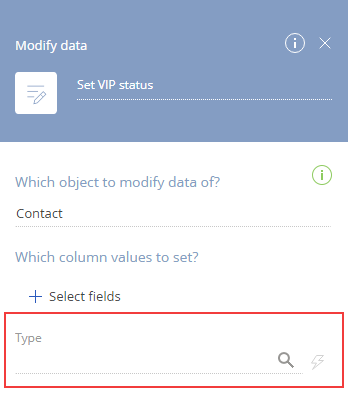
Specify the list of record fields you wish to modify in the [Which column values to set?] field. For example, to modify the contact type, select the “Contact” object in the [Which object to modify data of?] field, and select the [Type] field in the [Which column values to set?] field (Fig. 2).
Fig. 2 The “Modify data” element properties area
The fields selected in the [Which column values to set?] area are populated with custom values. Other fields do not change their value during campaign execution.
Click  next to the field to select its value. You can specify the field values in any of the following ways:
-
Manual input. You can specify the field value manually, using the same controls that are available for the same type of field on a regular record page: type in the values of text and numeric fields, select checkboxes for Boolean fields, select the value from lookups for lookup fields, and enter specific dates in the date fields. For example, select the “VIP” value in the [Type] field, and the [Modify data] element will set this particular value for all contacts it modifies.
-
Out-of-the-box macro. Certain columns have pre-defined macros, e.g., the “Contact account” macro in the “Account” field will populate it with the account specified in the campaign participant’s contact profile.
Note
The “Account” column in the “Contact” object is not available for selection by default. For more information, see the “Available objects” part of this article.
-
Custom macro. Use custom macros to populate the fields of the updated record with values from the participant’s contact record or records in other objects that are connected to the Contact object.
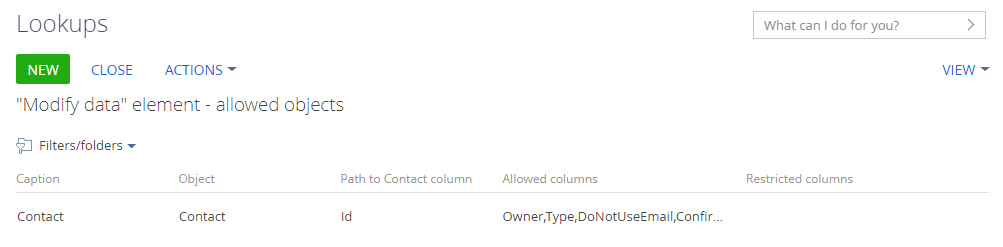
By default, the element only enables you to modify the “Contact” object data. You can configure the list of available objects in the “Modify data element - allowed objects” lookup (Fig. 4).
Fig. 3 The “Modify data element - allowed objects” lookup
To enable adding data to other objects, open System Designer -> Lookups -> “Modify data element - allowed objects” -> [New]. Populate the values of the new lookup record:
-
Specify the name of the object in the [Caption] column. This name is displayed in the [Which object to modify data to?] field.
-
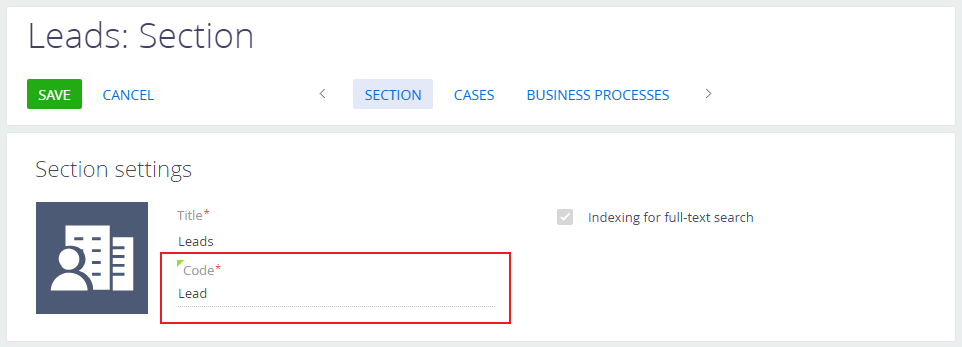
Specify the name of the object in the database (object “Code”) in the [Object] column. You can use the Section Wizard or Detail Wizard to look up the object (Fig. 4).
Fig. 4 Locating the object name in the Section Wizard
-
Specify the name of the column which connects the necessary object to the “Contact” object in the [Path to contact column] column. The column is usually named “Id”.
-
Specify available columns as comma-separated values in the [Allowed columns] column. This determines which object columns are available for selection in the [Which column values to set?] field. Type in “*” to make all columns available.
-
Specify the list of restricted columns as comma-separated values in the [Restricted columns] column. These columns will not be available for selection in the [Which column values to set?] field. The value in this column overrides the value in the [Allowed columns]. If you make all columns available in the [Allowed columns] column (the “*” value), the columns specified here will not be available for selection either way.
See also
•The [Exit from campaign] element
•The [Marketing email] element