


How to import contact communication options
In addition to the primary contact details of your customers, you can import additional information, such as communication options and addresses. They are located both in the primary object (Contact, Account) and on details on the [General information] tab.
-
If communication options are contained in the same import file as the primary object records (contacts or accounts), they will be imported along with primary object information. These communication options will be saved both in the primary object (“Contact” or “Account”) and on the [Communication options] detail. In this case, you can upload only one communication option and address of each type. Communication options and addresses that are located in the primary object can be used to search duplicates during import. For more information, please see the Customer base import article.
-
If communication options and addresses are located in a separate file, they can be imported after importing the customer database. To do this, select “Contact communication option” or “Account communication option” object.
Below is an example of importing communication options from a single file.
Prepare the import file. To do this, enter the contact full names in the first column, enter communication option types, such as “mobile phone” in the second column and the phone numbers in the third column. To import several communication options of the same type for a single contact, add a new row for each phone number in the imported file. The records in the [Full name] column must match the records of the similar column in the customer database file imported earlier.
Import the prepared To do this:
1.Open the System Designer by clicking the  button in the top right corner of the application window.
2.Click the [Data import] link in the [Import and integration] block. A data upload page will open in a new tab of your browser.
3.Click the [Select file] button and specify the prepared import file or drag the file directly to the Import Wizard page.
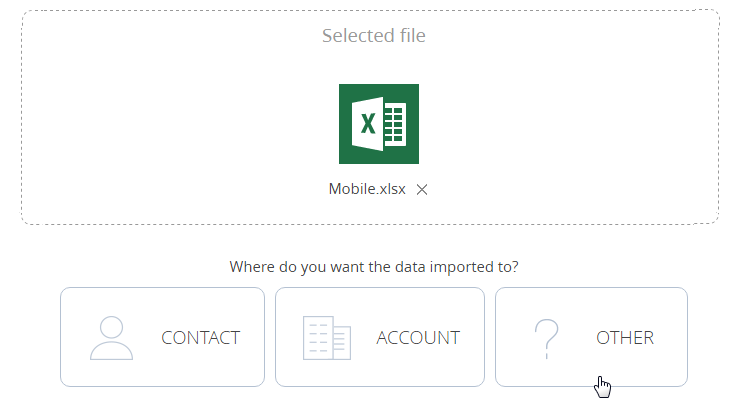
4.Click the [Other] button to select an import file (Fig. 1).
Fig. 1 Selecting object for import
5.Select “Contact communication options” from the drop-down list and click the [Next] button.
Note
If you are importing communication options for the [Accounts] section records, select the [Account communication options] object.
6.On the next wizard step, specify the column mapping in your file. In this case, the “Number” and “Type” columns are mapped automatically, and the “Contact name” column must be mapped to the [Contact] column.
Note
To map the columns in the imported Excel file and Creatio automatically, make sure that the column titles in the Excel file must match corresponding column names in Creatio.
7.On the [Duplicate management] page, select the “Contact” and “Number” columns. The selected columns will be used to check if the imported records already exist in Creatio. Click the [Start data import] button.
If you close the page after starting data import, the import will continue on the background. You will receive a notification from the notification center when the import is complete. Check the import result in the [Contacts] section.
See also