Set up a detail with fields
For Financial Services Creatio product lineup, use the BaseFieldsDetail schema of the BaseFinance package to set up details with fields. This package is available only in Financial Services Creatio product lineup.
To use details with fields in CRM Creatio products:
- Download the
sdkFieldsDetailPackagepackage: download package. - Import the package into Creatio. To do this, follow the guide in a separate article: Transfer packages.
- Add the
sdkFieldsDetailPackagepackage to the dependencies of a custom package.
Implement the Medical documents custom detail with the Number and Series virtual fields. Add the detail to the History tab of the contact page. The value of the Number field cannot be negative. Render the detail field names blue.
1. Create a custom detail
-
Create a custom package and set it as current. Learn more in a separate article: Packages basics.
-
Click
 to open the System Designer.
 -
Go to the System setup block → Detail wizard.
-
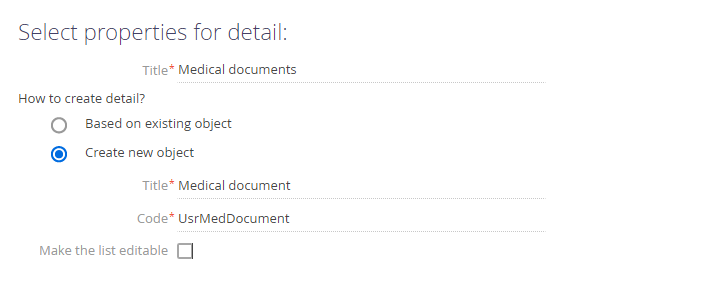
Fill out the detail properties:
-
Set Title to "Medical documents."
-
Set How to create detail? to "Create new object."
Fill out the object properties:
- Set Title to "Medical document."
- Set Code to "UsrMedDocument."
As a result, Creatio will add the following schemas to the configuration:
- The
UsrMedDocumentschema of the detail object. - The
UsrSchemac6fd3fd0Detailschema of the Medical documents detail list's view model. - The
UsrUsrMedDocument4988cee4Pageschema of the Medical documents detail record page's view model.
-
-
Go to the Page tab and set up the detail record page.
-
Set up the detail fields.
-
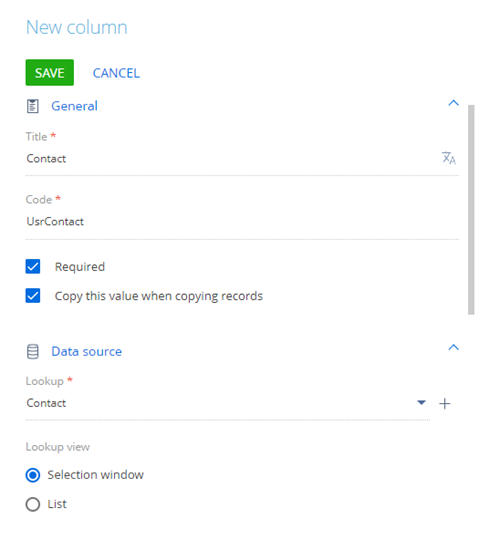
Fill out the Contact field of the Lookup type.
- Set Title to "Contact."
- Set Code to "UsrContact."
- Select the Required checkbox.
- Set Lookup to "Contact."
-
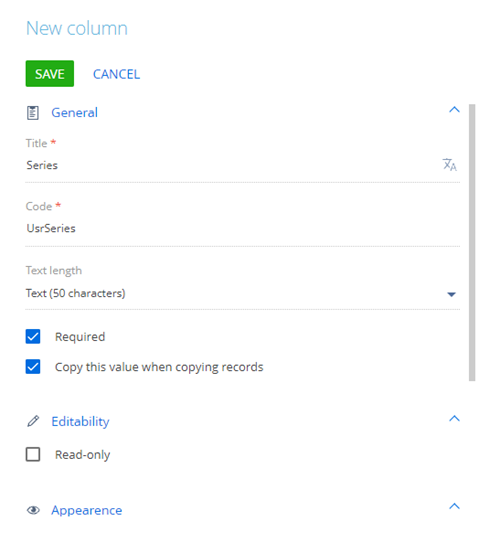
Fill out the Series field of the String type.
- Set Title to "Series."
- Set Code to "UsrSeries."
- Set Text length to "Text (50 characters)."
- Select the Required checkbox.
-
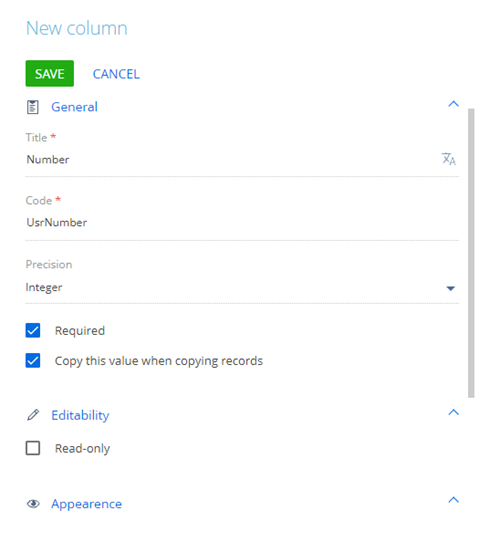
Fill out Number field of the Integer type.
- Set Title to "Number."
- Set Code to "UsrNumber."
- Select the Required checkbox.
-
-
If necessary, modify the position of detail fields.
-
Click Save on the Detail Wizard's toolbar.
As a result, Creatio will modify the UsrUsrMedDocument4988cee4Page configuration schema of the Medical documents detail record page's view model.
2. Set up the custom detail
-
Go to the Configuration section and select a custom package to set as the current package.
-
Open the
UsrMedDocumentschema of the detail object. -
Delete the
[UsrName]required column in the context menu of the object structure's Columns node.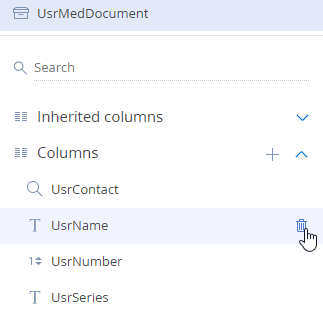
-
Click Publish on the Object Designer's toolbar.
-
Open the
UsrSchemac6fd3fd0Detailschema of the Medical documents detail list's view model. -
Click the
/scr_edit_button.png) button on the properties panel and specify
button on the properties panel and specify BaseFieldsDetailin the Parent object field. TheBaseFieldsDetailschema implements the detail that has fields. By default, the parent object in the Detail Wizard is the schema of a base detail that has a list.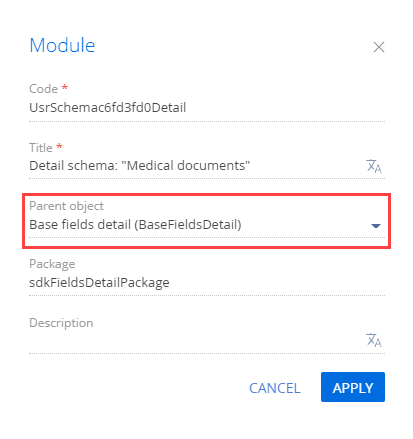
-
Add the
getDisplayColumnsmethod to themethodsproperty of the detail's view model schema. The method returns the array of column names displayed as fields in the detail.View the source code of the
UsrSchemac6fd3fd0Detailschema below.UsrSchemac6fd3fd0Detaildefine("UsrSchemac6fd3fd0Detail", [], function() {
return {
entitySchemaName: "UsrMedDocument",
details: /**SCHEMA_DETAILS*/{}/**SCHEMA_DETAILS*/,
diff: /**SCHEMA_DIFF*/[]/**SCHEMA_DIFF*/,
methods: {
getDisplayColumns: function() {
return ["UsrSeries", "UsrNumber"];
}
}
};
}); -
Click Save on the Module Designer's toolbar.
3. Add the detail to the section record page
-
Go to the Contacts section and open the contact page.
-
Click View → Open section wizard on the toolbar.
-
Go to the History tab of the Section Wizard workspace and click the New detail button.
-
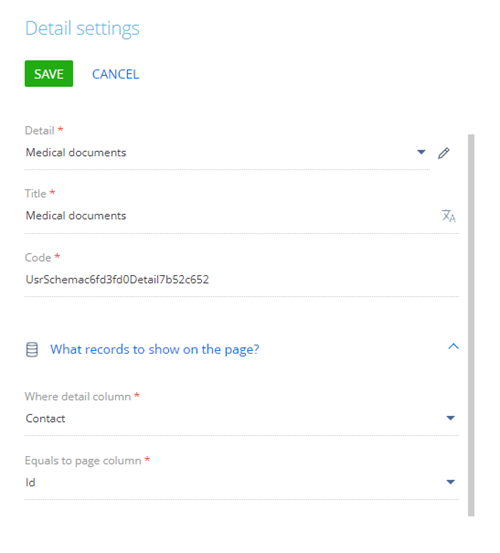
Fill out the detail parameters.
-
Set Detail to "Medical documents." Creatio will populate the Title and Code fields.
-
Set Where detail column to "Contact."
Leave other columns as they are.
-
-
Click Save → Section wizard → Save.
As a result, Creatio will add the Medical documents detail to the History tab of the contact page.

4. Add custom detail styles
The view model schema of a detail page does not support visual styles. As such, take the following steps to add the styles:
- Create a module schema. Define the styles there.
- Add the style module to the dependencies of the detail module.
1. Create a module schema
-
Go to the Configuration section and select a custom package to set as current.
-
Click Add → Module on the section list toolbar.
/scr_add_module.png)
-
Fill out the following schema properties:
- Set Code to "UsrMedDocumentRowViewModel."
- Set Title to "MedDocumentRowViewModel."
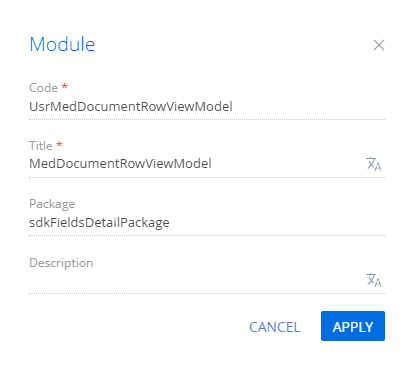
Click Apply to apply the properties.
-
Add the source code in the Schema Designer. Create a module description in the source code of the schema. Define the
Terrasoft.configuration.UsrMedDocumentRowViewModelclass inherited from theTerrasoft.BaseFieldRowViewModelclass in the module description.UsrMedDocumentRowViewModeldefine("UsrMedDocumentRowViewModel", ["BaseFieldRowViewModel"], function() {
Ext.define("Terrasoft.configuration.UsrMedDocumentRowViewModel", {
extend: "Terrasoft.BaseFieldRowViewModel",
alternateClassName: "Terrasoft.UsrMedDocumentRowViewModel"
});
return Terrasoft.UsrMedDocumentRowViewModel;
}); -
Go to the LESS node of the object structure and set up the needed visual styles of the detail.
Set up the visual styles of the detail.med-document-left-row-container {
.t-label {
color: blue;
}
}
.field-detail-row {
width: 100;
display: inline-flex;
margin-bottom: 10px;
.field-detail-row-left {
display: flex;
flex-wrap: wrap;
.control-width-15 {
min-width: 300px;
width: 50;
margin-bottom: 5px;
}
}
.field-detail-row-left.singlecolumn {
width: 50%;
}
} -
Click Save on the Designer's toolbar.
2. Modify the view model schema of the detail
To use the module and its styles in the detail schema:
-
Open the
UsrSchemac6fd3fd0Detailschema of the Medical documents detail list's view model. -
Add the
UsrMedDocumentRowViewModelmodule to the dependencies of theUsrSchemac6fd3fd0Detailschema. -
Add the following methods that override the base CSS style classes to the definition of the detail schema module:
- The
getRowViewModelClassName()method. Returns the class name for the view model of the record on the detail. - The
getLeftRowContainerWrapClass()method. Returns the string array of CSS class names. The names are required to generate the view of containers that include the record field signatures.
View the source code of the modified schema below.
UsrSchemac6fd3fd0Detaildefine("UsrSchemac6fd3fd0Detail", ["UsrMedDocumentRowViewModel", "css!UsrMedDocumentRowViewModel"], function() {
return {
entitySchemaName: "UsrMedDocument",
details: /**SCHEMA_DETAILS*/{}/**SCHEMA_DETAILS*/,
diff: /**SCHEMA_DIFF*/ [], /**SCHEMA_DIFF*/
methods: {
getDisplayColumns: function() {
return ["UsrSeries", "UsrNumber"];
},
getRowViewModelClassName: function() {
return "Terrasoft.UsrMedDocumentRowViewModel";
},
getLeftRowContainerWrapClass: function() {
return ["med-document-left-row-container", "field-detail-row"];
}
}
};
}); - The
-
Click Save on the Designer's toolbar.
As a result, Creatio will render the field names of the Medical documents detail added to the History tab of the contact page blue.

5. Add validation to the detail field
-
Open the
UsrMedDocumentRowViewModelschema of the module. -
Add a localizable string with the warning about an incorrect Number field value.
-
Click the
/scr_add_button.png) button in the context menu of the Localizable strings node.
button in the context menu of the Localizable strings node. -
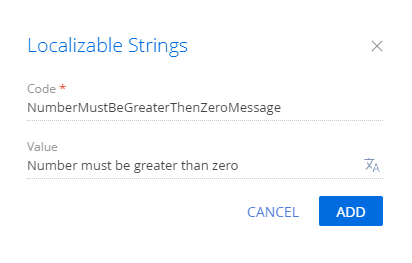
Fill out the localizable string properties:
- Set Code to "NumberMustBeGreaterThenZeroMessage."
- Set Value to "Number must be greater than zero."
-
Click Add to add a localizable string.
-
Add the
UsrMedDocumentRowViewModelResourcesresource module to the dependencies of theUsrMedDocumentRowViewModelmodule. This is required for Creatio to display the localizable string value in the front-end.
-
-
Add the validation logic of the Number field value. To do this, implement the following methods:
- the
validateNumberMoreThenZero()method that contains the validation logic of the field value - the
setValidationConfig()method that binds the[Number]column to thevalidateNumberMoreThenZero()validator method. - the
init()overridden base method that calls the base logic and thesetValidationConfig()method
View the source code of the modified schema below.
UsrMedDocumentFieldsDetaildefine("UsrMedDocumentRowViewModel", ["BaseFieldRowViewModel", "UsrMedDocumentRowViewModelResources"], function(resources) {
Ext.define("Terrasoft.configuration.UsrMedDocumentRowViewModel", {
extend: "Terrasoft.BaseFieldRowViewModel",
alternateClassName: "Terrasoft.UsrMedDocumentRowViewModel",
validateNumberMoreThenZero: function(columnValue) {
var invalidMessage ="";
if (columnValue < 0) {
invalidMessage = resources.localizableStrings.NumberMustBeGreaterThenZeroMessage;
}
return {
fullInvalidMessage: invalidMessage,
invalidMessage: invalidMessage
};
},
setValidationConfig: function() {
this.addColumnValidator("UsrNumber", this.validateNumberMoreThenZero);
},
init: function() {
this.callParent(arguments);
this.setValidationConfig();
}
});
return Terrasoft.UsrMedDocumentRowViewModel;
}); - the
-
Click Save on the Designer's toolbar.
As a result, if you enter a negative value in the Number field, Creatio will display the corresponding warning.

6. Make the detail fields virtual
-
Open the
UsrSchemac6fd3fd0Detailschema of the Medical documents detail list's view model. -
Add the
useVirtualRecord()method implementation.View the source code of the modified schema below.
UsrSchemac6fd3fd0Detaildefine("UsrSchemac6fd3fd0Detail", ["UsrMedDocumentRowViewModel", "css!UsrMedDocumentRowViewModel"], function() {
return {
entitySchemaName: "UsrMedDocument",
details: /**SCHEMA_DETAILS*/{}/**SCHEMA_DETAILS*/,
diff: /**SCHEMA_DIFF*/ [], /**SCHEMA_DIFF*/
methods: {
getDisplayColumns: function() {
return ["UsrSeries", "UsrNumber"];
},
getRowViewModelClassName: function() {
return "Terrasoft.UsrMedDocumentRowViewModel";
},
getLeftRowContainerWrapClass: function() {
return ["med-document-left-row-container", "field-detail-row"];
},
useVirtualRecord: function() {
return true;
}
}
};
}); -
Click Save on the Designer's toolbar.
As a result, if you open the History tab with the Medical documents detail, Creatio will display a virtual record.

Resources
Package with example implementation for Financial Services Creatio product lineup
Package with example implementation for CRM Creatio products