


Working with the server side source code
Glossary Item Box

Introduction
Creatio has the ability to debug program code using the integrated functions of the Visual Studio development environment. The Visual Studio debugger enables developers to freeze the execution of program methods, check variable values, modify them and monitor other activities performed by the program code.
The general procedure for Creatio development in Visual Studio is as follows:
- Perform preliminary settings in Creatio and Visual Studio.
- Create, obtain or update a package from the SVN repository.
- Create a [Source code] schema for development.
- Perform development in Visual studio.
- Save, compile and debug the source code.
ATTENTION
After successful compilation, the resulting Terrasoft.Configuration.dll assembly will be placed to the Bin catalog, while IIS will automatically use it in Creatio application.
General procedures for developing Creatio solutions in Visual Studio
1. Perform preliminary settings
Creatio and Visual Studio setup for development in the file system is described in the “Development in the file system” and “IDE settings for development” articles.
NOTE
For development in the file system, you can use Microsoft Visual Studio Community, Professional and Enterprise version 2017 (with latest updates) and higher.
2. Create, obtain or update a package from the SVN repository
Creating a custom package with or without SVN is described in the “Creating a package for development” and “Creating a package in the file system development mode” articles. Installing and updating packages is described in the “Installing packages from repository” and “Updating package from repository” articles.
NOTE
We recommend using Tortoise SVN or Git for working with version control repositories.
3. Create a [Source code] schema
Learn more about the process of creating the [Source code] schema in the “Creating the [Source code] schema” article.
4. Conduct development in the Visual Studio
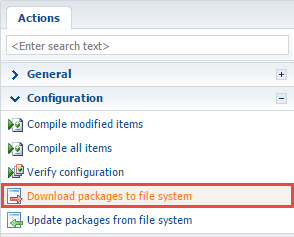
Before you start development in Visual Studio, make sure that you export existing schemas from the database to the file system.
Fig. 1 The [Download packages to file system] action
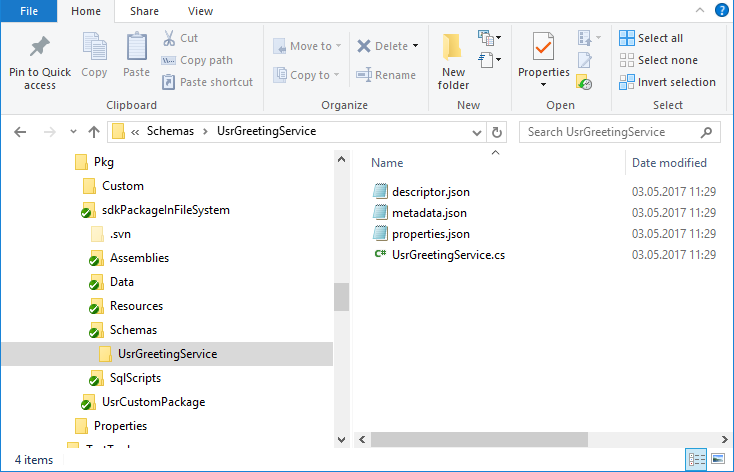
For example, if the [Source code] schema with the name UsrGreetingService was created in the sdkPackageInFileSystem package, the file of the source code of the UsrGreetingService.cs schema appears in the file system in the Pkg\sdkPackageInFileSystem\Schemas\ directory (Fig. 2). In this case, the system generated UsrGreetingServiceSchema.sdkPackageInFileSystem_Entity.cs file will be placed in the Autogenerated\Src directory.
Fig. 2 The source code schema file
NOTE
To add a schema to SVN, you must add the entire UsrGreetingService directory, including the JSON files.
Open the Terrasoft.Configuration.sln solution in Visual Studio to start the development (see “Development in the file system”). In Visual Studio Solutions Explorer, enable the display of all file types (Fig. 3, 1), open the UsrGreetingService.cs file (Fig. 3, 2) and add the required source code (Fig. 3, 3).
Fig. 3 Working with the schema file in Visual Studio
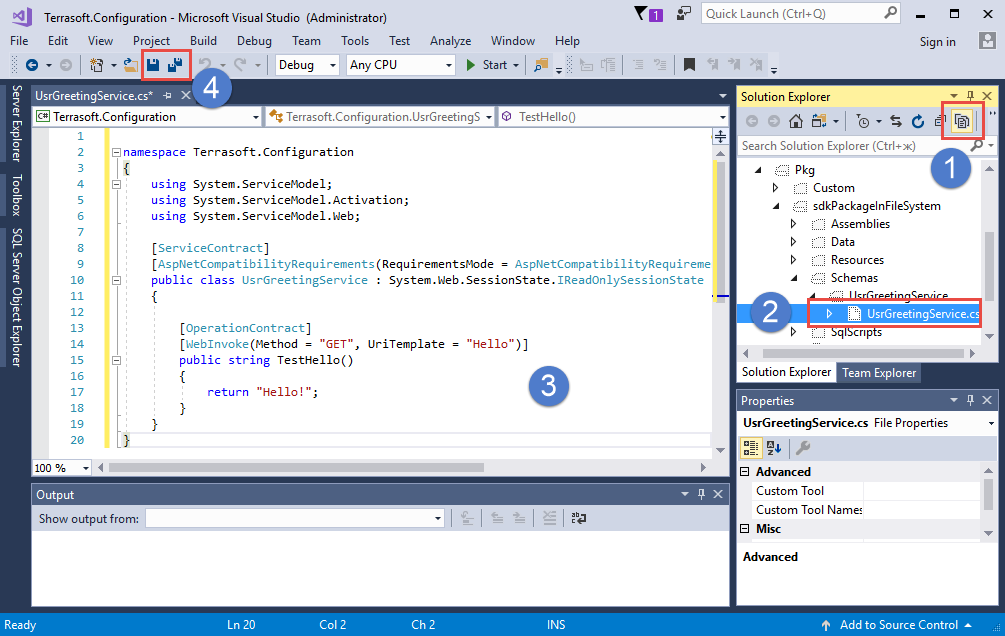
Below is an example of source code implementation, which must be added to the contents of the UsrServiceGreeting.cs file, using Visual Studio:
namespace Terrasoft.Configuration
{
    using System.ServiceModel;
    using System.ServiceModel.Activation;
    using System.ServiceModel.Web;
    // Class that implements configuration service.
    [ServiceContract]
    [AspNetCompatibilityRequirements(RequirementsMode = AspNetCompatibilityRequirementsMode.Required)]
    public class UsrGreetingService : System.Web.SessionState.IReadOnlySessionState
    {
        // Service operation.
        [OperationContract]
        [WebInvoke(Method = "GET", UriTemplate = "Hello")]
        public string TestHello()
        {
            return "Hello!";
        }
    }
}
For more information about the purpose of the attributes of the class that implements configuration services, please refer to the “Creating a user configuration service”.
5. Save, compile and debug source code
After modifying the source code, and before compiling and debugging it, be sure to save the code. Normally, this is done by Visual Studio automatically, but since Visual Studio compiler is not used, the developer must save the code manually.
After saving, the source code must be compiled with the “Build Workspace” or “Rebuild Workspace” commands (see “IDE settings for development”). If the compilation is successful, the code becomes available. In the example described previously, the service will become available at the following address (Fig. 4):
http://[Application URL]/0/rest/UsrGreetingService/Hello
Fig. 4 Checking service workability

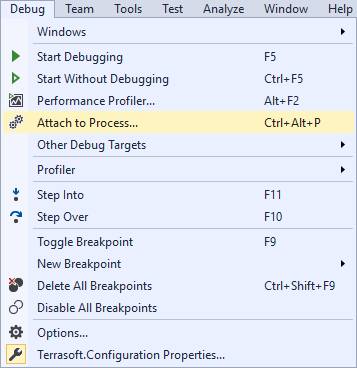
To begin debugging, attach to the IIS server process, where the application runs. Execute the Debug > Attach to process menu command (Fig. 5).
Fig. 5 The [Attach to process] command
In the opened window, select the working IIS process in the list of processes, where the application pool is running (Fig. 6).
Fig. 6 Attaching to an IIS process

NOTE
The name of the working process can be different, depending on the configuration of the IIS server being used. With a regular IIS, the process is w3wp.exe, but with IIS Express, the process name is iisexpress.exe.
By default, the IIS working process is run under the account whose name matches the name of the application pool. To display processes of all users, set Show processes from all users checkbox (Fig. 6).
After attaching to a working IIS process, execute compilation one more time. After that, begin the debugging process using the Visual Studio debugger. For example, you can set the stop points, view variable values, call stacks, etc. For more information on the Visual Studio debugger, please refer to the corresponding documentation.
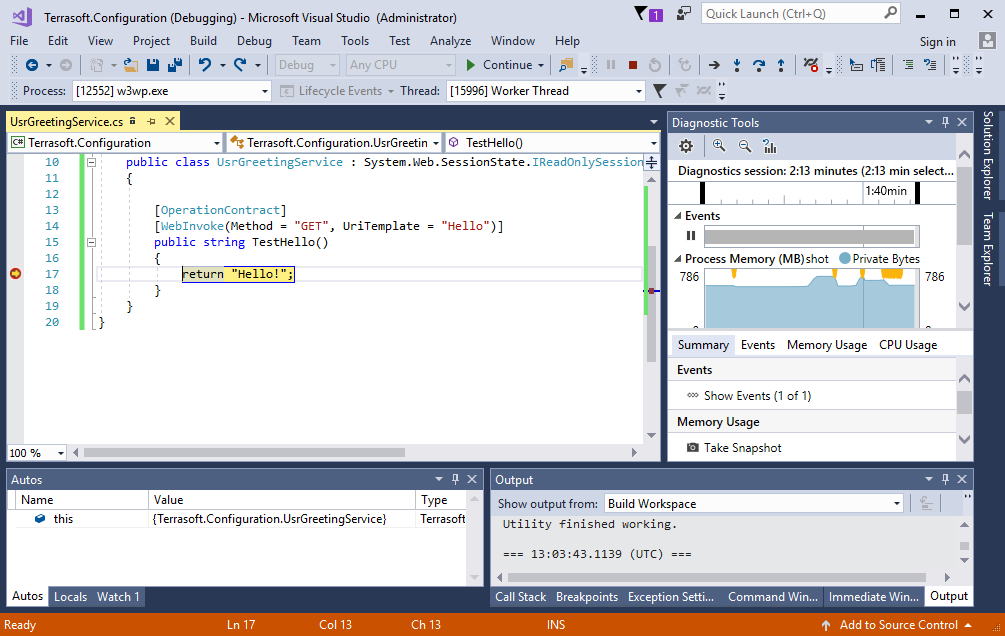
For example, after setting up the breakpoint on the return line from the TestHello() method, and re-compiling the application and executing the service request, the debugger will stop the program execution on the breakpoint (Fig. 7).
Fig. 7 Stopping an application on the breakpoint
ATTENTION
The debugging feature depends on the correct configuration of Visual Studio.