


Registering the MS Word printable
A new printable is added within several steps. The first step is registering a new printable in the [Printables] lookup.
Note
To register a new printable in Creatio, the user must have permissions to perform the “Access to "Lookups" section” system operation. System administrators are able to perform this operation by default, and can grant access to other users. Learn more about access rights in “The [Operation permissions] section” article.
Then you will need to determine the data that will be included in the printable by selecting corresponding columns of system objects. You can add simple data, such as a name of the selected contact or a date of the activity, as well as table data, such as a list of tasks connected to an account. Boolean fields, such as the [Do not use phone] checkbox, can also be added to the printable. Use special macros to set up the visual appearance of the boolean field values in the print form. Working with macros is covered in the Development Guide.
1. Registering a printable
To register a printable:
1.Open the system designer and click the [Lookups] link in the [System setup] navigation block.
2.Open the [Printables] lookup.
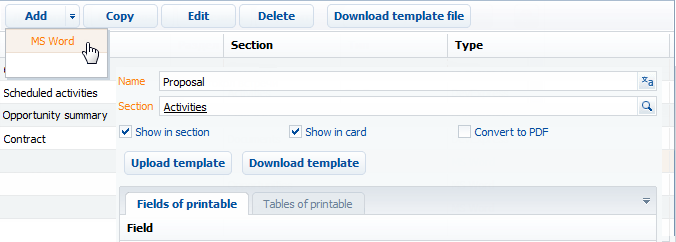
3.Select the [MS Word] command in the [Add] button menu (Fig. 1).
Fig. 1 Adding an MS word printable
4.Enter the name of the printable.
5.Select the section where the printable should be available. For example, to add an activity printable, specify the [Activities] section.
6.Select the [Show in section] and/or [Show in card] checkboxes.
7.Save the printable card.
To add data to a printable:
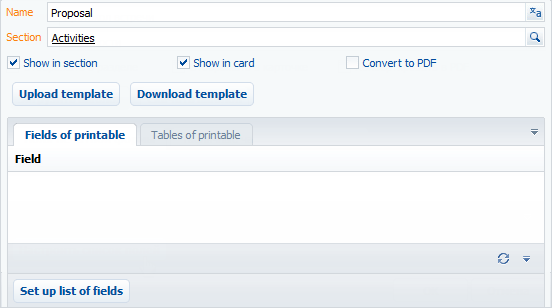
1.In the MS Word printable card, click the [Set up list of fields] button (Fig. 2).
Fig. 2 Configuring the list of fields for the printable
2.In the [Available columns] area of the opened window, select an object whose columns should be added to the printable. For example, to add information about an activity, select the “Activity” object. Select the “Contact” object in order to add information about a contact connected to the activity.
As a result, in the central part of the window, a list of columns for the selected object will be displayed.
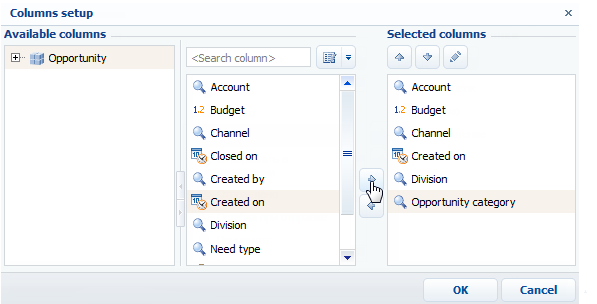
3.Double-click a column in the columns area to add it in the [Selected Columns] area. You can also add a column by selecting it in the columns area and clicking the  button. For example, to display an owner name in the printable for minutes of a meeting, you should add the [Owner] column (Fig. 3).
Fig. 3 Adding columns to the printable
4.Add all necessary columns to the [Selected columns] area and click [OK].
5.Save the printable card.
As a result, the list of fields for the printable will be created from the selected columns.
3. Adding the table data to a printable
You can also add data that will be used for creating tables in the printable. To do this:
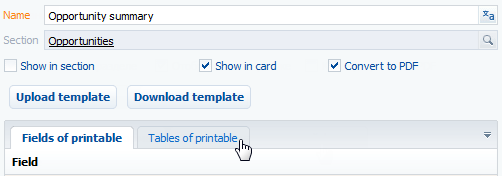
1.In the MS Word printable card, go to the [Tables of printable] tab (Fig. 4).
Fig. 4 Switching to the [Tables of printable] tab
2.Click the [New] button.
3.Populate the table data card (Fig. 5):
Fig. 5 Adding table data to the printable
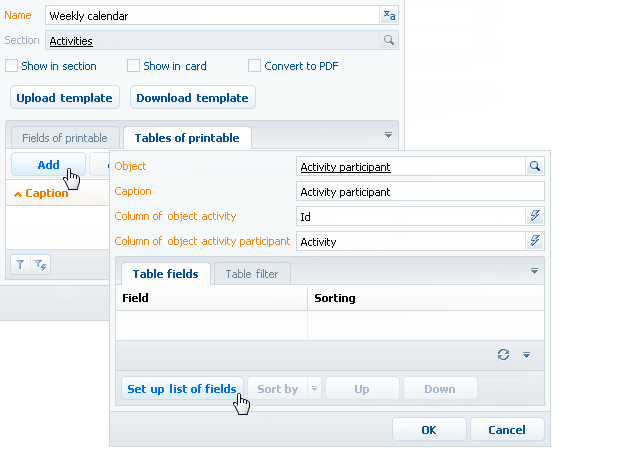
a.In the [Object] field, select an object whose data will be used to create a table. For example, select the “Activity participant” object to add a table containing the list of the minutes activity participants.
b.Specify the title to identify this table. Fields of this table will be added to a group with the specified name.
c.Select the [Hide the table if it is empty] checkbox if necessary.
4.Click the [Set up list of fields] button (Fig. 5).
5.Set up the list of columns for the table (Fig. 6).
Fig. 6 Setting up table columns
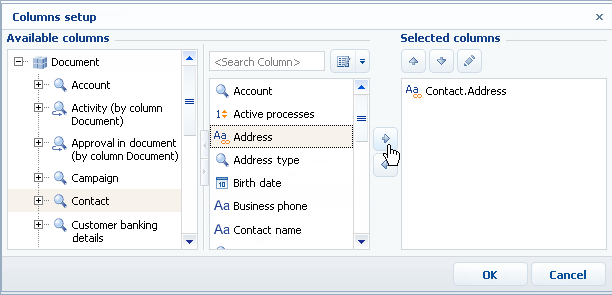
a.In the [Available columns] area, select an object whose columns should be added to the table. As a result, a list of columns for the selected object will be displayed in the central part of the window.
b.Double-click a column in the columns area to add it in the [Selected Columns] area. You can also add a column by selecting it in the columns area and clicking the  button.
c.Add all necessary columns to the [Selected columns] area and click [OK].
d.If necessary, use the  and
and  buttons to define the order of columns in the table.
6.If necessary, specify the sorting of records:
Fig. 7 Sorting table records in the printable
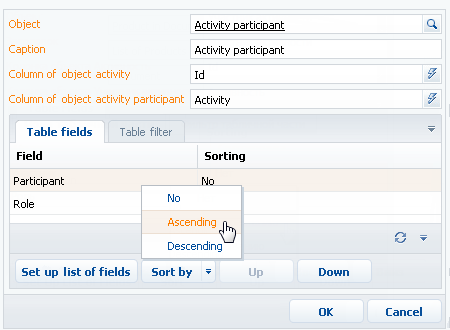
a.Select a column that should be used for sorting.
b.In the menu of the [Sort] button, select the order direction (“Ascending” or “Descending”). For example, you can sort a list of activity participants in the alphabetical order.
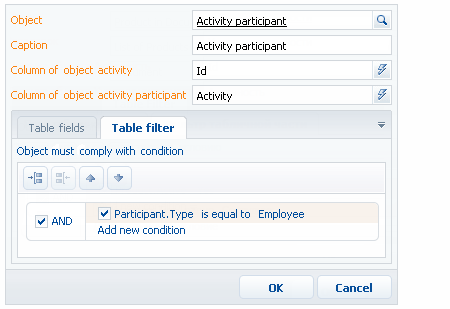
7.If necessary, go to the [Table filter] tab and create the filter whose conditions will define which records will appear in the table. For example, you can specify the company employees only (Fig. 8).
Fig. 8 Filtering records in a table
8.Save the table data card.
As a result, the printable can contain data that can be used for creating tables with multiple rows. Each record on the [Tables of printable] tab is a separate table that can be added in the printable template.
See also