How to add auto-numbering to the edit page field
Glossary Item Box

Introduction
You can add auto numbering for an object column. For instance, auto numbering is applied in the [Documents], [Invoices] and [Contracts] sections where a preformatted number is automatically generated when you add a new record.
There are two ways of implementing auto numbering:
- Client-side implementation.
- Server-side implementation.
To implement auto numbering on the client side, override the base virtual method onEntityInitialized() and call the getIncrementCode() method of the edit page base schema BasePageV2.
The getIncrementCode() method accepts two parameters:
- callback – the function that will run after receiving service response. The response must be passed to the corresponding column (attribute);
- scope – the context where the callback function will be run (optional parameter).
To implement auto numbering on the server side , add the event handler [Before record adding] to the object, whose column will be auto numbered. Set up number generating parameters in the business process, namely:
- Indicate the schema of the object for which generation will be performed.
- Call the [Generate ordinal number] action.
- Pass the generated value to the necessary object column.
NOTE
This is not the only way to implement auto numbering on the server side. It can be implemented via custom means, for instance, by creating a custom service.
Regardless of the chosen solution, add two system settings to use auto numbering:
- [Entity]CodeMask – object number mask.
- [Entity]LastNumber – current object number.
[Entity] – is the name of the object, whose column will be auto numbered. For example, InvoiceCodeMask (Invoice number mask) and InvoiceLastNumber (Current invoice number).
Case description
Set up auto numbering for the [Code] field in the [Products] section. The product code format must be as follows: ART_00001, ART_00002 and so on.
ATTENTION
We covered two alternative ways of case implementation: client- and server-side.
Source code
You can download the package with case implementation using the following link.
ATTENTION
The package does not contain the bound system settings ProductCodeMask and ProductLastNumber. You will need to add them manually.
Case implementation algorithm: client-side
1. Create two system settings
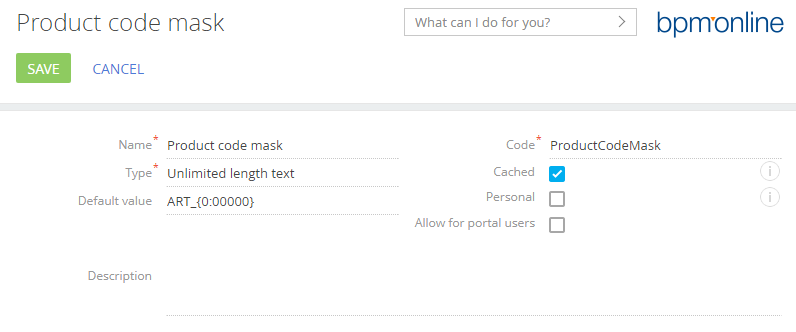
Create the [Product code mask] system setting with the following number mask: “ART_{0:00000}” (Fig.1) Populate the following fields:
- [Name] – “Product code mask”.
- [Code] – “ProductCodeMask”.
- [Type] – a string, whose length depends on the number of characters in the mask. In most cases 50 characters are enough. In this example, we use a string of unlimited length.
- [Default value] – "ART_{0:00000}".
Fig. 1. The [Product code mask] system setting
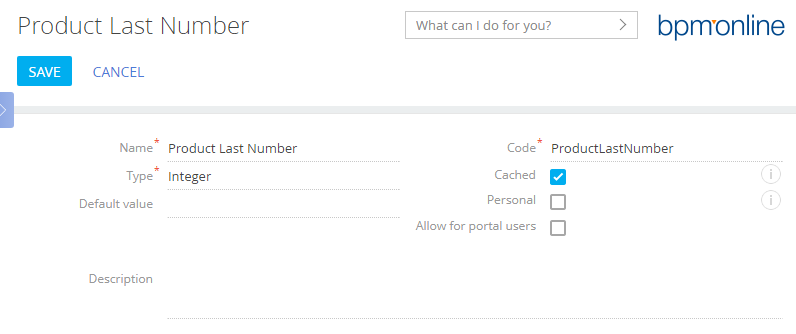
Create the [Product last number] system setting (Fig.2). Populate its properties:
- [Name] – “Product last number”.
- [Code] – “ProductLastNumber”.
- [Type] – “Integer”.
Fig. 2. The [Product last number] system setting
2. Create a replacing schema in the custom package
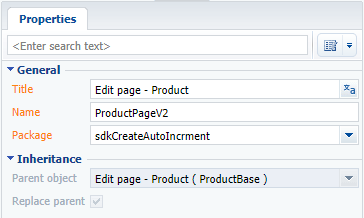
Create a replacing client module and specify the ProductPageV2 schema as parent object (Fig. 3). The procedure for creating a replacing page is covered in the “Creating a custom client module schema” article.
Fig. 3. Properties of the product edit page replacing schema
3. Override the onEntityInitialized() method
In the collection of edit page view model methods, override the onEntityInitialized() method. In onEntityInitialized() method, call the getIncrementCode() method and fill in the generated number in the [Code] column of its callback function. The replacing schema source code is as follows:
define("ProductPageV2", [], function() {
    return {
        // The name of edit page object schema.
        entitySchemaName: "Product",
        //  The collection of edit page view model methods.
        methods: {
            // Overriding Terrasoft.BasePageV2.onEntityInitialized base method, that
            // is triggered when the initialization of the edit page object schema is finished.
            onEntityInitialized: function() {
                // onEntityInitialized method parent realization is called.
                this.callParent(arguments);
                // The code is generated only in case we create a new element or a copy of the existing element.
                if (this.isAddMode() || this.isCopyMode()) {
                    //  Call of the Terrasoft.BasePageV2.getIncrementCode base method, that generates the number
                    // according to the previously set mask.
                    this.getIncrementCode(function(response) {
                        // The generated number is stored in [Code] column.
                        this.set("Code", response);
                    });
                }
            }
        }
    };
});
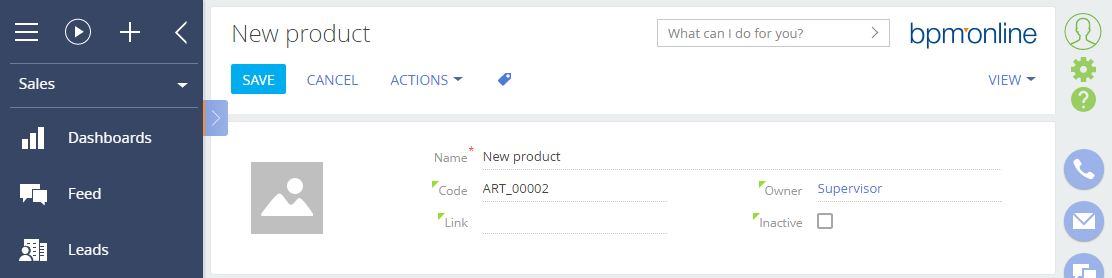
After saving the schema, clearing the browser cache and updating the application page, the automatically generated product code will be displayed when you add a new product (Fig.4).
Fig. 4. The result of case implementation on the client side
Case implementation algorithm: server-side
1. Create two system settings
This step is absolutely identical to the first step of case implementation algorithm on the client side.
2. Create a replacing schema of the [Product] object
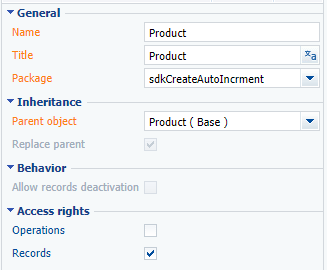
Select a custom package and execute the [Add] – [Replacing object] menu command on the [Schemas] tab. Specify the [Product] object as the parent object in the new object properties (Fig. 5).
Fig. 5. Properties of the product replacing schema
3. Add the [Before record adding] event handler to the object schema
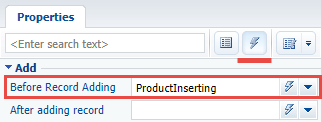
Add a new event handler in the object properties displayed in the object designer. To do this, go to the event tab and double-click the [Before Record Adding] field or click the event icon in this field (Fig.6).
Fig. 6. The [Before record adding] product event handler
The object’s process designer will open.
4. Add an event sub-process
To implement the [Before Record Adding] event handler, add event sub-process to the working area of the object process designer. Set up a business process for number generation (Fig.7).
Fig. 7. The sub-process for the [Before Record Adding] event handler

Event sub-process elements
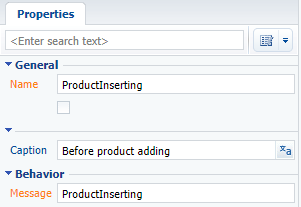
1. Initial message [Before product adding] (Fig.8) – the sub-process will be run upon receiving the ProductInserting message added at step3.
Fig. 8. The [Before product adding] initial message properties
2. [Exclusive gateway (OR)], which branches the process into two flows:
- Default flow – the transition down this flow will occur if the condition flow cannot be implemented. This branch finishes with the [Terminate] event.
- Condition flow [Code is empty] – checks whether the [Code] column is populated (Fig.9). The further execution of the sub-process can only be possible if the column is not populated.
Fig. 9. The [Code is empty] condition flow properties
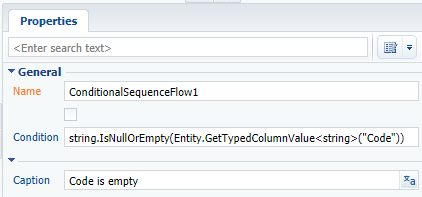
Add the following code to the [Condition] field of the condition flow:
string.IsNullOrEmpty(Entity.GetTypedColumnValue<string>("Code"))
3. Script task [Get entity schema to generate number] (Fig.10).
Fig. 10. [Get entity schema to generate number] script task properties
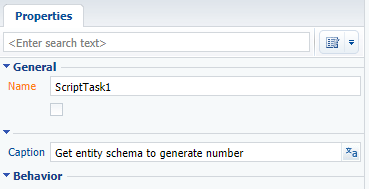
Program code С# script is executed in this element. To add it double-click the element. Add the following source code in the opened window:
//Setting the schema for number generation.
UserTask1.EntitySchema = Entity.Schema;
return true;
Note that “UserTask1” here is the name of the [Generate number] user action.
ATTENTION
Save the script after adding the source code. To do this, select the [Save] menu action.
4. User task [Generate number] (Fig.11).
Fig. 11. The [Generate number] user task properties

This element performs the [Generate ordinal number] system action. It is the [Generate ordinal number] system action, which generates the current ordinal number in accordance with the ProductCodeMask mask set in the system settings.
5. Script task [Save number to entity column] (Fig.12).
Fig. 12. The [Save number to entity column] script task properties
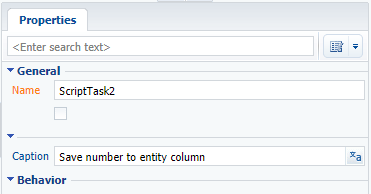
Program code С# script is executed in this element. The value generated by the UserTask1 user action is stored in the [Code] column of the [Product] created object. The source code of the schema is available below:
Entity.SetColumnValue("Code", UserTask1.ResultCode);
return true;
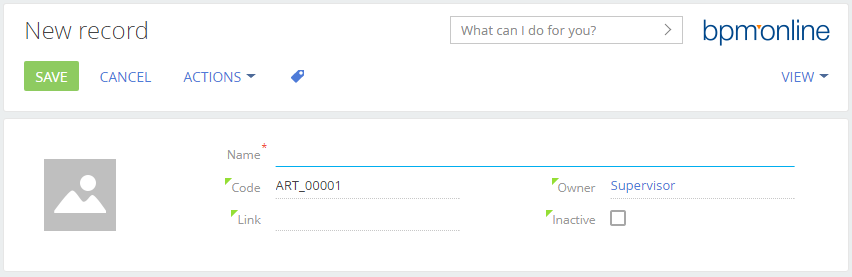
Save and close the default process designer and publish the [Product] object schema. As a result, after saving the new product, the [Code] field will be automatically populated on the product page (Fig.13, Fig.14).
ATTENTION
Since code auto generation and saving in the column is performed on the server side when the [Before saving record] event occurs, it is impossible to view the code value on the product page immediately. This is because the [Before saving record] event occurs on the server side after sending the request to add a record from the application client part.
Fig. 13. The code is not displayed when creating a product
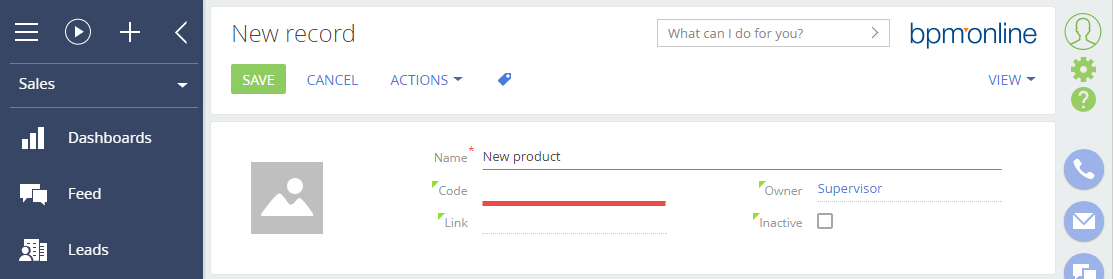
Fig. 14. The code is displayed in the saved product