


How to work with the [Cases] section
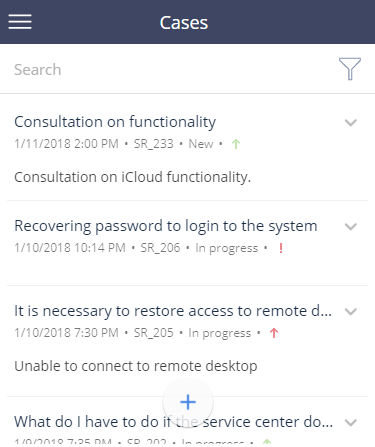
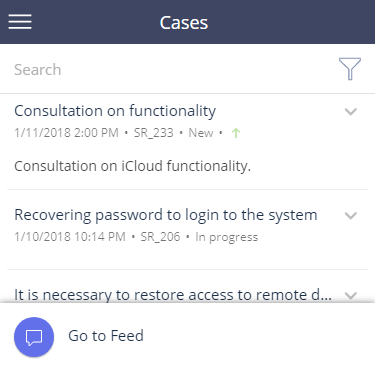
The CASES section (Fig. 1) in mobile app is used for managing cases (incidents and service requests, claims, etc.) received by the help desk or contact center.
To open the [Cases] section, tap the  button on the mobile app main menu.
The section is available by default in any mobile app synchronized with a desktop Creatio product that has the [Cases] section. There is no need to set it up in the mobile application wizard. The [Cases] section enables you to:
•register cases (for example, create internal service requests),
•view case status,
•add information about case resolution,
•post messages on the customer portal,
•escalate cases (only for applications synchronized with Service Creatio, enterprise edition).
Case list
The following fields are displayed by default for each record in the list of the [Cases] section: Subject, Registration date, Number, Status and Description. Icon at the right of the case record represents case Priority:
• – low.
• – medium.
• – high.
• – critical.
Tap the  button at the top right of the list record to display the quick action menu. In the [Cases] section, it enables you to view the case feed.
Note
You can configure the list via the mobile application wizard, available in the system designer of the desktop application.
The [Cases] section has the standard search field and filter options.
To create a new case, tap the  button at the bottom of the list.
Case page
The case page fields are divided into several groups.
General information
| Number | The case number. Creatio automatically generates numbers in accordance with a specified pattern. This is a non-editable field. |
| Subject | Short case title. |
| Status | Case status. This is a non-editable field. |
| Registration date | Date and time of case registration. This is a non-editable field. |
Note
Use the “Case number mask” system setting of the desktop application to customize automatic numbering of cases.
Description
This group contains the [Description] field. Use it to add detailed information about the case.
Case information
| Contact | The customer who reported the case. If the [Account] field is populated, the list of contacts will display only the contacts of this account. One of the fields ([Contact] or [Account]) must be populated. |
| Account | The account for which the case was registered. If the [Contact] field is populated, the [Account] field is automatically filled in with the contact’s account. One of the fields ([Contact] or [Account]) must be populated. |
| Priority | The priority of the case. |
| Category | Case category: service request or incident. |
| Assignee | An employee who works on case resolution. |
Attachments
The [Attachments] detail (Fig. 2) contains files and links related to the case. Tap  and select an attachment file.
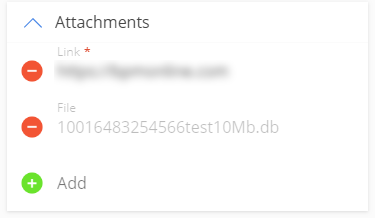
You can also add case attachments using the [Add file or link] action ( ) in the actions menu of the record.
The following options are available:
•[Take photo] – take a photo from your mobile device and to attach it.
•[Choose from gallery] – attach a file from the file system of your mobile device.
•[Add link] – add a URL as an attachment.
Note
iOS users are able to attach only files from the gallery and links
Feed messages connected with the case (Fig. 3)
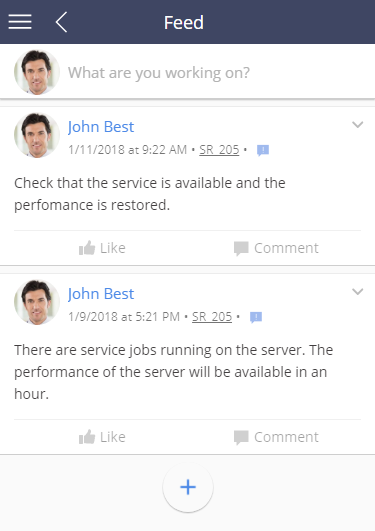
You can access the case feed in one of the following ways:
•Tap the  button at the top right of the record in the list.
•Tap the [Go to Feed] detail in the case record.
•Tap the  in the case record.
•Tap the [Go to Feed] action in the actions menu of the case record.
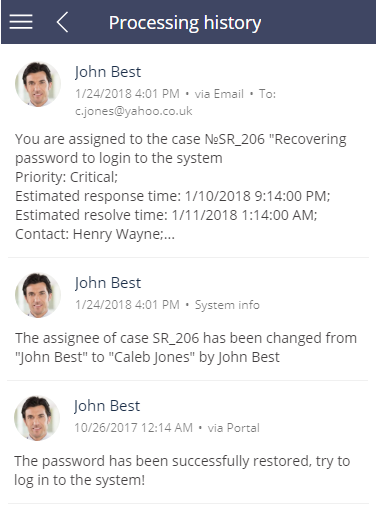
Processing history
This detail displays the history of communications with the case customer, as well as internal communications and automatic notifications. The processing history includes:
•Emails sent and received during the case resolution process.
•Internal notes posted by employees in the case feed.
•Messages posted by employees and portal users on the customer portal.
The detail also contains system messages that inform you about various system-wide events that are connected to the case.
Fig. 4 Processing history screen
Activities
Displays the list of activities connected to the case.
Tap the  button to add an activity. A new activity page will open. The [Case] and [Account] fields of the new activity page will be automatically populated with the case number and case account.
Case actions
Tap  to access case actions:
|
| Create a new case from the case record page. |
|
| Add an attachment to the opened case. |
|
| Browse the feed of the opened case. |
|
| Post replies and requests for additional information on the customer portal. |
|
| Escalate the case to a different support level (available only for applications synchronized with Service Creatio, enterprise edition products). |
|
| Create a copy of the current case. |
|
| Delete the current case. |
 Add case
 Add a file or link
 Go to Feed
 Post message on the portal
 Escalate
 Copy
Copy Delete
Creating cases in the mobile app
To register a new case:
1.Tap  to open the [Cases] section.
2.Tap the  button. The case page will open.
3.Fill out the required fields:
a.Specify the case subject.
b.Select the customer for this case in the [Contact] or [Account] field. One of these fields must be filled in. If the [Account] field is filled in first, the list of contacts will display only the contacts of this account. If the [Contact] field is filled in, the [Account] field is automatically filled in with the account specified for this contact.
4.Complete the case profile:
a.Select the case category (incident or service request).
b.Specify the assignee or assignees group for the case.
c.Save the case.
Processing cases in the mobile app
Mobile application functions enable you to post messages in the case feed (for internal communications) or communicate with the case customer on the portal. If your mobile app is synchronized with a product that contains service enterprise functions, you can also escalate cases.
Posting internal messages
There are two ways of posting messages message in the feed:
a.From the main menu: tap  to open the cases section, locate the needed case and tap
  button, then select
  [Go to Feed] command (Fig. 5).
b.From an opened case page: tap  , then tap
  [Go to Feed] command.
Once the feed page opens, tap  to post a new message. Type the message and tap the [Publish] button.
Replying to case customer on the portal
To post a message on the self-service portal:
a.To access case portal from the main menu, tap  to open the cases section. Tap the case record in the section list to open the case.
b.To access the portal from an opened case page, tap  , then tap
  [Post message on the portal] command.
Once the portal page opens, type the message and tap the [Publish] button.
Escalating cases
To escalate a case to another support level:
a.To access case escalation from the main menu, tap  to open the cases section. Tap the case record in the section list to open the case.
b.To access the escalation from an opened case page, tap  , then tap
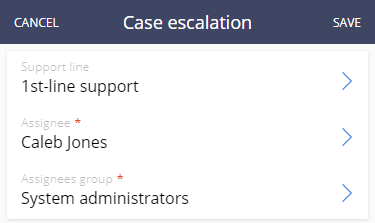
  [Escalate] command (Fig. 6). Specify the support line and new assignee or assignees group on the opened escalation page (one of the fields has to be field in).
See also