


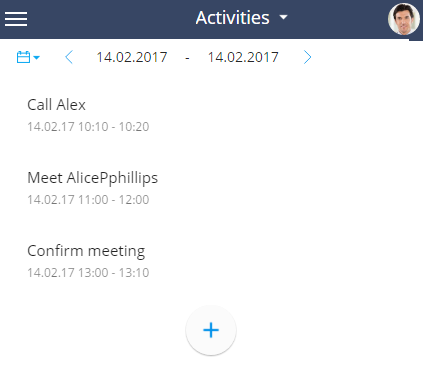
The [Activities] section in the mobile application is synchronized with the primary Creatio application and can be used both offline and online (Fig. 1).
Tasks can be displayed either as a virtual organizer or a drop-down list. In the calendar mode the tasks which you are responsible for, and those in which you were added to [Participants] detail, are displayed. In the list mode only the tasks which you are responsible for are displayed.
Fig. 1 [Activities] section of mobile application

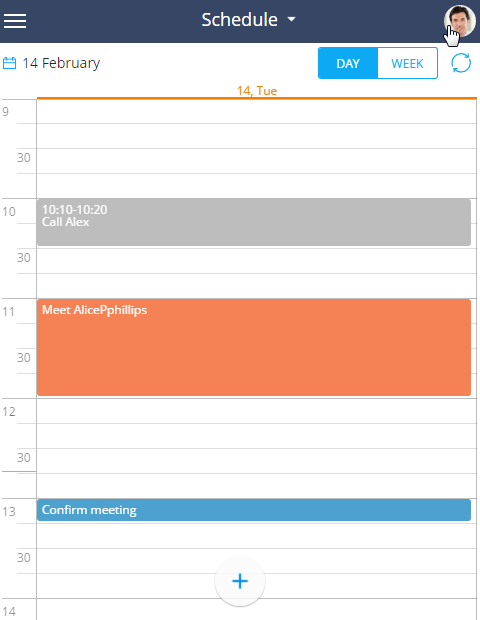
Calendar mode
In calendar mode, tasks are displayed in a virtual organizer. The calendar area is divided into days. The date and day of the week are displayed in the heading of each day column. The current day is highlighted.
Depending on the size of your mobile device screen, the default calendar is displayed for the current day or for the current week. If necessary, you can change the display period of the schedule.
Note
Due to work limitations of different mobile devices the displaying of the schedule can be different. For tablets: the schedule in the [Activities] section can be changed to weekly or daily mode. For mobile phones: in portrait view, the schedule is always displayed daily and in landscape view it is displayed weekly.
The current time is indicated with an orange line.
In the calendar area all activities are displayed in the form of rectangular blocks whose height corresponds to the duration of the activity.
In the left side of the calendar area time intervals are displayed.
Activity colors in calendar view
Activities in the calendar view are highlighted with different colors depending on their status and due date.
-
Activities are highlighted red when their due time has already passed and are not in the final state yet.
-
Activities are highlighted blue when their due time hasn't passed and are not in the final state yet (scheduled or in progress)
-
Grey is used to highlight activities that are in the final state (completed or canceled).
Drop-down list mode
The [Activities] section can also be viewed as a drop-down list (Fig. 2).
Fig. 2 [Activities] section of mobile application as a drop-down list
You can select the view (drop-down list or calendar) in the upper area of the workspace area (Fig. 3).
Fig. 3 Selecting view in [Activities] section

Viewing the calendar of another owner.
The ability to view the calendar of another owner is only available in online mode.
To view the calendar of another owner:
1.Tap the [Edit] button in the upper right corner of mobile application (Fig. 4)
Fig. 4 Changing owner to view the calendar
2.Select an owner in the drop-down list (Fig. 5).
Fig. 5 Selecting an owner to view the calendar
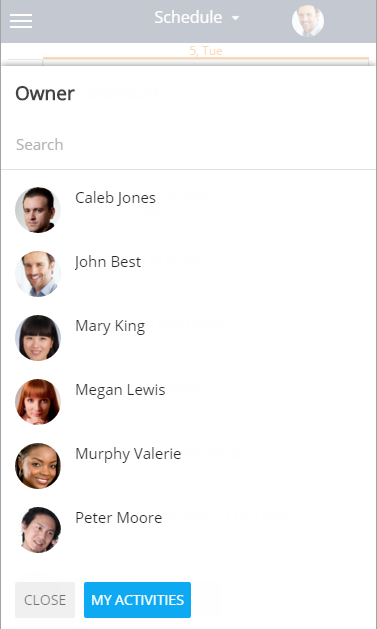
3.To get back to your calendar tap the [My activities] button in the owners drop-down list.
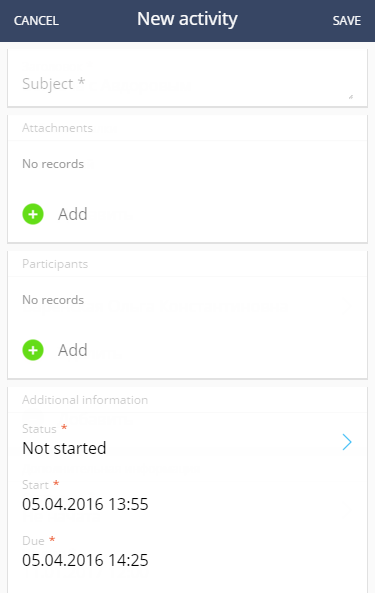
How to create a new task.
To create a new task in the [Activities] section, tap the  button. Then, fill in the required information and tap [Save] (Fig. 6).
How to create a multi-day task
When working in mobile application you can create multi-day tasks (tasks lasting for more than one day).
To create a multi-day task:
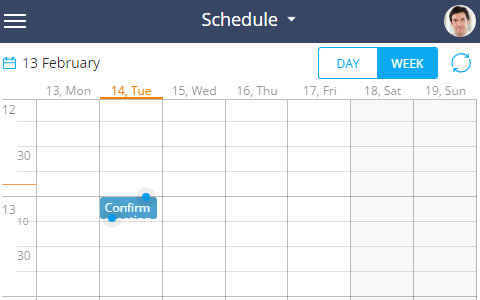
1.Highlight a task in the calendar (Fig. 7)
Fig. 7 Creating a task in the calendar
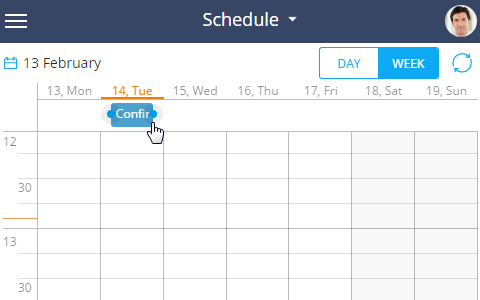
2.Drag a task to the panel with the days of the week (Fig. 8).
Fig. 8 Dragging a task to the panel with days of the week
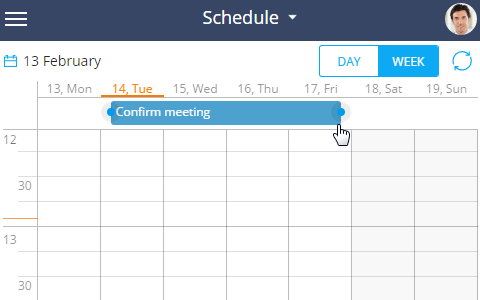
3.Hold the small circle on the corner of the activity bar  and drag it to expand the activity to the required range (Fig. 9).
Fig. 9 How to create a multi-day task
How to change the calendar view
To change the display period for tasks in the calendar, tap the  button and select the required time interval.
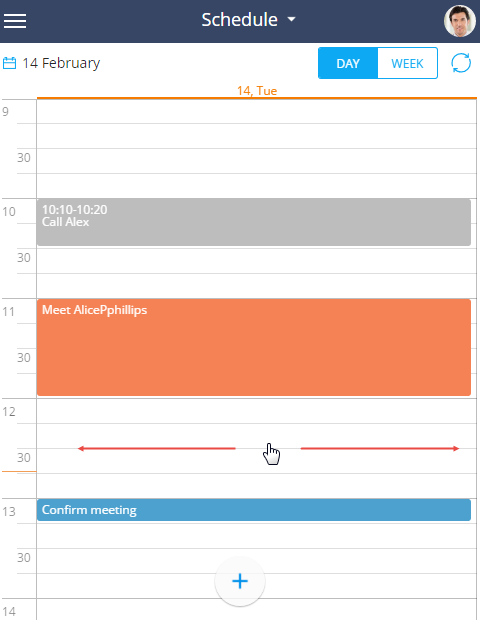
Tap anywhere on the blank calendar space and swipe right to go to the next day or left to go to the previous day (Fig. 10).
Fig. 10 Switching between days
How to change activity duration in the calendar
You can also change activity duration without opening its page. Tap an activity, hold the circle at the corner of the activity  , and drag it to the required time (Fig. 11).
Fig. 11 Changing activity duration

To move an activity to another time, drag it to the required time interval.
How to change a task status
To change a task status, go to the activity edit mode and select the required value in the [Status] field.
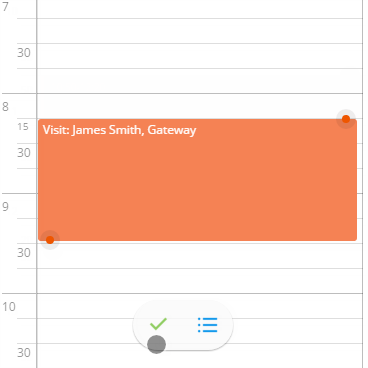
If you need to mark a task as completed, tap the button in the calendar and then tap the  button (Fig. 12).
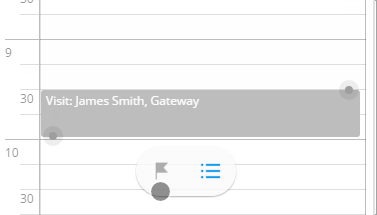
To return a task to its initial state, select it in the calendar and tap  (Fig. 13).
Fig. 13 Changing status of a completed task
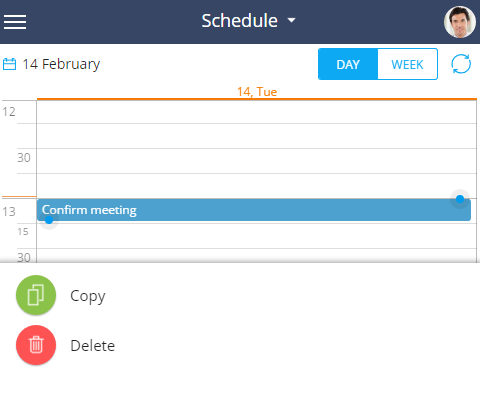
Actions menu
The actions menu is used for copying, deleting and splitting tasks. To view the options, highlight a task and tap  (Fig. 14).
Fig. 14 [Activities] section actions panel
The [Copy] action menu is used to copy tasks. When copying a task from the calendar, the [Participants] details are also copied. When copying from the activity page a new page is created in which you can fill in all the required information.
To delete tasks, select [Delete].
To split tasks, for example if several activities overlap in the calendar, use the [Split] action. As a result, the system splits the activity based on the time of the end and the beginning of overlapping tasks.
In online mode you can also display activities created in the Creatio main application. To do this, use the [Refresh] action.
See also
•How to work with the [Cases] section