


User self-registration on the portal
Enabling the self-registration for portal users helps save time and automates several functions of the portal administrator. The setup procedure consists of several required and optional steps.
Required:
-
Make sure that there is a Creatio portal system user with the least permissions. Read more >>>
-
Set up portal user licensing at self-registration. Read more >>>
-
Set up sending notifications about portal user registration and password recovery. Read more >>>
Optional:
Edit the registration and password recovery email templates. Read more >>>
A separate Creatio user account (one with minimal access permissions) is required for the correct self-registration of portal users, password recovery and receiving case feedback. By default, it is the SysPortalConnection user. Please make sure that you do not delete this user, and do not modify this user’s access permissions and licensing. Otherwise, user self-registration on the portal might be unavailable.
If you face any issues when performing self-registration, check the settings of the system user.
1.Click  -> [System users], locate a portal system user record.
2.Open the system user page SysPortalConnection -> find a portal license in the [Licenses] tab.
3.Make sure the system user is connected to an existing contact (the [Contact] field).
Note
The name of the portal license consists of the portal configuration and the main application deployment method, e.g., “Creatio self-service portal cloud” or “Creatio customer portal on-site”.
To change the portal user account:
1.Add a user in the [Users and roles management] section. Click  -> [System users] -> [New] ->[Portal user]. Please do not specify the “Supervisor” or an employee user who works in the main Creatio application.
2.Assign a portal license on the [Licenses] tab.
3.Configure minimal access permissions for the new user in the [Object permissions] section. See the “Object permissions” article for more information.
4.Specify the new user in the application settings:
•On-site:: specify the user in the web.config file. Read more in the “Set up automatic user licensing of portal users during registration” article.
•Cloud: contact Creatio support and provide the system user credentials.
Set up automatic user licensing of portal users during registration
For the portal users to automatically obtain a portal license during registration:
1.Click  System Designer, -> [System users].
2.Open the portal system user page. By default, the portal system user is SysPortalConnection.
3.On the [Licenses] tab, select a checkbox next to the portal license (Fig. 1).
Fig. 1 Assigning a portal license to the system user
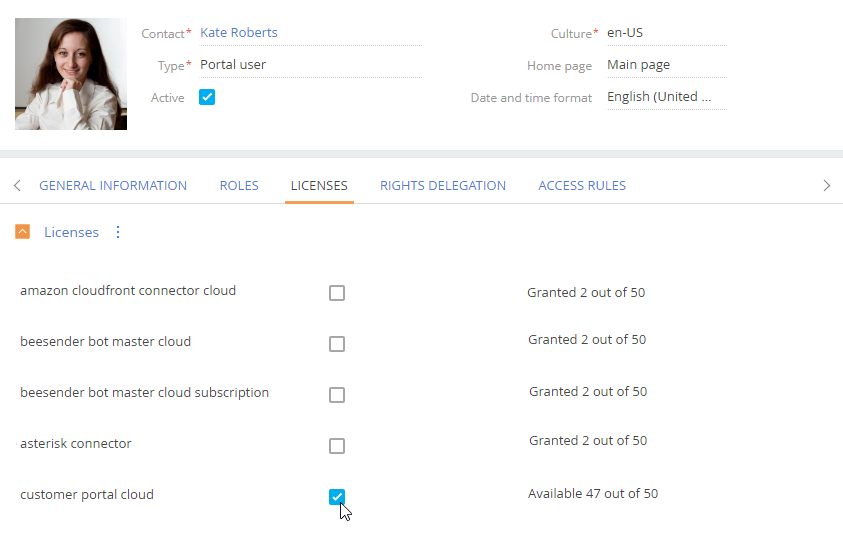
4.In the license manager, verify that there are unassigned portal licenses to provide for the self-registered portal users. Licenses will be assigned automatically. Learn more about licensing in the “License distribution” article.
Note
The name of the portal license consists of the portal configuration and the main application deployment method, e.g., “Creatio self-service portal cloud” or “Creatio customer portal on-site”.
Additional on-site settings
For applications deployed on-site, in addition to the steps above, you need to edit the Web.config file located in the root directory of the Creatio application.
1.In the SspUserRegistrationLicPackage parameter, specify the product name, where the licenses should be applied. For example:
<add key="SspUserRegistrationLicPackage" value ="Creatio Customer Portal On-Site" />
2.Make sure that the UserManagementSauName and UserManagementSauPassword parameters contain the system user login and password. New portal users will receive the permissions of the user specified in the configuration file.
Set up notifications for portal users
To send invitations or confirmation emails to portal users, configure a mailbox for portal notifications. To do this, you need to synchronize a mailbox with Creatio.
Note
Learn more about mailbox synchronization in the “Configuring email accounts in Creatio”.
To set up notifications for portal users
1.Click  —> [System settings].
2.Open the “SSP registration mail box” (code “SSPRegistrationMailbox”) system setting.
3.In the [Default value] field, specify a mailbox that will be used to send notifications to the portal users.
You can customize the templates for email notifications that the portal users receive after registration or when recovering their passwords. Use the [Email templates] lookup to customize existing email templates or create new templates. By default, Creatio uses the following templates for email notifications:
-
“SSP invite template (US)” - an invitation to the portal.
-
“Template - Portal user registration” - portal user registration confirmation.
-
“Link for password recovery” - password recovery link.
Note
Learn more about email templates in the “Configuring email templates” article.
To determine which template will be sent to a user, Creatio uses the following system settings:
-
“SSP invite template” (PortalInvitationEmailTemplate);
-
“Confirmation email template for portal user registration” (PortalRegistrationEmailTemplate);
-
“Password reset email template for portal user” (PortalRecoveryPasswordEmailTemplate).
To locate these system settings, click  -> System Designer -> [System settings].
See also