How to specify recipients or senders in the [Send email] element
In the [Send Email] element, the values of the [From] and [To] fields are specified similarly to any other element or process parameter. You can select any available value or process parameter by clicking  in these fields. However, there are certain specifics when it comes to selecting senders and recipients or using process parameters as values of these fields.
Selecting the email’s sender
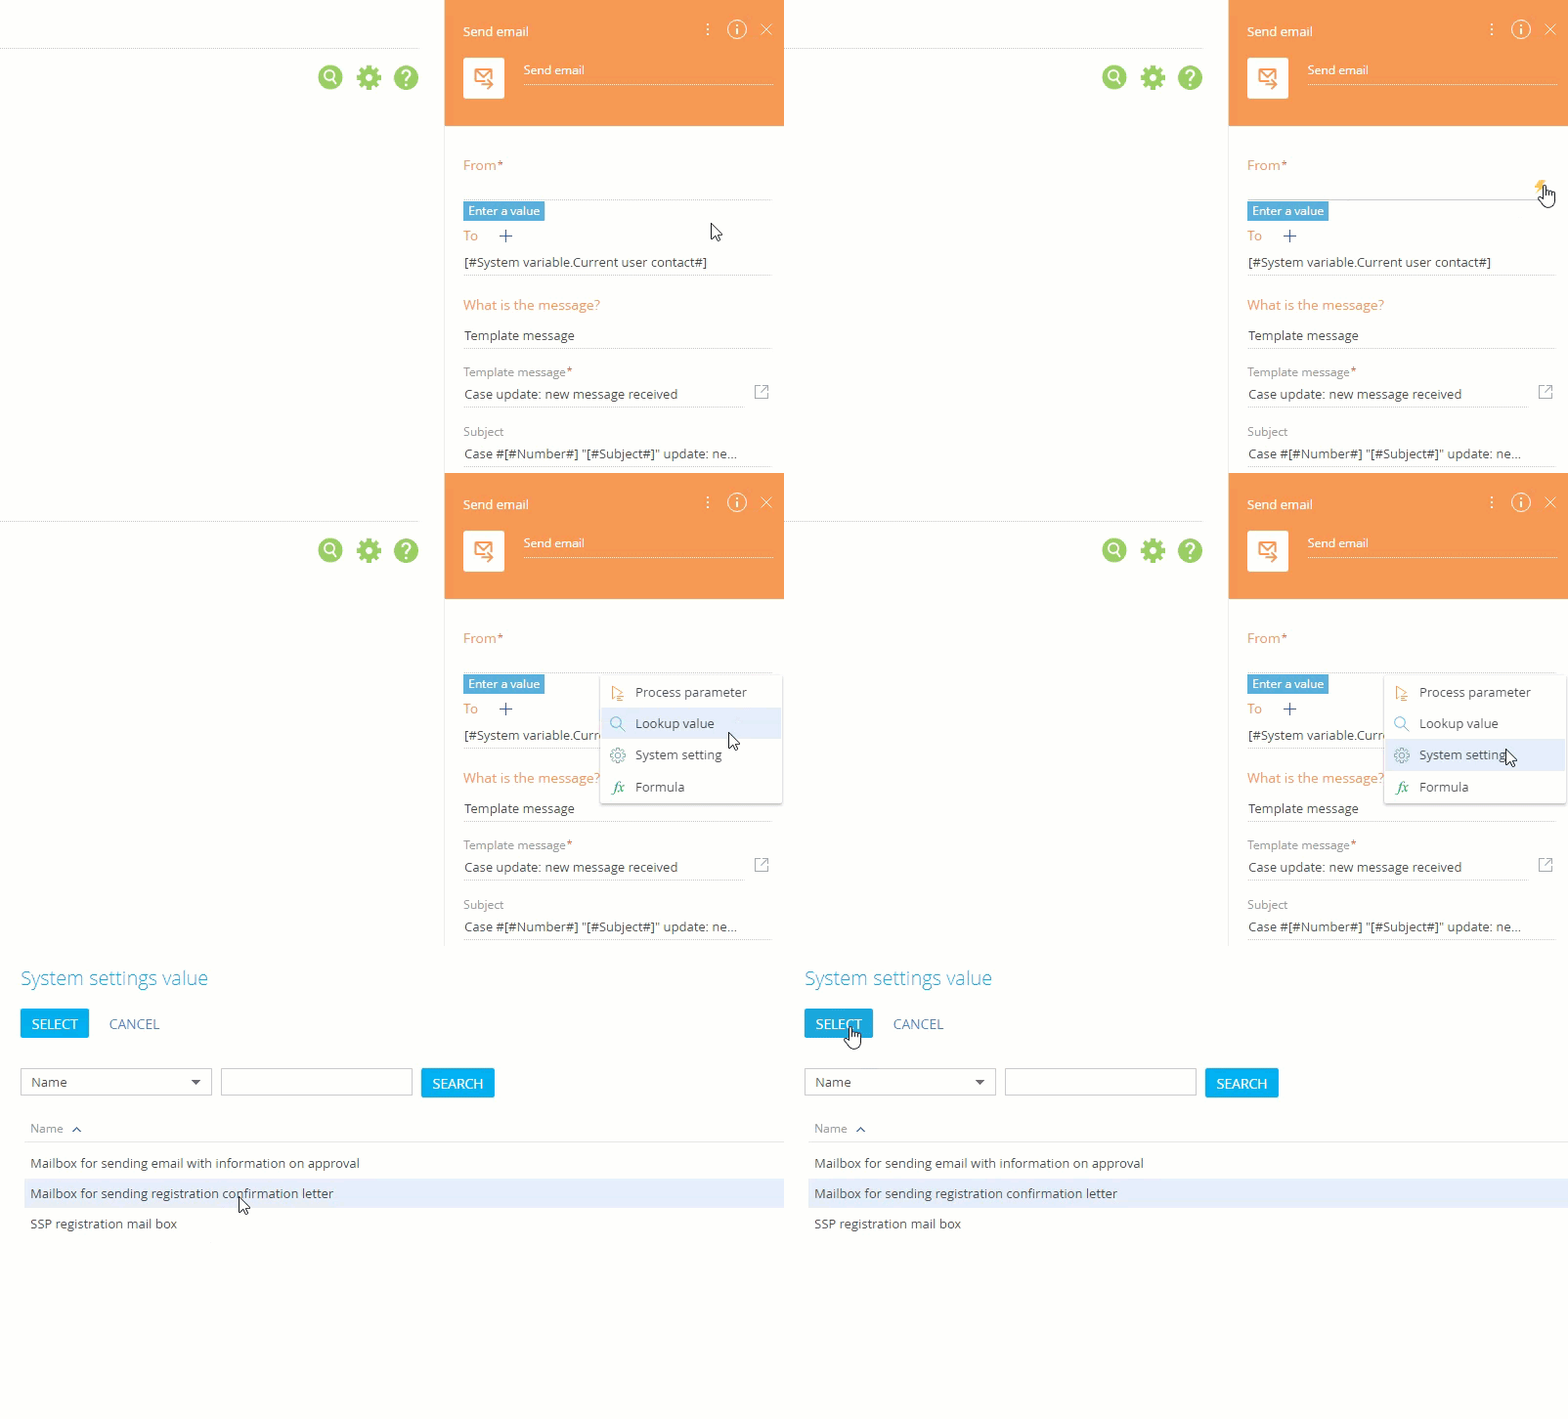
The value of the [From] field is a mailbox. You can select any of the mailboxes synchronized with your Creatio application, i.e. any mailbox registered in Creatio with login and password data. For example, you can set up a separate “Mailbox for sending registration confirmation letter” for sending notifications as part of a business process, then select it in the [From] field (Fig. 1).
Fig. 1 Selecting a mailbox from the [Mailbox synchronization settings] lookup

Note
Email integration is required to work with emails in Creatio. Please make sure that all users who start the process have access to the mailbox specified in the [From] field. Learn more about access rights in a corresponding article.
Note
Additionally, you can map any process parameter whose value is selected from the [Mailbox synchronization settings] lookup to the [From] field. Learn more about mapping parameters in the corresponding article.
Selecting email recipients
In the [To] field, you can specify recipients in any of the following ways:
-
Type in the address manually. For example, “johnbest@gmail.com”. Note that you cannot specify several addresses in one field this way. To add another recipient, click + and type in the new address in the new field.
-
Map another parameter of the “lookup” type, which uses [Account] or [Contact] lookup. To do this, click
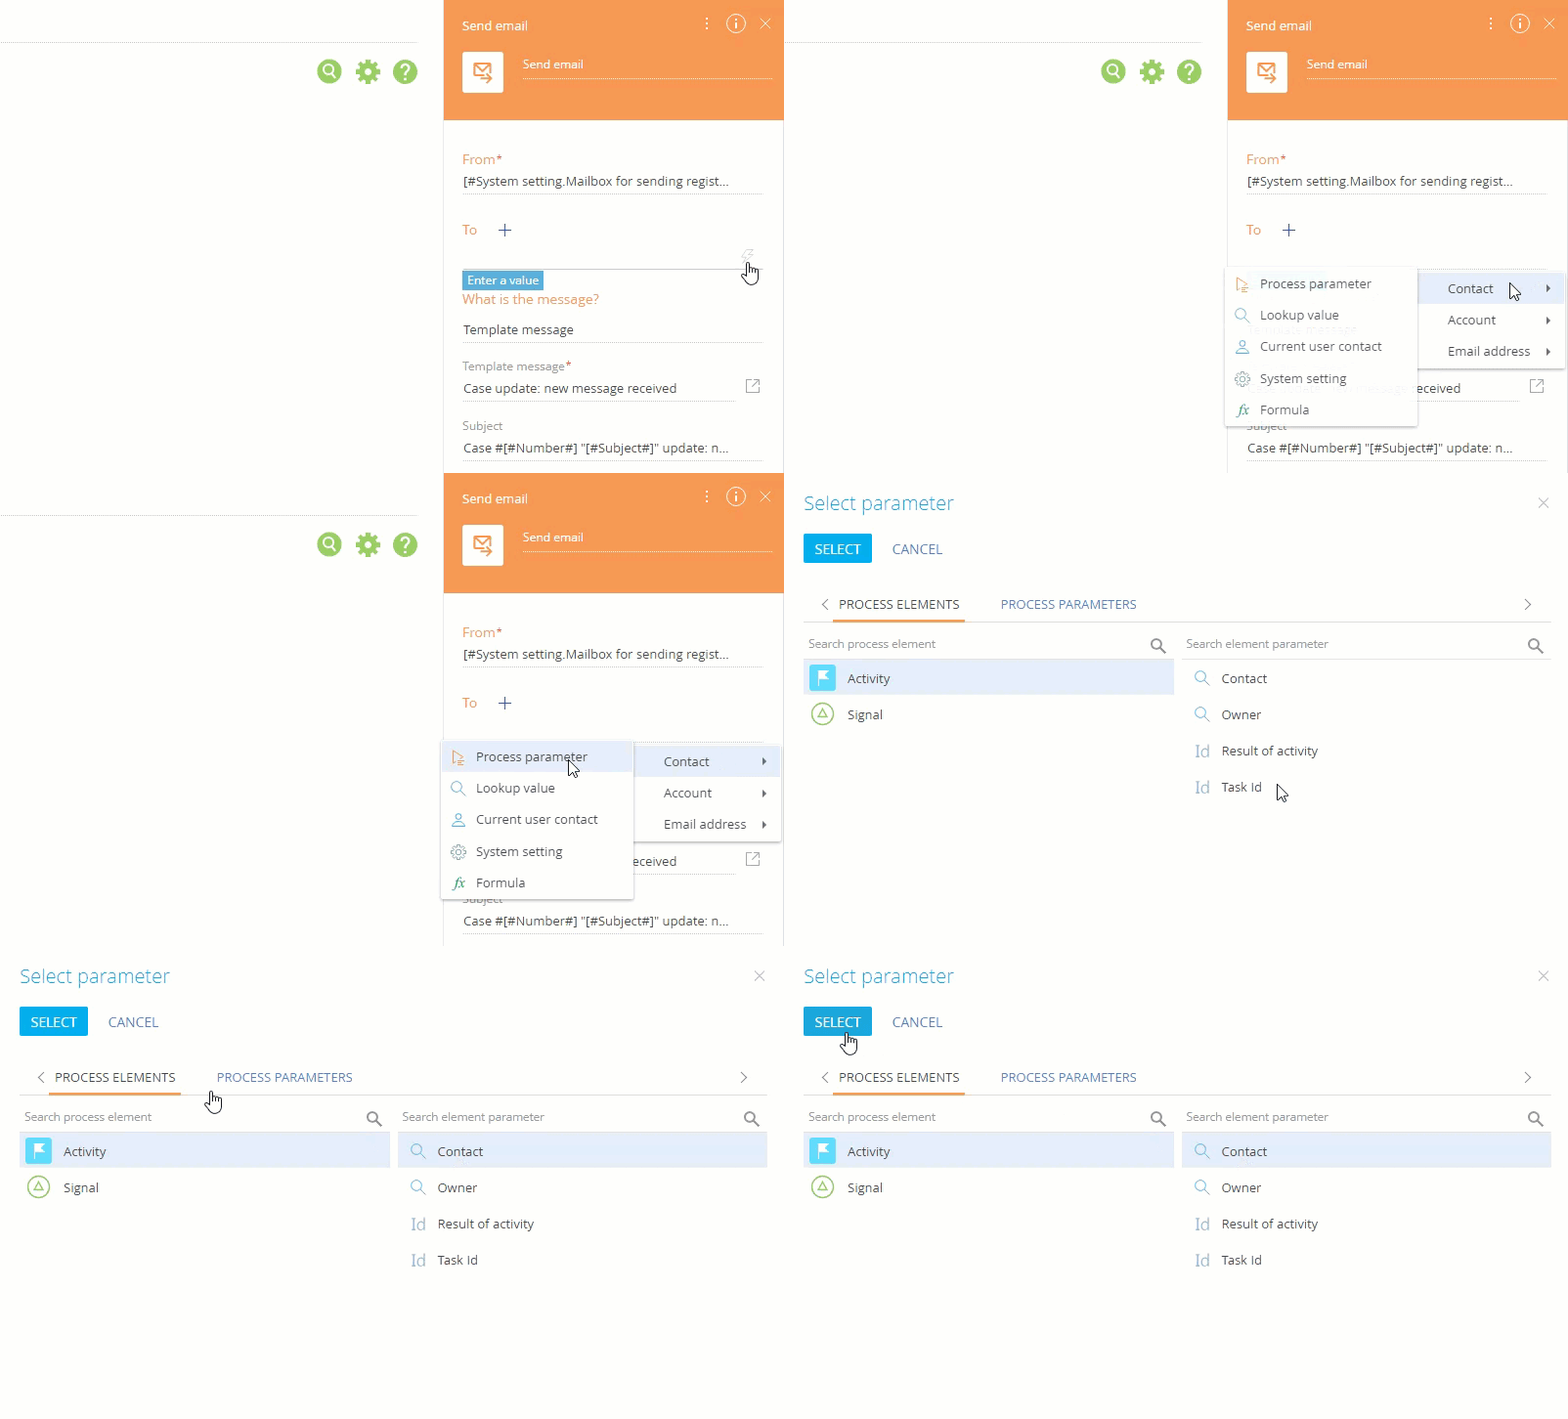
 in the [To] field and select [Contact]/[Account] -> [Process parameter]. For example, you can select a “Contact” parameter from a preceding [Activity] process element (Fig. 2). The email of this contact will be pulled from its [Communication options] detail.
Fig. 2 Selecting a contact from the [Activity] process element

-
Select a specific account or contact.To do this, click
 in the [To] field and select [Contact]/[Account] -> [Lookup value], then select the needed account or contact from the list.
 -
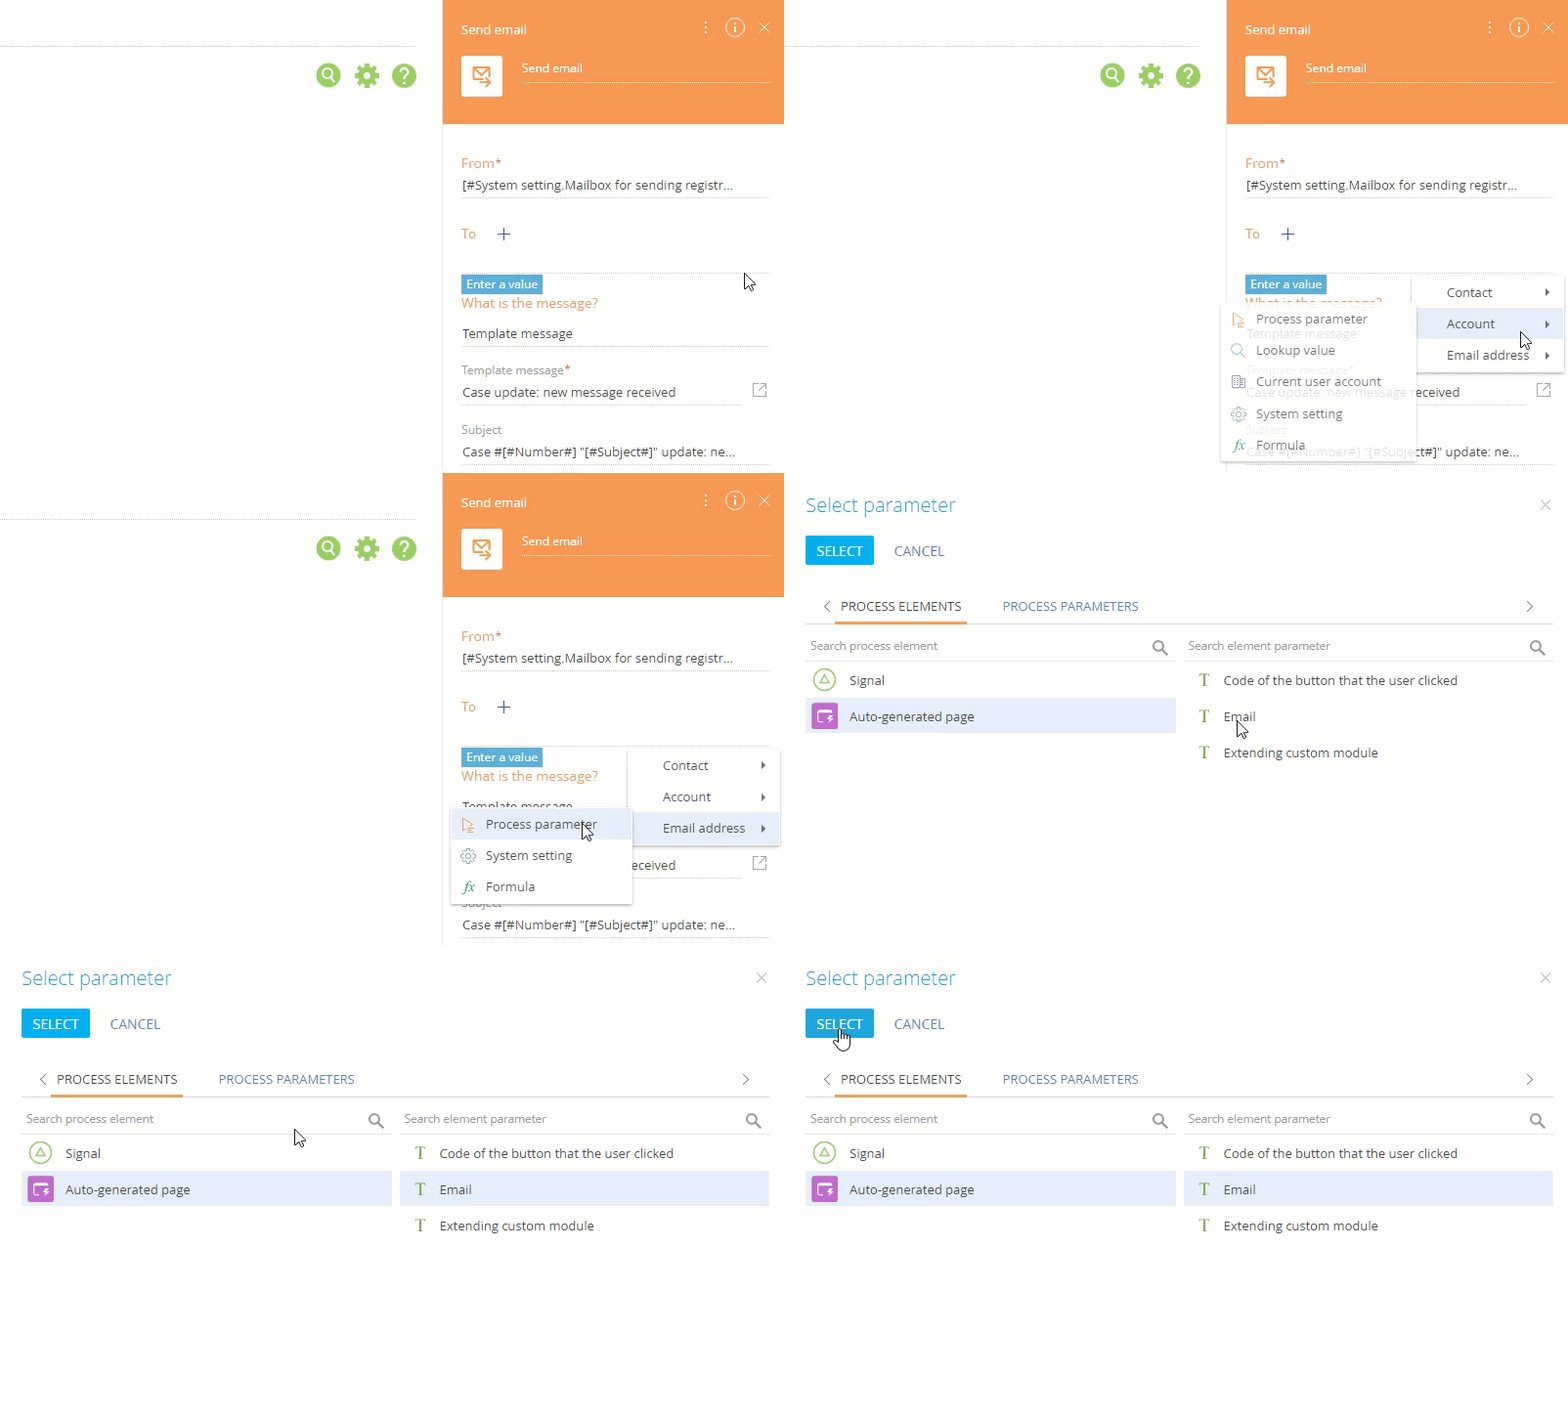
Map a text parameter that contains an email address. For example, you can select a manually created “Email” text parameter from the [Auto-generated page] process element (Fig. 3). In this case, the parameter is populated manually by a user once the auto-generated page opens, and can be used in the [To] field as a recipient’s email address.
Fig. 3 Selecting an email from the [Auto-generated page] process element

-
Select system settings, whose values are email addresses (text), accounts or contacts. For example, “Emails to connect our technical support”.
-
Select an account or contact email address of the user who runs the process. To do this, click
 in the [To] field and select [Contact]/[Account] ->“Current user account”/“Current user contact”.
Depending on the selected option, the [Send Email] element will use the mailbox, specified in the [From] field to send an email to the recipient(s) specified in the [To] field.
See also


