How to send an email during process execution
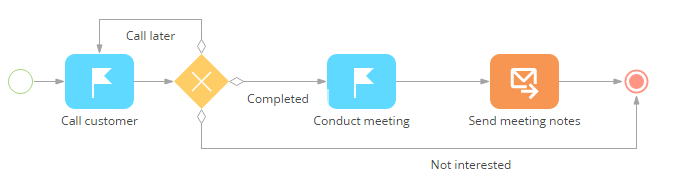
Manual email sending is used if you need make changes (additions) to the email body or add attachments to it. Let's take a look at sending emails manually as part of a meeting process workflow (Fig. 1).
Fig. 1 Meeting appointment process
Example
The customer must receive meeting notes after the meeting. The process must automatically open a new email page, where the user must enter notes or attach them manually before sending the message.
Place the [Send email] element of the [User actions] group on the business process diagram. Specify the parameter values on the [Send email] element setup area (Fig. 2).
Fig. 2 The [Send email] element setup area
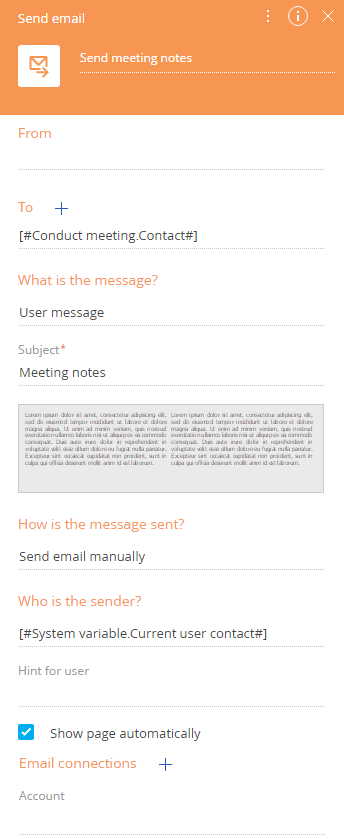
1.To send a message from a corporate mailbox, select [Lookup value] in the [From] field. Select the corporate mailbox account in the opened window. If the [From] field is left blank, the user who runs the process will be required to specify the email address from which the email will be sent in the [From] field on the edit page of the email message.
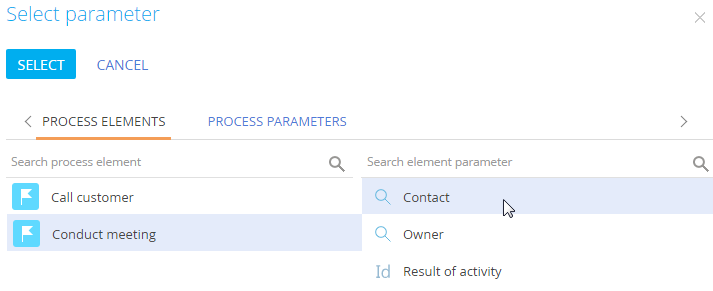
2.Specify the recipient's email address in the [To] field. Select [Contact] > [Process parameter] in the parameter value menu. Specify the recipient's email address in the [To] field. Select [Process parameter] in the [Contact] menu. Select the [Conduct meeting] element and its parameter – [Account] (Fig. 2).
Fig. 3 Selecting the recipient’s email address
3.If you need to send the meeting notes to several contacts, press the  button and add the [Cc] and [Bcc] fields. Specify the necessary recipients in the fields.
4.Select “Custom message” in the [What is the message?] field.
5.Type out the email contents.
a.Click the  button in the email body area.
b.Create your email in the content designer.
c.Save the changes.
6.In the [Subject] field, enter “Meeting notes”.
7.Select “Send email manually” in the [How is the message sent?] field.
8.To open the email edit page for the person responsible for the task, select “Current user contact” in the [Who is the sender?] field.
9.Tick the [Show page automatically] checkbox and the page will show up once the responsible individual reaches this part of the process. If the checkbox is removed, the email will be saved as a draft and will not be sent.
10.In the [Account] field, specify the account from the “Conduct meeting" activity. Click the field and select [Process parameter] in the parameter value menu. Select the [Conduct meeting] element and its parameter [Account]. The sent email will be displayed on the [History] tab of the customer's account record.
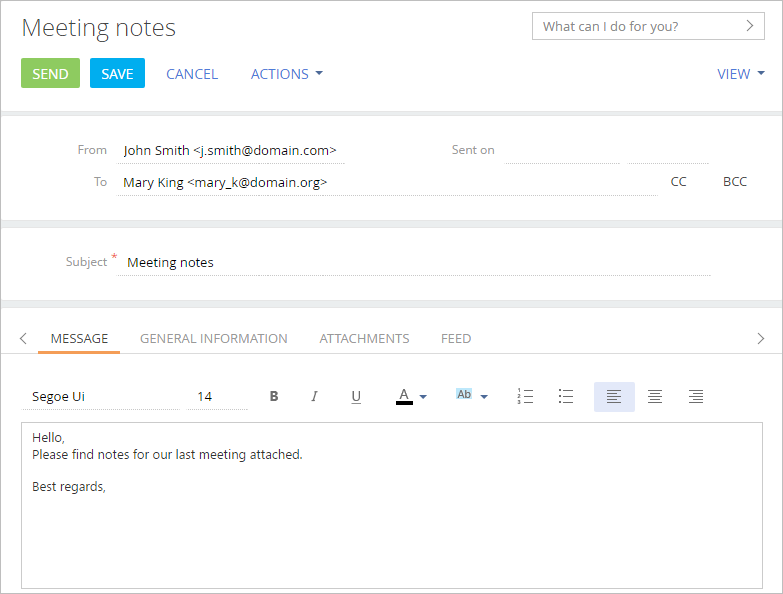
As a result, a new email page will open, where you can enter needed changes and add the meeting notes (Fig. 4).
Note
If you enabled automatic email signatures, a signature will be added to the email body.