


Developing an advanced Marketplace application
Glossary Item Box
Introduction
Developing a Creatio Marketplace app with a custom section is identical to developing a project solution with a custom section. Please refer to "Section business logic" for more insights about the main principles of custom section development.
Use the Section Wizard to create a new custom section. All schemas created by the Section Wizard are stored in the package specified in the [Current Package] (CurrentPackageId) system setting. By default, this is the [Custom] package.
Since [Custom] is a system package and cannot be exported using SVN or WorkspaceConsole, you cannot use this package for development purposes (if the changes must be transfered to other environments).
NOTE
The schema export and import mechanism will enable you to export the schemas from [Custom] package. However, you cannot transfer the package data and SQL scripts using this mechanism.
Specify a custom package in the [Package] property of a custom schema to move the schema to that package upon saving.
Therefore, all development must be carried out in custom packages.
To create an app with a custom section:
1. Create a custom package.
2. Set values of the [Current package] and [Object Name Prefix] system settings to begin development in the custom package. The value of the [Object Name Prefix] system setting should match the prefix specified in the Marketplace Developer profile (See: “Developer profile setup”).
3. Create a new section using the Section Wizard.
4. Implement the necessary features.
5. Connect the necessary section data to your custom package.
Application details
Create a new section called [Web data] in the [Marketing] workplace. Implement displaying of the web stats based on the website URL on the section page. Display statistics in an <iframe> element using a third-party website https://www.similarweb.com.
Implementation algorithm
1. Creating a custom package
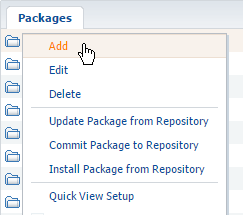
To create a new custom package, go to the [Configuration] tab of the [Advanced settings] window, right-click the [Packages] area and select [Add] (Fig 1).
Fig. 1. Adding a new package
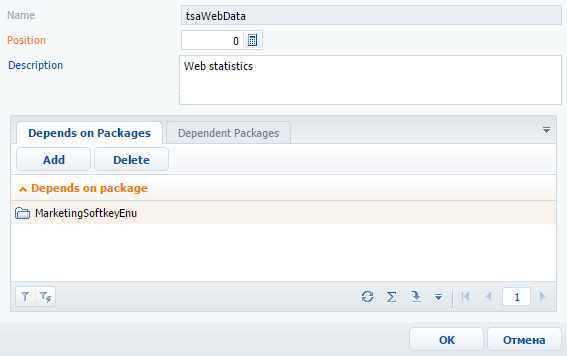
Fill out the primary field values in the package page and save it. Add package dependencies by opening the page again. Since the section must be displayed in [Marketing] workplace, add a dependency from the [MarketingSoftkey] package (Fig. 2).
Fig. 2. Package page
ATTENTION
The package name should include the prefix that you specified in the Developer profile (See: “Developer profile setup”).
NOTE
The specified dependencies of the package will influence the compatibility between your application and other Creatio products.
2. Setting the values of the [Current package] and [Object name prefix] system settings
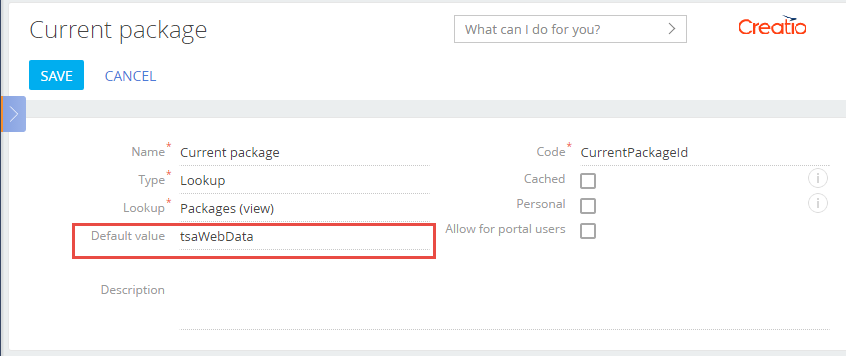
To save section schemas generated by the Section Wizard in your custom package, specify it as the “current package”. Go to the [System settings] section, open the [Current package] system setting and select the needed custom package in the [Default value] field (Fig. 3).
Fig. 3. Editing [Current package] system setting
Save the system settings.
Specify the prefix value from the Developer profile in the [Object name prefix] system setting (Fig. 4).
Fig. 4. Filling in the [Object name prefix] system setting
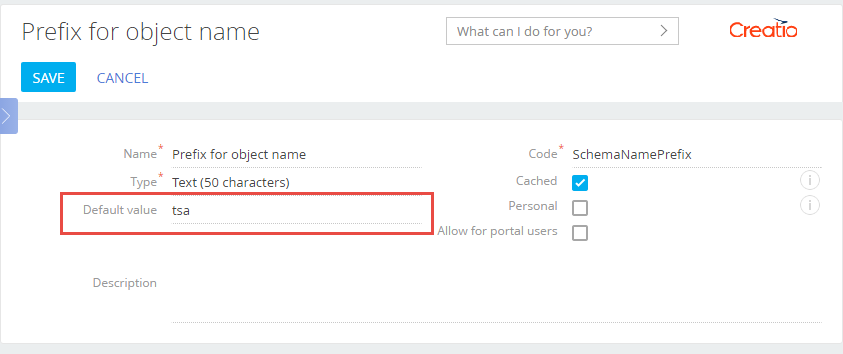
This prefix will be automatically added to the names of the schemas created by the Wizard.
3. Using the Section Wizard to create sections
Please refer to “Section Wizard”, “How to configure section properties”, and “How to configure section page” articles for more information about sections and the Section Wizard.
Fill out the values for the following properties (Fig. 5):
Fig. 5. Section properties in the Section Wizard
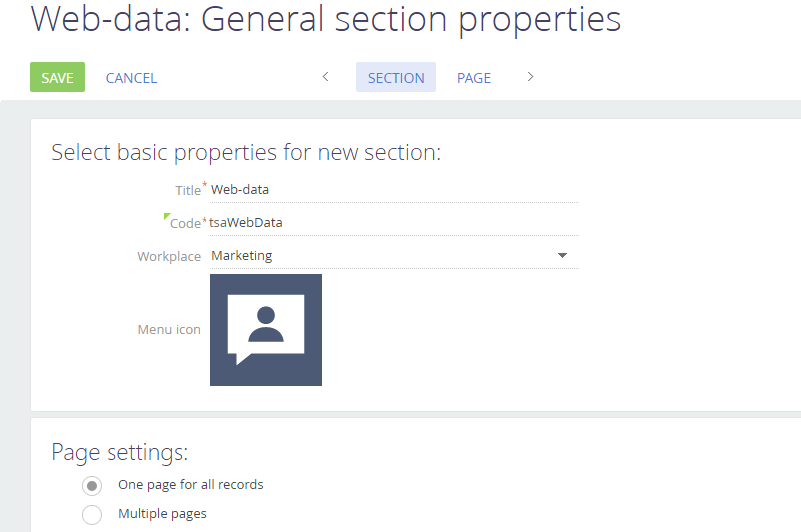
- [Title] – “Web-data”. The title is displayed in the main menu and on the section page.
- [Code] – "tsaWebData". The name of the schema of the object in the section (where “tsa” is the prefix that was added automatically). Find out about the schemas created by the Section Wizard in “How to configure section properties”.
- [Workplace] – “Marketing”. Your section will be available in this workplace.
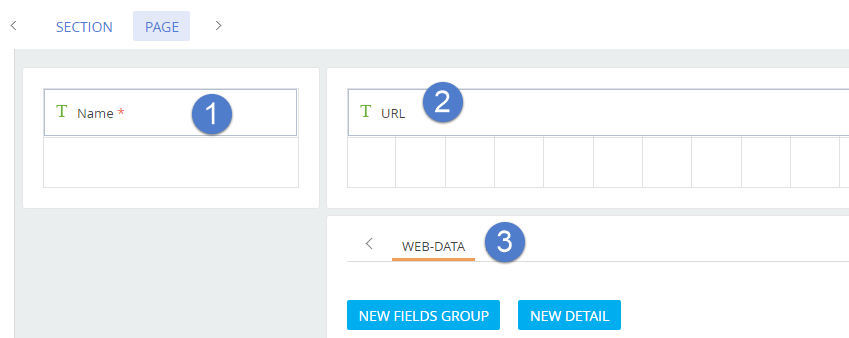
The section edit page must have a field for entering website URL. You can use the default [Name] field, which is automatically created by the Wizard (Fig. 6, 1) for this purpose. Add an extra field (2), which will contain the link to the website stats from https://www.similarweb.com for the specified URL. This link will be assigned to the src attribute of the <iframe> element of the page. To place the <iframe> element, add the [Web-data] tab to the tab panel (3).
Fig. 6. Adding fields and tabs to the records edit page
Click the [Save] button. The Section Wizard will create the necessary schemas in the corresponding package and save the results in the database.
NOTE
It might take a few minutes for the Wizard to finish up the processes. You will be notified once the new section is saved.
Restart the browser and clear your cache to view the new section.
4. Implementing the section features
If you created your section in the wizard, the base features for adding, deleting, and sorting records will automatically be available in the section. The features for saving and loading the record data are automatically inherited in the schema of the edit page as well.
You need to create a button to generate the link to the stats page for the website specified in the URL field. To add a button, use the configuration object and add it to the diff array. The caption of the button is connected to the localized string AddUrlButtonCaption. The click event must be connected to the addUrl() method, which is used to form the link to the stats page and to set the new value for the tsaURL, associated with the [URL] field of the edit page. This link is also assigned to the src attribute of the <iframe> element. Learn more about adding buttons on the editing page in the “Adding a button” article.
The <iframe> element is added to the tab through a configuration object, which is added to the diff array. The <iframe> html element with the specified styles will be generated in the html properties of the configuration object. At the same time the src attribute is not indicated, since it’s generated in the addUrl() method. To restore the data in <iframe> after switching to another tab, connect the afterrerender event to the method addUrl().
Upon opening the saved record, the afterrerender event usually occurs before the data is downloaded. This is why the addUrl() method should also be called in the method-handler onEntityInitialized().
The source code of the view model schema of the edit page:
define("tsaWebData1Page", [], function() {
    return {
        entitySchemaName: "tsaWebData",
        details: /**SCHEMA_DETAILS*/{}/**SCHEMA_DETAILS*/,
        diff: /**SCHEMA_DIFF*/[
            // Name of the Web-page.
            {
                "operation": "insert",
                "name": "tsaName",
                "values": {
                    "layout": {
                        "colSpan": 24,
                        "rowSpan": 1,
                        "column": 0,
                        "row": 0,
                        "layoutName": "ProfileContainer"
                    },
                    "bindTo": "tsaName"
                },
                "parentName": "ProfileContainer",
                "propertyName": "items",
                "index": 0
            },
            // Link to Web-page statistics.
            {
                "operation": "insert",
                "name": "tsaURL",
                "values": {
                    "layout": {
                        "colSpan": 24,
                        "rowSpan": 1,
                        "column": 0,
                        "row": 0,
                        "layoutName": "Header"
                    },
                    "labelConfig": {},
                    "enabled": true,
                    "readonly": true,
                    "bindTo": "tsaURL"
                },
                "parentName": "Header",
                "propertyName": "items",
                "index": 0
            },
            // Tab on the tab panel.
            {
                "operation": "insert",
                "name": "TabData",
                "values": {
                    "caption": "Web-data",
                    "items": []
                },
                "parentName": "Tabs",
                "propertyName": "tabs",
                "index": 0
            },
            // The [NEW URL] button.
            {
                "operation": "insert",
                "parentName": "ProfileContainer",
                "propertyName": "items",
                "name": "AddUrlButton",
                "values": {
                    "layout": {
                        "colSpan": 24,
                        "rowSpan": 1,
                        "column": 0,
                        "row": 1
                    },
                    "itemType": Terrasoft.ViewItemType.BUTTON,
                    "caption": {"bindTo": "Resources.Strings.AddUrlButtonCaption"},
                    "click": {"bindTo": "addUrl"},
                    "style": Terrasoft.controls.ButtonEnums.style.BLUE
                }
            },
            // Container with an embedded iframe HTML element.
            {
                "operation": "insert",
                "name": "IFrameStat",
                "parentName": "TabData",
                "propertyName": "items",
                "values": {
                    "id": "testiframe",
                    "itemType": Terrasoft.ViewItemType.CONTAINER,
                    "selectors": {"wrapEl": "#stat-iframe"},
                    "layout": { "colSpan": 24, "rowSpan": 1, "column": 0, "row": 0 },
                    "html": "<iframe id='stat-iframe' class='stat-iframe' width='100%' height='550px'" +
                        "style = 'border: 1px solid silver;'></iframe>",
                    "afterrerender": {
                        "bindTo": "addUrl"
                    }
                }
            }
        ]/**SCHEMA_DIFF*/,
        methods: {
            // Hangdler for data load completion event.
            onEntityInitialized: function() {
                // Calling parent implementation of method.
                this.callParent(arguments);
                // Calling a method to add URL to iframe Html element
                this.addUrl();
            },
            // Method for adding URL to the iframe Html element.
            addUrl: function() {
                // Getting component by id.
                var iframe = Ext.get("stat-iframe");
                if (!iframe) {
                    window.console.error("A tab with the iframe is not found");
                    return;
                }
                // Getting the value in the [tsaName] column.
                var siteName = this.get("tsaName");
                if (!siteName) {
                    window.console.error("Website name not specified");
                    return;
                }
                // Generating a link to the statistics page.
                var url = "https://www.similarweb.com/website/" + siteName;
                // Setting the value of the [tsaName] column.
                this.set("tsaURL", url);
                // Assigning a link to the statistics page to the iframe Html element.
                iframe.dom.src = url;
            }
        },
        rules: {}
    };
});
Once the schema is saved, you’ll notice the [New URL] button in the [Web-stats] section, and the <iframe> element, which will display the stats for the specified Website. (Fig. 7).
Fig. 7. Page editing section record
