


Creation of the package and switching to the file system development mode
Glossary Item Box

Introduction
After performing the [Download packages to file system] action in the development in the file system mode all custom packages will be uploaded to the ..\Terrasoft.WebApp\Terrasoft.Configuration\Pkg folder. The content of the custom package uploaded to the file system will not be bound to the SVN storage even if the package is bound to the storage in the [Configuration] section.
Fill out the [Revision control system storage] field to bind a package to the SVN storage (see “Creating a package for development”). A working copy of the package will be created in the file system. A path to the folder where the work copies of the packages are being created is specified in the defPackagesWorkingCopyPath setting in the ConnectionStrings.config file (see “What parameters are used in ConnectionStrings.config” ).
This feature can be used to create a package bound to SVN and used for development in the file system. If you specify a path to the ..\Terrasoft.WebApp\Terrasoft.Configuration\Pkg folder in the defPackagesWorkingCopyPath setting, the package will be automatically bound to the SVN storage after it is uploaded to the file system.
To do this:
1. Specify a path to the ..\Terrasoft.WebApp\Terrasoft.Configuration\Pkg. folder in the defPackagesWorkingCopyPath setting.
2. In the development mode, use the built-in tools to create a package in the [Configuration] section bound to the SVN storage.
3. Commit the package in the storage in the [Configuration] section.
4. Switch to the file system development mode
5. Export the package to the file system.
6. Add new elements of the package to the SVN storage.
Case description
In the development mode, use the built-in tools to create a custom package in the [Configuration] section bound to the SVN storage. Configure the Creatio so that the content of the package in the development mode was bound to the SVN storage after the package upload.
The case requires understanding of the difference between development modes. In general: in the development mode in the file system, it is necessary to work with the SVN storage only from the file system, and in the development mode using the built-in tools it is necessary to work with SVN only via the built-in tools of the [Configuration] section.
Case implementation algorithm
1. Modify the defPackagesWorkingCopyPath setting
Specify a path to the ..\Terrasoft.WebApp\Terrasoft.Configuration\Pkg. folder in the defPackagesWorkingCopyPath setting of the ConnectionStrings.config file. Example:
<?xml version="1.0" encoding="utf-8"?>
<connectionStrings>
  ...
  <add name="defPackagesWorkingCopyPath" connectionString="C:\creatio\Terrasoft.WebApp\Terrasoft.Configuration\Pkg"/>
  ...
</connectionStrings>
This modification enables to combine the folder with working copies of custom packages with the folder in which the packages will be uploaded in the development in the file system mode.
2. Create a custom package
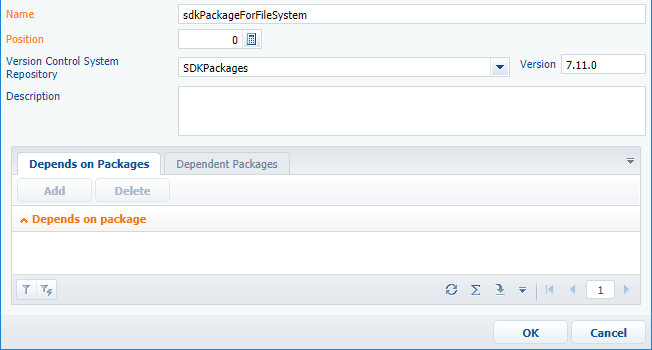
In the development mode, create a custom package in the [Configuration] section bound to the SVN storage via the built-in tools. Please refer to “Creating a package for development” for any details. Specify the name, storage and version of the created package (Fig. 1).
Fig. 1. Package properties
After creation of the package add necessary dependencies form the base packages (see “Package dependencies”).
3. Commit a package to storage
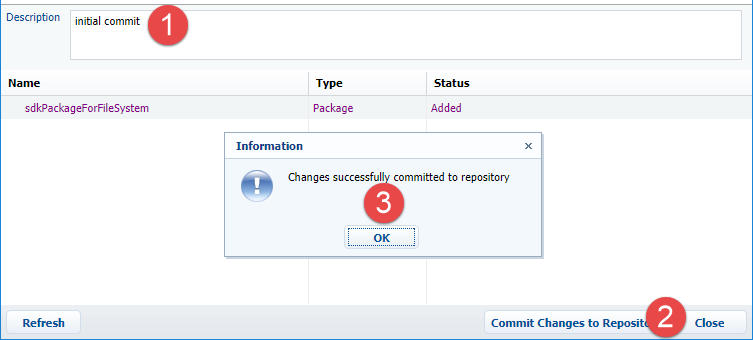
To commit a package to the storage perform the [Commit package to repository] action (Fig. 2). In the dialog box (Fig. 3) add the description of changes (1) and press the [OK] button. After the commit is complete, the corresponding message will appear (3).
Fig. 2. The [Commit package to storage] action
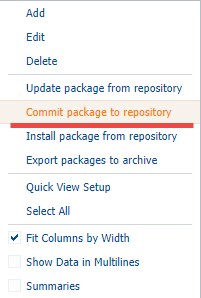
Fig. 3. Commit properties window
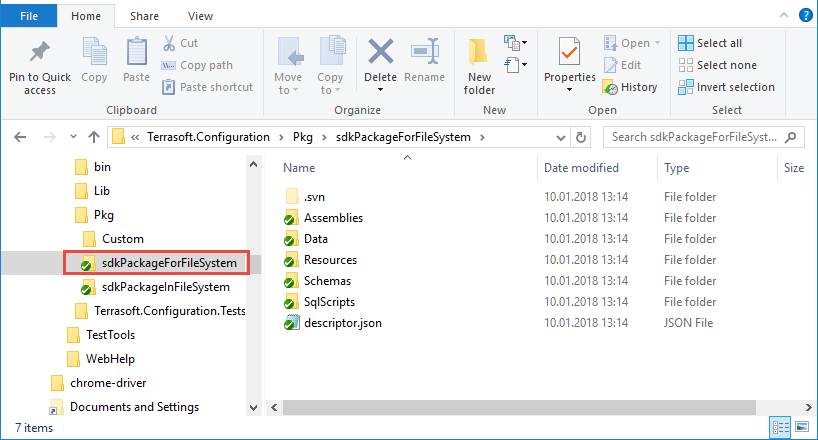
After the commit is complete, the ..\Terrasoft.WebApp\Terrasoft.Configuration\Pkg catalog will contain a local working copy of the package (Fig. 4).
Fig. 4. Package working copy
4. Switch to the file system development mode.
To enable the development in the file system mode, edit the Web.config file in the application root folder and set enabled attribute of the fileDesignMode element to true.
<fileDesignMode enabled="true"/>
Disable the using of the static content (see “Client static content in the file system”).
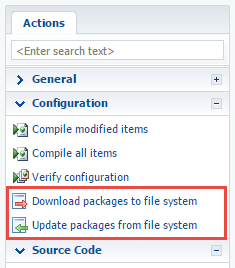
After the development in the file system mode is enabled, two buttons will appear on the [Actions] tab in the [Configuration] section (Fig. 1):
- [Download packages to file system] – exports the packages from the application database to the following directory: ...\Terrasoft.WebApp\Terrasoft.Configuration\Pkg.
- [Update packages from file system] – imports the packages from the following catalog: ...\Terrasoft.WebApp\Terrasoft.Configuration\Pkg to the database.
Fig. 5. Actions in the [Configuration] section for development in the file system
5. Export the package to the file system.
If the package content was not changed after committing to the storage, this action is optional.
Perform the [Download packages to file system] action to download packages to the file system. As a result, all elements of the package that were created or modified via built-in tools in the [Configuration] section will be downloaded to the file system to the ..\Terrasoft.WebApp\Terrasoft.Configuration\Pkg folder.
Since in the development in the file system mode the built-in tools for working with SVN are disabled, the new elements of the package will not be bound to the storage.
6. Add new elements of the package to the SVN storage
To add the new elements of the package to the storage, select the folder of the package working copy and perform the [Add...] command of the SVN application (for example, TortoiseSVN) (Fig. 6).
Fig. 6. Command of adding the elements to the storage

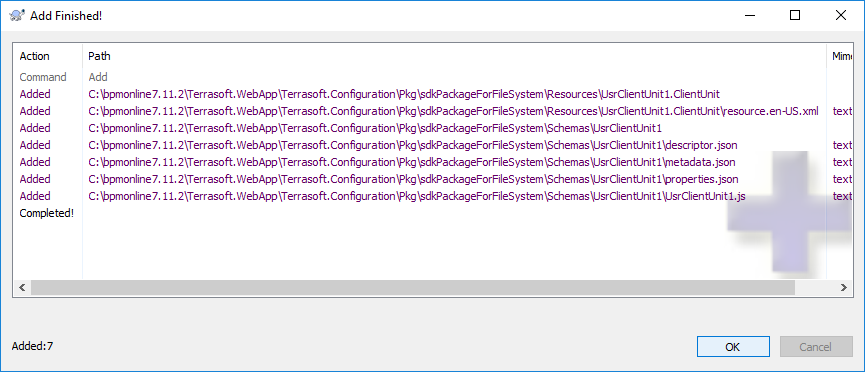
After this the dialog box with selection of the elements to add will be displayed (Fig. 7). Select the necessary elements and click the [OK] button, after that the window with the results of command execution will be displayed (Fig. 8).
Fig. 7. Selection dialog box
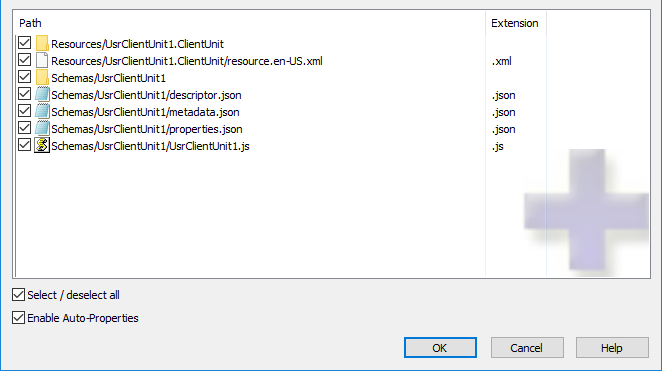
Fig. 8. Information window
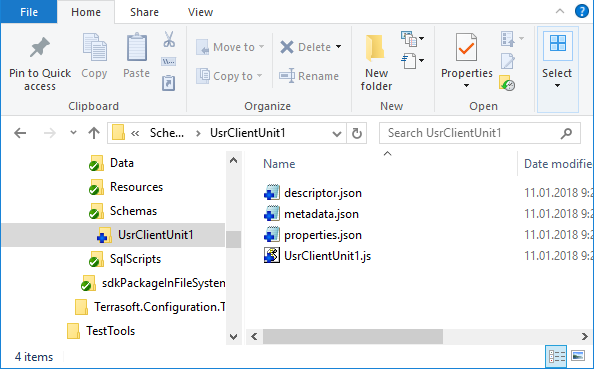
Added elements will be marked as bound but not committed to the SVN storage (Fig. 9).
Fig. 9. Displaying of the added but not committed package elements
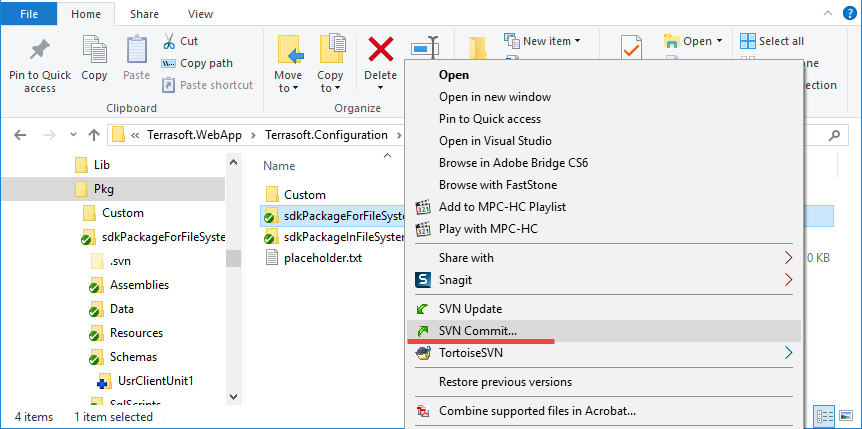
Perform the [SVN Commit...] command to commit all modified elements of the package in the storage. (Fig. 10).
Fig. 10. Command of adding the elements to the storage
More information about committing the elements in the storage can be found in the “Updating and committing changes to the SVN from the file system” article.
See also
- Working with SVN in the file system
- Creating a package in the file system development mode
- Installing an SVN package in the file system development mode
- Binding an existing package to SVN
- Updating and committing changes to the SVN from the file system