How to add the color select button to the edit page
Glossary Item Box

Introduction
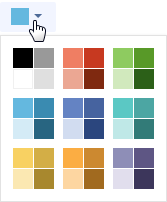
One of Creatio control elements is the color button (Fig.1).
Fig. 1. Color button
Algorithm of adding the color button to object edit page:
- Add the [Text (50 characters)] data type column to the object that will store information about the selected color.
- Add the [COLOR_BUTTON] type element description to the diff array. Set up binding to the column added on previous step for the value property of this element.
- Add a button label via the [LABEL] control element if needed.
Case description
Adding color button to product edit page.
Source code
You can download the package with case implementation using the following link..
Case implementation algorithm
1. Creating a “Product” replacing object and adding the [UsrColor] column to it.
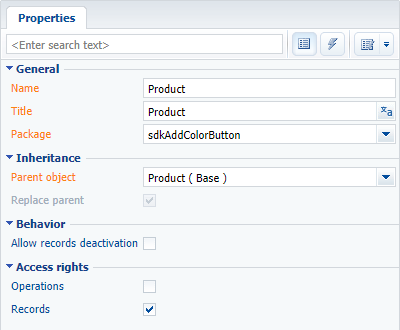
Create the [Product] replacing object (Fig.2). Learn more about creating a replacing object in the “Creating the entity schema” article.
Fig. 2. Configuration object properties
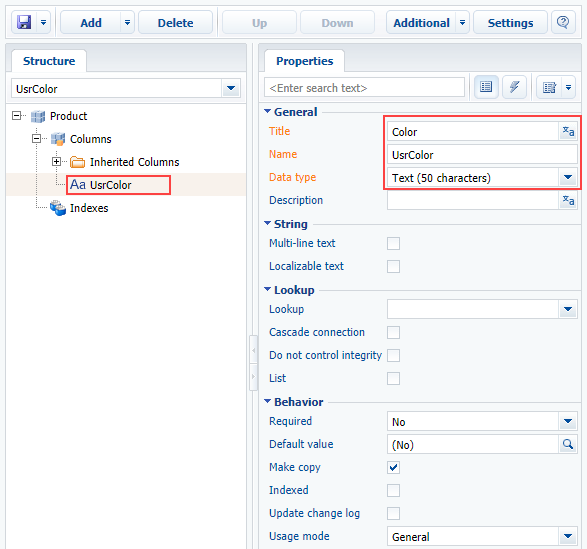
Add a new column (Fig.3) and indicate the following properties (Fig.4):
- [Title] – “Color”
- [Name] – "UsrColor"
- [Data type] – "Text (50 characters)”
Fig. 3. Adding a new column
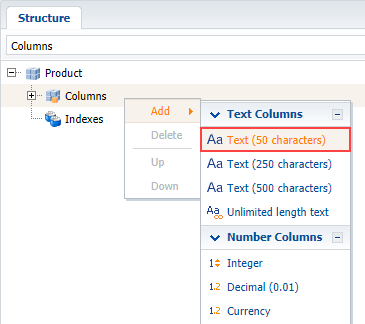
Fig. 4. Properties of the added column
Save and publish the object schema after you set up all properties.
2. Creating a product replacing edit page in custom package
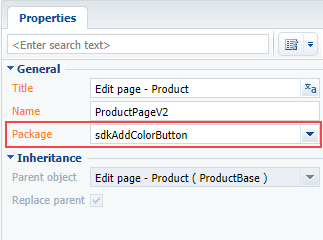
Create a replacing client module and specify the [Edit page – Product], ProductPageV2 schema as the parent object in it (Fig. 5). The procedure of creating a replacing page is covered in the “Creating a client schema“ article.
Fig. 5. Properties of the product edit page replacing schema
The replacing schema source code is as follows:
define("ProductPageV2", [], function() {
    return {
        // Name of the edit page object schema.
        entitySchemaName: "Product",
        diff: /**SCHEMA_DIFF*/[
            // Color button.
            {
                // Operation of adding.
                "operation": "insert",
                //  Meta-name of the parent container where the compponent is added.
                "parentName": "ProductGeneralInfoBlock",
                // The button is added to component collection
                // of the parent container.
                "propertyName": "items",
                // The name of schema component involved in action.
                "name": "ColorButton",
                // Properties transferred to the component constructor.
                "values": {
                    // Element type — color button.
                    "itemType": this.Terrasoft.ViewItemType.COLOR_BUTTON,
                    // Binding of the control element value to the view model column.
                    "value": { "bindTo": "UsrColor" },
                    // Button location.
                    "layout": { "column": 5, "row": 6, "colSpan": 12 }
                }
            }
        ]/**SCHEMA_DIFF*/
    };
});
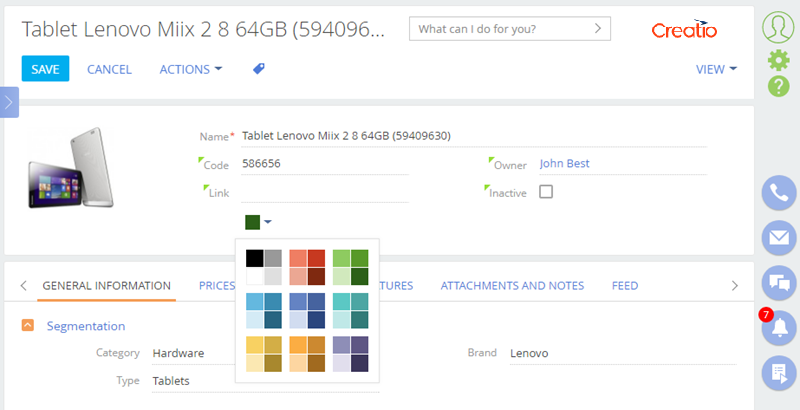
After saving the schema and refreshing the application page the color button will be displayed on the product edit page (Fig .6).
Fig. 6. Case result