How to add the field validation
Glossary Item Box

Introduction
Validation is the verification of field values for their compliance with certain requirements. Values of the Creatio page fields are validated at the level of the page view model columns. The logic of the field value validation is implemented in the custom validation method.
Validator is the method of the view model where values of the view model column are analyzed for compliance with business requirements. This method must return validation results as an object with the following property:
- invalidMessage – a message string displayed under the field when making an attempt to save a page with an invalid field value and in the data window when saving a page with the field that did not passed validation.
If the value validation is successful, the validator method returns the object with empty string.
To start the field validation, the corresponding view model column must be bound to a specific validator. For this purpose, override the setValidationConfig() base method and call the addColumnValidator() method in it.
The addColumnValidator() method accepts two parameters:
- name of the view model column, to which the validator is bound.
- name of the column value validator method.
ATTENTION
If the field is validated in the replacement client schema of the base page, the parent implementation of the setValidationConfig() method must be called before calling the addColumnValidator() method to correctly initialize validators of the base page fields.
To add validation of field values:
- Add the validator method to the collection of methods of the view model that will check a field value.
- Override the setValidationConfig() method and connect the validator to the corresponding view model column in it.
Source code
You can download the package with case implementation using the following link.
Example 1
Case description
Set the validation on the opportunity page as follows: the date in the [Created on] field must be earlier than the date in the [Closed on] field.
Case implementation algorithm
1. Create a replacement client module of the opportunity edit page
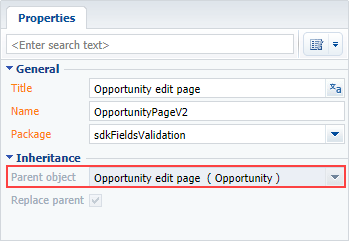
A replacing client module must be created and [OpportunityPageV2] must be specified as the parent object in it (Fig. 1). Creating a replacing page is covered in the “Creating a custom client module schema” article.
Fig. 1. Properties of the replacing edit page
2. Add an error string to the collection of localizable strings of the page replacing schema
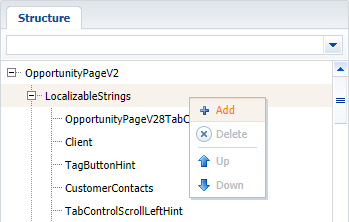
Create a new localizable string (Fig. 2).
Fig. 2. Adding localized string to the schema
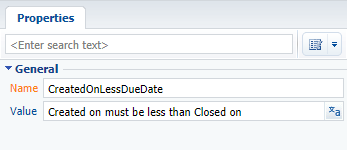
For the created string, specify (Fig. 3):
- [Name] – “CreatedOnLessDueDate”.
- [Value] – “Created on must be less than Closed on”.
Fig. 3. Properties of the custom localizable string
3. Add the implementation of methods in the methods collection of the view model
- dueDateValidator() – validator method that determines if the condition is fulfilled.
- setValidationConfig() – an overridden base method in which the validator method is bound to the [DueDate] and [CreatedOn] columns.
The replacing schema source code is as follows:
define("OpportunityPageV2", [], function() {
    return {
        // Name of the edit page object schema.
        entitySchemaName: "Opportunity",
        methods: {
            // Validate method for values in the [DueDate] and [CreatedOn] columns.
            dueDateValidator: function() {
                // Variable for storing a validation error message.
                var invalidMessage = "";
                // Checking values in the [DueDate] and [CreatedOn] columns.
                if (this.get("DueDate") < this.get("CreatedOn")) {
                     // If the value of the [DueDate] column is less than the value
                     // of the [CreatedOn] column a value of the localizable string is
                     // placed into the variable along with the validation error message
                     // in the invalidMessage variable.
                    invalidMessage = this.get("Resources.Strings.CreatedOnLessDueDate");
                }
                 // Object whose properties contain validation error messages.
                 // If the validation is successful, empty strings are returned to the
                 // object.
                return {
                    // Validation error message.
                    invalidMessage: invalidMessage
                };
            },
            // Redefining the base method initiating custom validators.
            setValidationConfig: function() {
                // This calls the initialization of validators for the parent view model.
                this.callParent(arguments);
                // The dueDateValidator() validate method is added for the [DueDate] column.
                this.addColumnValidator("DueDate", this.dueDateValidator);
                // The dueDateValidator() validate method is added for the [CreatedOn] column.
                this.addColumnValidator("CreatedOn", this.dueDateValidator);
            }
        }
    };
});
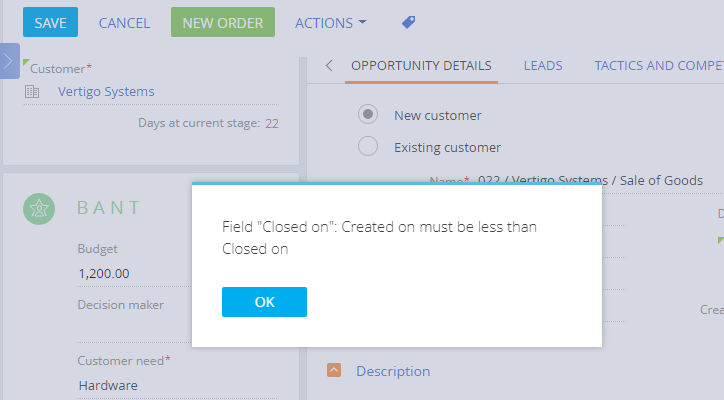
After you save the schema and refresh Creatio page, a string with the corresponding message (Fig. 4) will appear on the opportunity edit page when entering the date of closing or date of creation which does not satisfy the validation condition (the date of creation must be before than the date of closing). The data window will appear when making an attempt to save the opportunity (Fig. 5).
Fig. 4. Case results: invalid date message
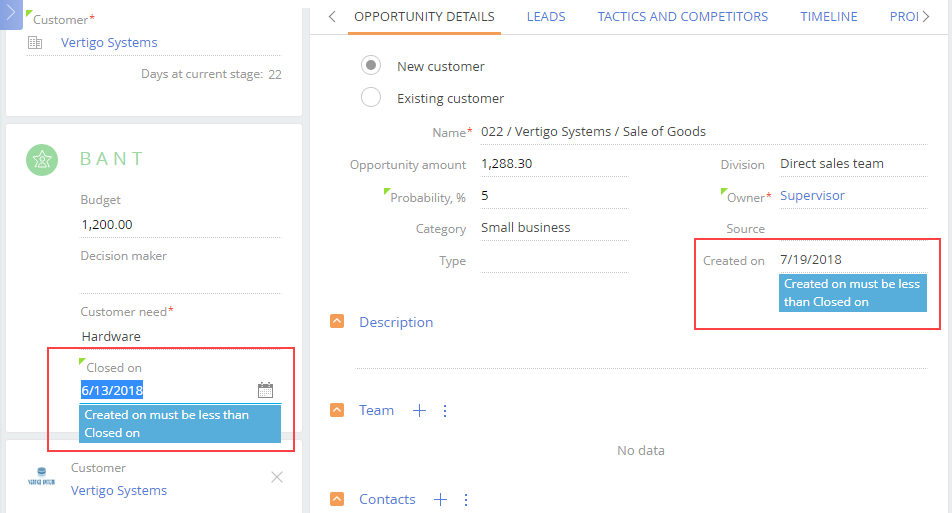
Fig. 5. Case results: message when saving
Example 2
Case description
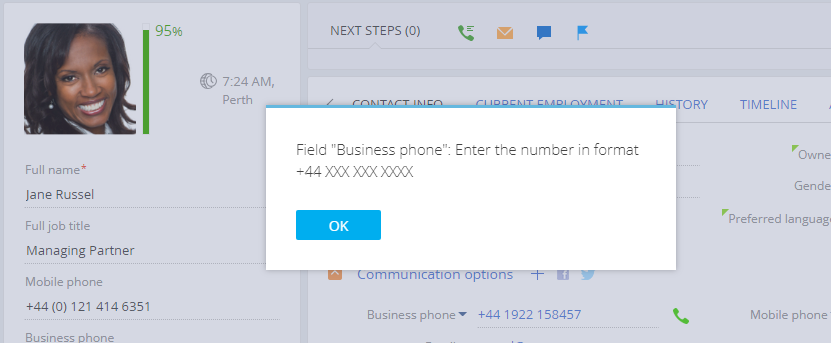
Set the [Business phone] field validation as follows: phone number must correspond to the following mask: +44 XXX XXX XXXX, otherwise the “Enter the number in the “+44 XXX XXX XXXX” format ” message appears.
Case implementation algorithm
1. Create a replacing client module
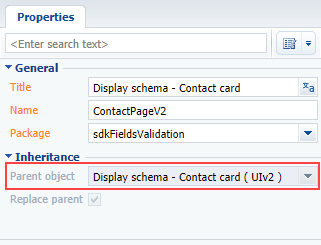
Create a replacing client module and specify the [Display schema – Contact card] (ContactPageV2) schema as parent object (Fig. 6). Creating a replacing page is covered in the “Creating a custom client module schema” article.
Fig. 6. Properties of the replacing edit page
2. Add an error string to the collection of localizable strings of the page replacing schema
Create a new localizable string (Fig. 2).
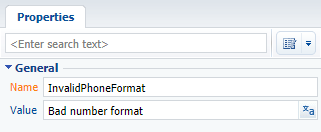
For the created string, specify (Fig. 7):
- [Name – "InvalidPhoneFormat".
- [Value] – "Enter the number in the “+44 XXX XXX XXXX” format”.
Fig. 7. Properties of the custom localizable string
3. Add the implementation of methods in the methods collection of the view model
- phoneValidator() – validator method that determines if the condition is fulfilled.
- setValidationConfig() – an overridden base method in which the validator method is bound to the [Phone] column.
The replacing schema source code is as follows:
define("ContactPageV2", ["ConfigurationConstants"], function(ConfigurationConstants) {
    return {
        entitySchemaName: "Contact",
        methods: {
            // Redefining the base method initiating custom validators.
            setValidationConfig: function() {
                // Calls the initialization of validators for the parent view model.
                this.callParent(arguments);
                // The phoneValidator() validate method is added to the [Phone] column.
                this.addColumnValidator("Phone", this.phoneValidator);
            },
            phoneValidator: function(value) {
                // Variable for stroing a validation error message.
                var invalidMessage = "";
                // Variable for stroing the number check result.
                var isValid = true;
                // Variable for the phone number.
                var number = value || this.get("Phone");
                // Determining the correctness of the number format using a regular expression.
                isValid = (Ext.isEmpty(number) ||
                    new RegExp("^\\+44\\s[0-9]{3}\\s[0-9]{3}\\s[0-9]{4}$").test(number));
                // If the format of the number is incorrect, then an error message is filled in.
                if (!isValid) {
                    invalidMessage = this.get("Resources.Strings.InvalidPhoneFormat");
                }
                // Object which properties contain validation error messages.
                // If the validation is successful, empty strings are returned to the object.
                return {
                    invalidMessage: invalidMessage
                };
            }
        }
    };
});
When the schema is saved and the system web-page is updated, the verification of the number format validity will be preformed on the contact or account edit page when a new phone number is added. If the format is incorrect, a string with a corresponding message will appear (Fig. 8, 9).
Fig. 8. Case results: Message about the incorrect format
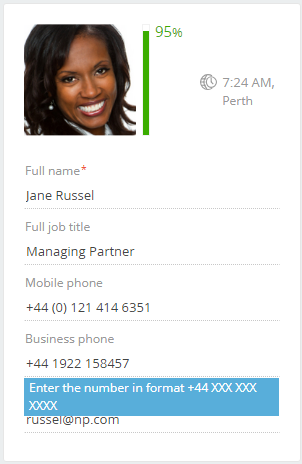
Fig. 9. Case results: message when saving