Creating the [Source code] schema
Glossary Item Box

Perform the following actions to create a non-visual module schema.
1. Go to the [Configuration] section and select the custom package to add a new schema.
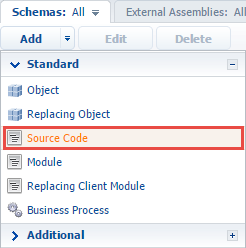
2. On the [Schemas] tab, run the Add > Source Code command (Figure 1).
Fig. 1. Adding a new [Source code] schema

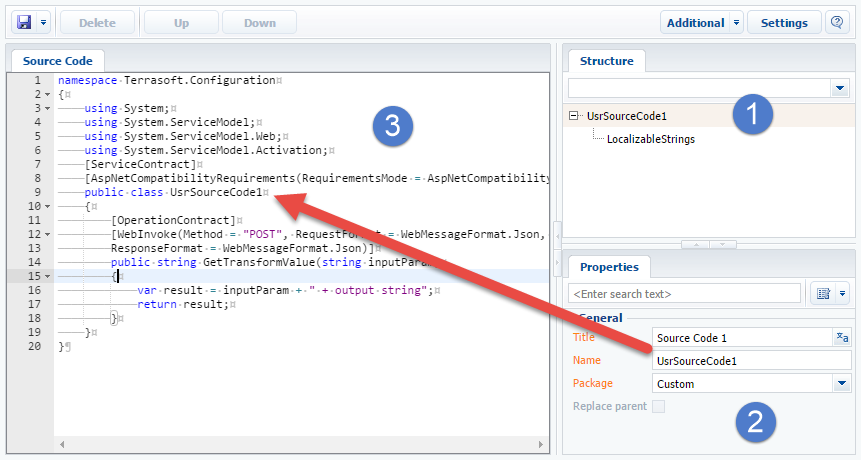
3. Select the root element of the structure (Fig. 2, 1) and fill in the created schema properties (2) in the schema designer.
Fig. 2. The [Source code] schema designer

Main [Source code] schema properties:
- [Name] – schema name. May contain only Latin characters and numbers. Includes the [Prefix for object name] system setting prefix (SchemaNamePrefix).
- [Title] – schema title. May be localized.
- [Package] – a custom package used to create a schema.
4. Use the [Source Code] tab of the schema designer to add the source code (Fig. 2, 3). Make sure that the source code declares a class with a name that matches the schema name.
5. Publish the schema (Fig. 3):
Fig. 3. Saving and publishing a schema

ATTENTION
The schema designer uses RAM to process changes. Save the schema to apply changes to the schema metadata. To do this, click [Save] in the object designer. Publish the schema to apply changes to the database.


