


The data on the portal are represented in the list view. A list contains records, each one having a group of fields. You can choose which information will be displayed in each section list.
Note
More information about Creatio section lists is available in a Record lists article.
How to set up displaying of information in the portal sections
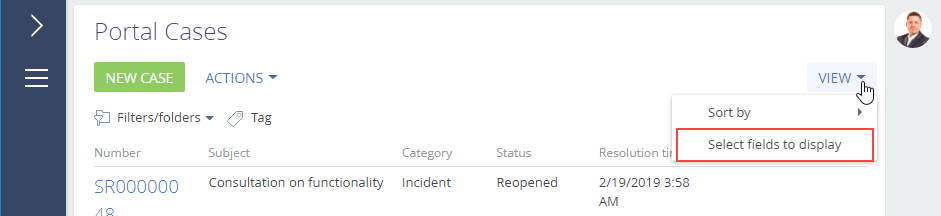
You can choose which information is displayed in each section list. To set up lists, use the [View] menu (Fig. 1).
Fig. 1 List setup menu of the [Portal cases] section
Example
Add case response time information to the list of the [Portal Cases] section.
1.Go to the [Portal Cases] section.
Note
The [Portal Cases] section is available in the self-service portal by default.
2.In the [View] menu, select the [Select fields to display] command.
3.Select the column, whose information you want to display and click  (Fig. 2).
Fig. 2 Adding the [Resolution time] column to the list
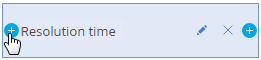
4.A column selection window opens. Choose the “Response time” in the drop-down list and click the [Select] button.
5.Adjust column width if needed. To do this, drag its border with your mouse.
Fig. 3 Changing a column width

6.Save the new settings.
How to group records on the portal
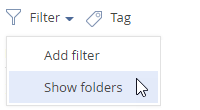
Use folders to segment records on the portal. Select [Filter] > [Show folders] to view folders in the current section Fig. 4).
Fig. 4 Opening the folder tree
Note
More information about Creatio folders is available in the Folders article.
You can create a custom folder structure, as well as set up rules for populating the folder contents. Deleting a folder will not result in deleting the records contained in it.
Section folders have a tree-like structure. A folder position in the structure does not affect its properties: if a record is included in one of the subordinate folders, it does not necessarily mean it is included in the parent folder.
To create a root folder, select the [All] folder and click the [New folder] button.
To create a subordinate folder, select a parent folder and click the [New folder] button.
Example
View all unresolved service requests in the [Portal cases] section.
1.Go the [Portal Cases] section.
Note
The [Portal Cases] section is available in the self-service portal by default.
2.In the [Filter] menu, select the [Show folders] option.
3.Click the [Add folder] button.
4.Enter the folder name and click [OK] in the opened window.
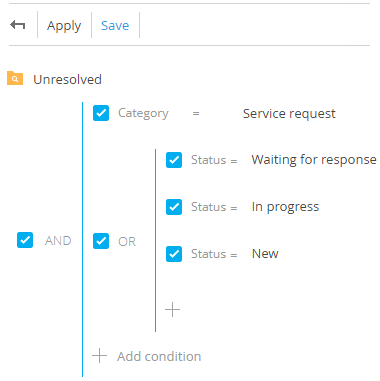
5.Set the following filter conditions: “Case category = Service request”:
a.Click <Add condition>.
b.In the opened window, select the “Case category” column.
c.In the filter setup area, click <?>. In the opened window, select the needed value for the selected column, in this case “Service request”.
6.Add another condition: “Status=New; In progress; Waiting for response”.
7.Alternatively, you can add three separate conditions and group them using “OR” logical operator to group cases in one of the mentioned statuses:
a.Holding down the CTRL key, select the filter conditions to group.
b.From the [Actions] menu, select the [Group] option. As a result, the selected conditions will be combined in a separate group with the corresponding operator.
c.Set “OR” as the logical operator for the newly created group by clicking the operator name.
8.Click the [Save] button (Fig. 5).
Note
Use the advanced filter mode to set up filters. More information about Creatio advanced filter mode is available in the Advanced filter article.
How to filter records on the portal
Use filters to search records in section lists.
Note
More detailed information on filters is available in the Filters article.
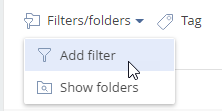
To set up filtering conditions for the list records, use the [Add filter] command in the [Filters/folders] menu (Fig. 6).
Example
In the [Portal cases] section, find the case by its number.
1.Go the [Portal Cases] section.
Note
The [Portal Cases] section is available in the self-service portal by default.
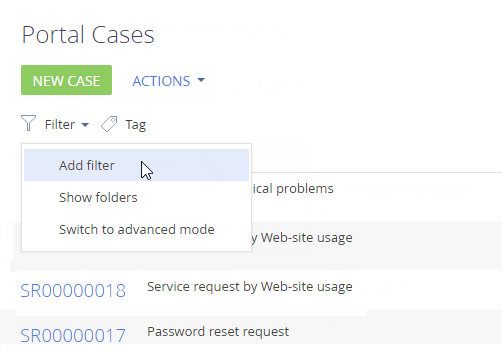
2.In the [Filters/folders] menu, select the [Add filter] option (Fig. 7).
Fig. 7 A standard filter in the [Portal Cases] section
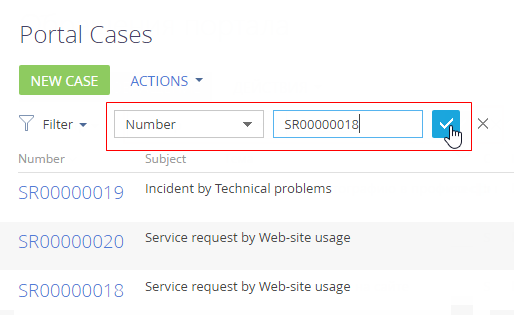
3.To search a case by its number, select the [Number] field from the list, enter the case number and click  (Fig. 8).
Fig. 8 Search for a case by number
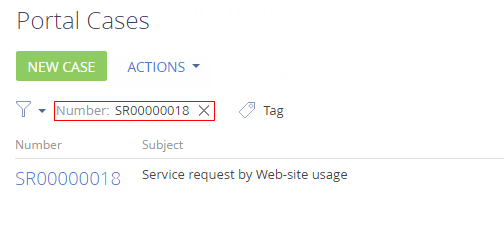
Then, the page will display only the records that match the configured filter (Fig. 9). To disable a previously configured filter, click the  button.
Fig. 9 A standard filter applied to the [Portal Cases] section
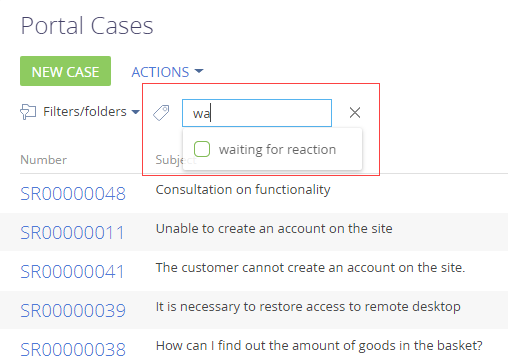
How to tag records on the portal
To quickly search for information by keywords, you can assign a tag or a set of tags to any record on the portal.
For example, in the [Portal Cases] section, you can tag cases waiting for reaction and filter them by the assigned tag.
Note
The [Portal Cases] section is available in the self-service portal by default.
Records are tagged manually. To create a tag and then tag a case, go to the record page and click  . To filter records in the section by tags, use the filtering area (Fig. 10).
Fig. 10 Tag filter in the [Portal Cases] section
Note
For more details on how to use filters, please see the Tags article.
See also
•Portal registration and login