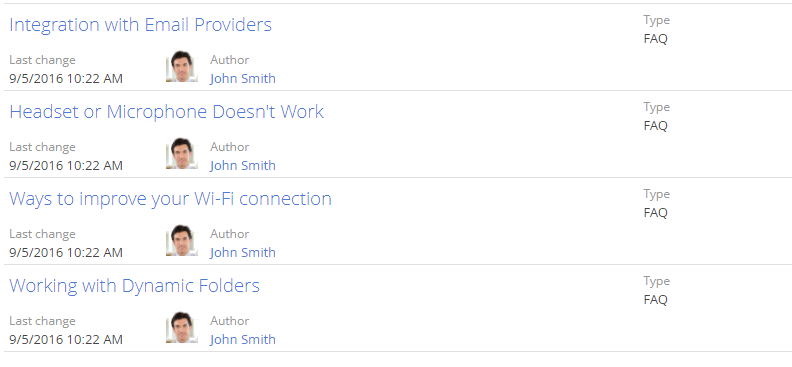
Data in the system sections as well as on some page details (for example, on the Activities detail of the account page) is displayed as a list. A list contains records, and each record contains a field group.
In this view, the emails and web addresses are displayed as links. Clicking a web address opens a window containing the specified web page. Clicking an email address opens a window where you can create a new message using the default mail client.
Some other values in the system are also displayed as links to allow quick switching between the records. For example, the value in [Owner] field of the Activities section is displayed as link to allow you to switch from the activities list to the activity's owner page.
Note
Data displayed in the list can be exported to Excel for future processing. Read more >>>
Use data import in Creatio to add large numbers of records. Read more >>>
List Views
There are two basic views a section can be displayed in.
The list view (Fig. 1) displays records in the form of a simple table. Every object field has a corresponding column.

In the tile view (Fig. 2), fields can be displayed in several rows for each record.

You can choose between the list view and the tile view while setting up the list.
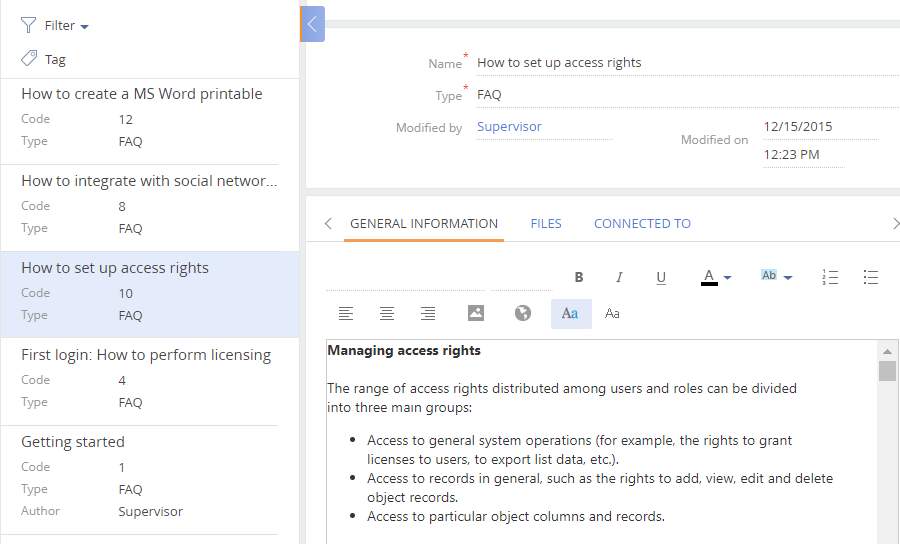
When a record page opens the list is displayed in the additional vertical view (Fig. 3). In this view, the list data is displayed in a column. Each field of the record corresponds to a certain line in the vertical view. When you toggle between records in the vertical view, the right side of the page displays the detailed information about the selected record.

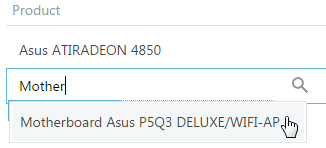
In Creatio you can edit records directly in the list without opening the corresponding pages. The editable list (Fig. 4) is used for fast and frequently changing objects, for example, records on the [Products] detail in the [Documents] section.

Adding a record
1.Create a new record on the detail. An additional string will appear in the editable list.
2.Click the area where the needed field is, and enter the value (Fig. 5).

Note
An editable field is underlined by a dotted line.
3.To fill in the next field of the record, press the [Tab] key or click the area where the needed field is. You can also press the [Space] key to check or uncheck checkboxes.
4.When all needed fields are filled in, save the record using the [Ctrl]+[Enter] key combination or by clicking the  button.
Note
If all requested fields of the record are filled in, the record will be saved automatically after clicking outside of the string area.
Canceling changes
To correct a mistake made when editing a record, cancel the changes by pressing the [Esc] key or by clicking the  button. As a result, all unsaved changes will be canceled.
When adding a new record, click the  button ([Esc] key) to delete the record.
Deleting records
To delete a record, use the  button. When deleting a previously saved record, the system will display an additional confirmation message. If the record is not saved yet, the notification about the deletion option will not be displayed.
List setup
You can customize the appearance of a list, its field group and the data sorting parameters. You can also bring up the summary information for displayed records. To set up lists, use the [View] menu (Fig. 6).

Menu commands:
-
[Sort by] — sorts the list records by the selected column data.
-
[Set up summaries] — displays the number of records, amount, average, maximum or minimum value by the data in the selected columns;
-
[Select fields to display] – sets up the list of displayed columns, changes their order and appearance.
Contents
•Setting up summaries by columns
See also
Video tutorials


