Depending on the specifics of a each particular web service, it may process any and all requests, or require some form of authentication before the web service can be used. Creatio web service integration supports two types of authentication:
-
HTTP Basic authentication involves passing a login and password as part of a web service request to authenticate Creatio to the integrated web service. It is a simpler form of authentication to use, however, it is not secure without SSL/TLS. It is a simpler form of authentication to use, however, it is not secure without SSL/TLS.
-
OAuth 2.0 Authorization is secure authentication mode, supported by most of the popular service providers, including Facebook, Google and Amazon.
Using basic authentication
To enable HTTP basic authentication:
1.Obtain login credentials for basic authentication. The method of obtaining the credentials depends on the web service you integrate.
2.Open the [System designer] go to the [System settings] section and add 2 system settings:
a.A “string” type system setting for storing a login for the web service.
b.An “encrypted string” type system setting for storing the password for the web service.
3.Populate the system setting values with the login and password for authentication with the web service.
4.Open the web service page and go to the [Authentication] tab.
5.In the [Authentication] field, select “Basic”.
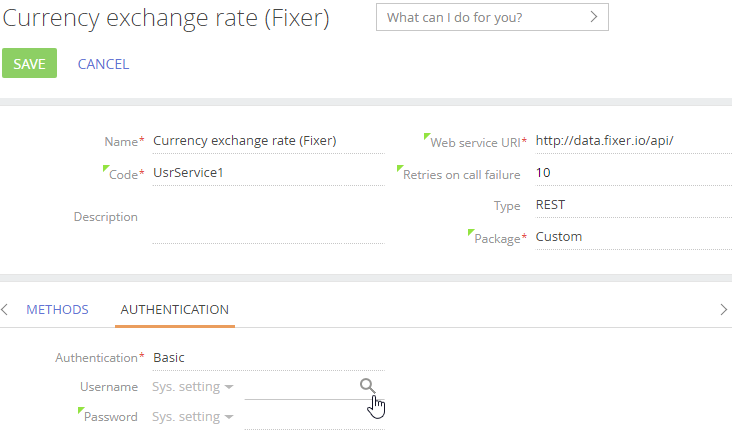
6.In the [Username] and [Password] fields, select the system settings that contain the login and password for accessing the web service (Fig. 1).
Fig. 1 The [Authentication] tab

The system settings used in the authentication will be bound to the web service package. The system settings are bound without values, so the password and login values will not be bound to the package. After installing the web service integration package on a new application, make sure that you populate the login and password system settings.
To use OAuth authentication, provided the application has been set up before (e.g., when installing a package with web service integration):
1.Open the web service page and go to the [Authentication] tab.
2.In the [Authentication] field, select “OAuth 2.0”.
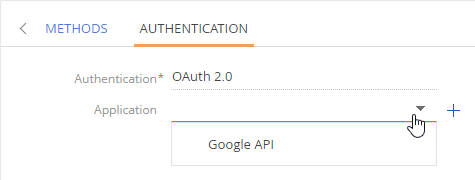
3.In the [Application] field, select an existing OAuth application (Fig. 2). Learn more about setting up the new OAuth 2.0 application in a separate article.
Fig. 2 Selecting an existing OAuth application

See also


