


Setting up the MS Exchange email service provider
You can add a Microsoft Exchange email service provider using several methods.
Note
To set up connection parameters for email providers, a user must have the permission to run the [Access to “Access rights” workspace] (CanManageAdministration) system operation.
Learn more about using system operations in the “System operation permissions” article.
Method 1. Adding the Microsoft Exchange provider from the [Email] tab of the communication panel
1.In the communication panel, click  to open the [Email] tab.
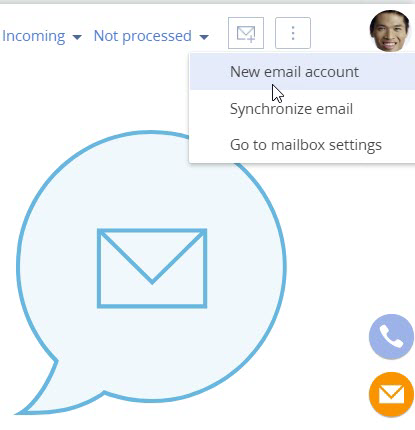
2.Click  and select the [New email account] action (Fig. 1).
Fig. 1 Adding a new email account
Note
To add a new email account, you can also select the [Go to mailbox settings actions] under  and click [New] on the page that opens.
3.In the [New email account] widow that pops up, enter the email address and click [Next].
4.Select the email service provider from the list. If the needed provider is not available on the list, click [Add new server].
Note
Add the domains of a new provider to the [Email providers domains] lookup for automatic recognition of the email provider. As a result, users will not have to specify the mail provider manually when setting up an email account.
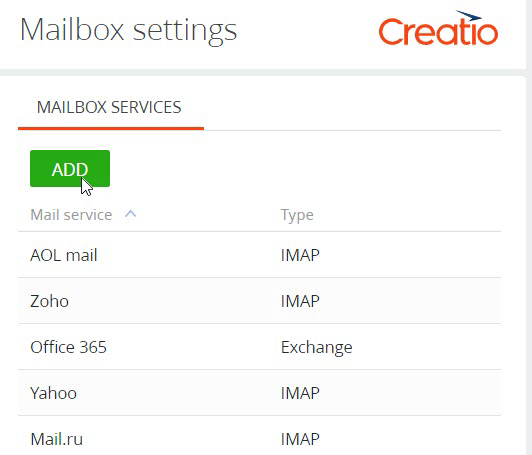
5.On the opened page, click [Add] (Fig. 2).
Fig. 2 Adding a new email provider
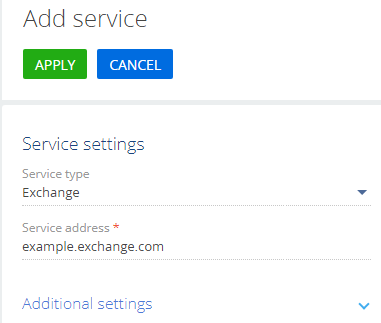
6.On the page that opens, select “Exchange” in the [Service type] field.
7.Populate the [Service address] field in the “example.exchange.com” format (Fig. 3).
Fig. 3 Specifying the mail service address
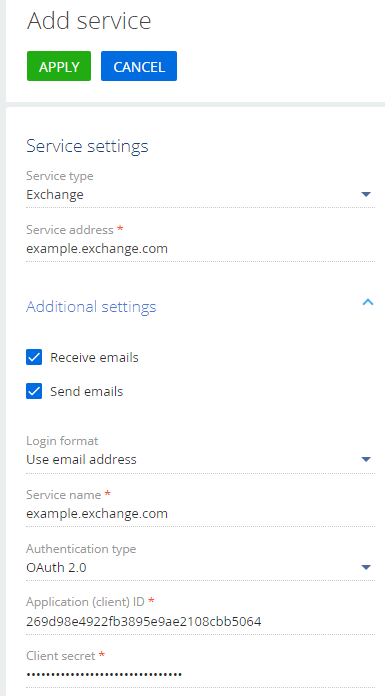
8.You can also populate the additional settings to set up receiving and sending emails, specify the login format, service name and the authentication method.
Enable receiving and sending emails:
•Select the [Receive emails] and/or [Send emails] option.
Set up the mailbox login format:
•Select the [Use manual entry] option if users enter their email address and login.
•Select the [Use email address] option if the full email address is used as a login (for instance, “example@google.com”).
•Select the [Use mailbox name] option if the part of the email address before “@” is used as a login. For instance, the “example” will be a login for “example@google.com” email address.
Set up the authentication method:
•Select “Basic” for the basic authentication using the user name and password with Base64 encryption.
•Select “OAuth 2.0” to restrict the service access to protected user resources without the need to pass the login and password. Read more about the OAuth 2.0 authentication method in the “Setting up OAuth authentication” article.
Populate the [Application (client) ID] and [Client secret] required fields (Fig. 4).
•[Application (client) ID] is generated by the authentication server of the integrated web service. The application identifier can also be called “Application (ID)”, “Consumer ID” or “Public key” in the documentation and web service API.
•[Client secret] – a secret key generated by the authentication server. The secret key can also be called “Application secret”, “Consumer secret” or “Secret key” in the documentation and web service API.
Fig. 4 Additional settings of the mail service
9.Save the settings by clicking [Apply].
As a result, Creatio users will be able to receive and send emails via the MS Exchange server. In addition, they will be able to synchronize contacts and activities between Exchange and Creatio.
Method 2. Adding the Microsoft Exchange provider from the user profile
1.Open the user profile page by clicking the [Profile] image button on the main page of the application.
2.Click [Email accounts] (Fig. 5).
Fig. 5 Opening the email accounts

3.Click [New] in the opened window.
To complete the setup, perform steps 3–9, described above in Method 1.
Note
To delete a mail server, delete all its mailboxes (email accounts) first.
See also