


In bpm’online, the CallWay integration functionality has a separate license. You need to generate a license request, send it to our service team, upload the received license file into the system and finally, distribute the licenses between the users.
Note
See more details about licensing in the “Software licensing” and “License distribution” articles.
The integration can be performed if all prior CallWay configurations are performed by the telephony administrator.
Setting up bpm’online messaging service
The messaging service allows you to connect bpm’online to the telephony using the integration protocol to connect to CallWay and distribute call events between bpm’online users.
1.Contact bpm'online support at support@bpmonline.com to receive installation files. Run the received .MSI file on the message exchange server and proceed with the installation.
Attention
.NET Framework of version 4.7.2 or higher should be installed on the server where you configure the bpm’online Messaging Service.
2.Specify the CallWay server address in the “Terrasoft.Messaging.Service.exe.config” file:
<callway url="CallWay_server_address" login="XXX" password="XXX" port="34600" restoreConnectionInterval="2000" />
See the list of configuration file parameters in the table below.
| Parameter | Notes |
|---|---|
| url | CallWay server IP address parameter. |
| login | Integration protocol login and password. |
| password | |
| port | Integration protocol port. By default, “34600”. |
| restoreConnectionInterval | The time interval to reconnect integration messaging service to the CallWay telephony server, if a failure occurs. The value is specified in milliseconds and is “2000” - by default. |
Setting up message exchange library
Message exchange library selection and setup is performed once by the system administrator.
1.Open the system designer by clicking  in the top right corner of the application window.
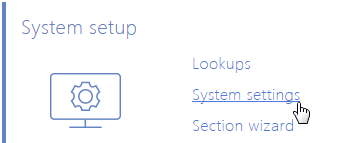
2.Click the [System settings] link in the [System setup] block (Fig. 1).
Fig. 1 Opening the [System settings] section
3.Specify the message exchange library. To do this, open the “Default messages exchange library” system setting. On the system setting page:
a.Fill in the [Value by default] field by selecting the "Telephony integration library based on Callway protocol” value.
b.Click the [Save] button.
4.Specify the message service connection parameters. To do this, open the “Message exchange server” system setting. On the system setting page:
a.In the [Default value] field, specify the message exchange network address in the following format: “ws://0.0.0.0:2013”, if your website is available by the http protocol, or “wss://0.0.0.0:2013”, if your website is available by the https protocol, where:
•“0.0.0.0” – IP address that your bpm’online users use to access your message exchange server.
•“2013” – the port used by default for connecting to the message service. You can change the port number in the “Terrasoft.Messaging.Service.exe.config” file.
Note
If your website is available by https and secure (wws) connection is used for websockets, you will need to install a security certificate on the message exchange server and specify it in the configuration files of the message service. For more information about the setup process, contact bpm'online's technical support at support@bpmonline.com.
b.Click the [Save] button.
Setting CallWay parameters
These settings should be applied for each bpm’online user who received CallWay integration license. Use the user login credentials to access the system.
1.Open the user profile page by clicking the [Profile] image button on the main page of the application.
2.Click the [Call Center parameters setup] button.
3.On the opened page, populate the required values:
a.[Disable Contact Centre integration] – this checkbox allows you to disable bpm’online phone integration. The call button will not be displayed on the communication panel of the application.
b.[Agent internal number] – CallWay user phone number.
c.[Routing rule] – specify the routing rule if it is required for the CallWay configured server.
d.[Use CallWay client] – select the checkbox if an employee uses CallWay internal client. While using the CallWay internal client, the answer button in the application becomes available.
e.[Enable debugging] – the checkbox allows you to display troubleshooting information within the browser console. This troubleshooting information can be used when the phone integration runs into problems and the customer addresses the service team.
4.Click the [Save] button on the page.
5.Refresh the browser page to apply the changes.
See also