Use the Send email ![]() element to create and send new email messages automatically or manually as part of the case. Enter the email content directly when setting up the element or select one of the pre-configured templates.
element to create and send new email messages automatically or manually as part of the case. Enter the email content directly when setting up the element or select one of the pre-configured templates.
To display the task title in the assignee's language, make sure the “Create business process tasks in the owner's language” (“UsePerformerCultureInUserTask” code) system setting is enabled and the Translation section includes the translation. Learn more: Localize UI via the Translation section.
Set up the Send email element
Specify the email parameters in the element setup area (Fig. 1).
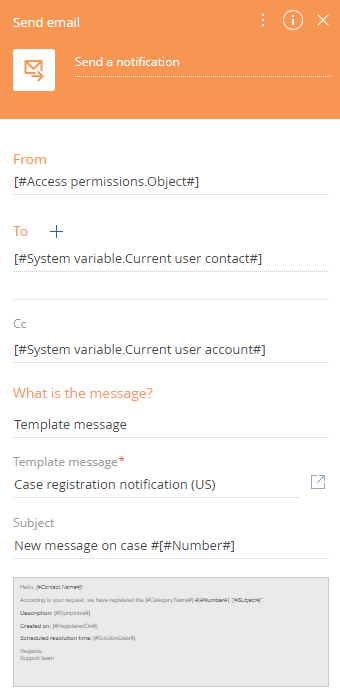
The element caption is displayed at the top of the setup area. This makes the element easy to find on the case diagram.
Fill out the following fields:
- From – specify an email account integrated with Creatio and used for sending emails. You can specify the sender manually or use a dynamic value generated as part of the case. If the email is sent automatically, this field is required. For example, select Lookup value in the parameter value box and select the “support@ourcompany.net” email from the Mailbox synchronization settings lookup to send notifications from the company email. If the email is sent manually, this field is optional. The user may select the needed account from the list on the email page.
-
To – specify the recipient. This can be an email address, a contact, or an account. You can choose a specific account or map the field value using the parameter value box. If you select either a contact or an account, Creatio will pull the email from the Communication options detail. When entering the email address directly, enclose it in quotation marks. For example, “johanson@gmail.com.”
To set up a support case notification, select Contact → Element parameter in the parameter value box. Specify one of the previous case steps, e. g., “Case processing”, in the parameter selection box and select the Contact parameter value. This is a required field.
If necessary, specify additional recipients, as well as carbon copy (cc) and/or hidden copy recipients (bcc). To do this, click the
 button in the To area, and select the needed fields.
 - What is the message? – select the email content type.
-
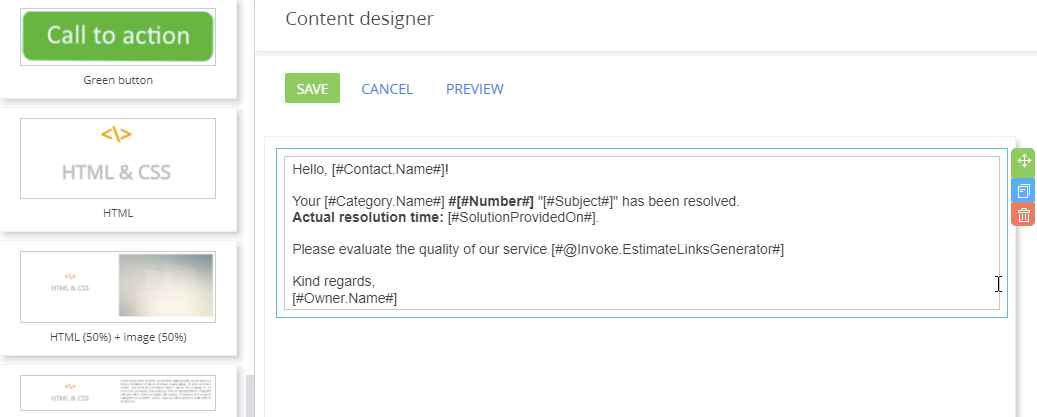
“Custom message” – add content to the email body in the Content Designer during the element setup. You can also create a new email page for the user to edit and send manually as part of the case.
If you select “Custom message”, enter the necessary message in the message area. Use the Content Designer to customize the message body, as well as add images and case parameters to it (Fig. 2).
Fig. 2 Edit the email body in the Content Designer
-
“Template message” – Creatio will generate an email based on a template created in the Content Designer. Select the template from the Message templates lookup.
If the template contains macros, fill out the Record for macros field so that the macro values in the template are relevant to the current case. For example, specify the “Id” column of the main record in the Record for macros field to send a support case processing notification.
-
- Subject – enter the subject of the email. This field is required for manually sent emails. If you are using templates, Creatio will populate the field automatically.
- Record for macros – specify the source record for the template macro values. The field is displayed only if the macro source is specified in the selected email template.
- How is the message sent? – select the sending method:
- “Send email manually” – a new email page will open for the user to send the email as part of the case. For example, select this method if the user must update or modify the email body before sending the email. If you select this value, fill out the following fields:
- Who performs the task? – select one of the options and fill out the field that opens:
- “User” – specify the user who will send the email in the Contact field.
- “Employee's manager” – specify the user whose manager will send the email in the Contact field.
-
“Role” – specify the role associated with the users who can send the email in the Role field.
- Show page automatically – select the checkbox to display the email page to the user automatically as part of the case. For example, the user must edit the email content. If the checkbox is cleared, a draft message will be created. The user can view the draft in the draft messages list, on the Business process tasks tab of the communication panel, or in the task panel.
- Hint for user – add a text hint for the user responsible for the task. The user can view the hint by clicking the
 button on the email page.
 - Email connections – by default, Creatio will prompt you to connect the email to the case object. You can associate an email with other Creatio entities. For example, display this email on the Email detail of the account page. To do this, click
 and specify the object to connect to the email. You can fill out these fields using the parameter value box.
- Who performs the task? – select one of the options and fill out the field that opens:
- “Send email automatically” – Creatio will send a pre-configured email automatically as part of the case. This option requires an address in the From field. For example, select this option to send notifications and other automatic messages. If you select an automatic email sending option, fill out the following fields:
-
Importance – select the email priority. Used to categorize outbound emails.
-
Ignore errors on sending – select the checkbox to continue the case regardless of the email sending errors. Otherwise, the case will end with an error should a sending error occur. A user can advance to the final “unsuccessful” stage from any stage without completing the required steps.
-
- “Send email manually” – a new email page will open for the user to send the email as part of the case. For example, select this method if the user must update or modify the email body before sending the email. If you select this value, fill out the following fields:
- When is the step performed? – indicates whether to activate the element at the start of the stage or after a case step. Select “At the start of the stage” if the email needs to be sent at the start of the case stage. Select “After the previous step is complete” if the email needs to be sent after the previous step in the case stage. Specify the step in the Perform after step field.
- Step type – specify if the step is required. Select “Required step” if the task must be completed to transition to the next stage. If sending an email is not required to transition to the next stage, select “Optional step.”