


You need to create a portal user account for each portal user. Each portal user account must be linked to a contact.
Company employees can manage your portal users through the primary application, while the portal administrators can do it through the portal. This article will cover managing portal users through the primary application.
Note
You can find instructions for the portal administrators in the “Portal administrators” article.
In the primary application, the portal users can be registered by system administrators or users who have permission to the “Manage portal users” (CanAdministratePortalUsers) system operation. The latter is a good option when company portal users are created by an employee who is not supposed to have access to other employee accounts.
You can add the following types of portal users:
-
Individual portal users, without an organization. In this case, you would need to register each user. Read more >>>
-
Portal organization users. You can add portal organization users “en mass”. Read more >>>
Note
You can import portal users via LDAP integration or Excel import. For more information, see “LDAP integration and user authentication in Creatio” and “Import users from Excel” articles.
To restrict certain users from accessing the portal, deactivate them. For more information, see “Deactivate users”.
You need administrator privileges to be able to add portal users. For more information, see “Add a system administrator user.”
To add a portal user account:
1.Click  -> [Organizational roles].
2.In the tree-like organizational structure to the left of the list, select the “All portal users” role. The area to the right of the roles tree will show the page of the selected role.
3.Go to [Users] tab —> [Users] detail —>  —> [Add new].
4.Populate the new user page (Fig. 1). For more on adding users, see “Add a regular user”.
Note
If a contact record for the new portal user does not yet exist, you can add it during this step. Click  in the [Contact] field, then click [New] in the lookup window that pops up. Populate the contact page that opens. After you save the contact page, you will return to the new user page, with the [Contact] field populated with the newly created contact
Add users as part of a portal organization
To link portal users to an organization, add the organization record first.
All users in an organization automatically inherit any permissions assigned to that organization. This lets you set up access permissions only once – for an organization, and assign these permissions by including new users in the organization.
Depending on the user permissions, there are several ways you can create an organization and add users to it.
-
Users with system administrator permissions can create organizations from the page of organizational roles. Read more >>>
-
Users with permissions to the “Manage portal users” (CanAdministratePortalUsers) system operation can create organizations from the account pages. Read more >>>
Add users to a portal organization from the organizational role page
Adding organizations in this manner is available only for system administrators. For more information, see “Add a system administrator user.”
1.Click  —> [Organizational roles] —> “All portal users”.
2.Go to the [Organizations] detail —>  —> select an account for the new organization in the [Account] field (Fig. 2). Use search string in the account lookup window to find the needed account by its name.
If necessary, modify the organization’s name in the [Name] field.
Fig. 2 Adding a portal organization from the organizational role page
Note
If an account record for the new portal organization does not yet exist, you can add it during this step (when populating the [Account] field on the organization page).
3.Save the page. Go to the [Organizations] detail and click the needed organization. The organization page opens.
4.On the [Portal users] detail:
•Click  and select [Add existing contacts] to add an existing contact. Select the contacts in the pop-up window (Fig. 3).
•Click  and select [Add new contacts] to add a new contact. Enter the email addresses of the new users, use spaces or commas to delimit the addresses. Creatio automatically validates any entered email address. Click [Create portal users].
Creatio will locate the contacts with matching email addresses or create a new contact for each address that does not match any existing contacts. For any new contacts, the [Full name] field will contain email address text, minus the “@” character and email domain name.
5.Creatio will prompt you to send email invitations to the new portal users. You can choose to send the invitations later by closing the prompt.
Note
Learn more about setting up the invitation in the “Sending a portal invitation” article.
Fig. 3 Adding users to a portal organization from the organizational role page
As a result, the users will be added to the organization and automatically inherit any permissions assigned to that organization. Learn more about access permissions in the “Access permissions on the portal“ article.
To manage the portal users’ parameters (login, password, roles, and licenses), double click the corresponding string on the [Portal users] detail.
Managing the portal users’ parameters requires permission to the [Manage portal users] (CanAdministratePortalUsers) system operation.
Learn more about using system operations in the “System operation permissions” article.
Add users to a portal organization from the account page
Users with permission to the “Manage portal users” (CanAdministratePortalUsers) system operation can add a portal organization from the corresponding account page. Learn more about using system operations in the “System operation permissions” article.
Use this option if you do not have permission to access the [System users] section.
1.Open the account page —> click the [Contacts and structure] tab —> go to the [Portal users] detail.
2.Click [Create organization]. The button is available only of the account is not already linked to a portal organization.
Note
If you try to add portal users by clicking  before you create a portal organization, you will be prompted to create a portal organization.
3.Select “All portal users” in the [Parent role] field (Fig. 4).
Fig. 4 Adding a portal organization from the account page
4.Save the changes. As a result, a new organization will be added and become available on the page of the “All portal users” role.
•If the contact record already exists, go to the [Portal users] detail —>  —> [Add existing contacts] to add a new contact. Select the contacts in the pop-up window (Fig. 5).
Fig. 5 Adding users to a portal organization from the [Portal users] detail
•If the contact record does not exist, go to the [Portal users] detail —>  —> [Add new contacts]. Enter portal user email addresses and click [Add users].
5.Creatio will prompt you to send email invitations to the new portal users. You can choose to send the invitations later by closing the prompt.
Note
You can also add portal users to an organization from the [Contacts] detail. Select several contacts in the detail’s list, click  and select [Add portal users].
As a result, the users will be added to the organization and automatically inherit any permissions assigned to that organization. Learn more about access permissions in the “Access permissions on the portal“ article.
To manage the portal users’ parameters (login, password, roles, and licenses), double click the corresponding string on the [Portal users] detail.
Note
Portal administrators can also add new portal users within their organization. More information is available in a separate article.
To restrict a portal user from accessing the portal, deactivate the corresponding portal user account.
Deactivate a portal user from the user page
1.Click  —> [System users]. Open the user page.
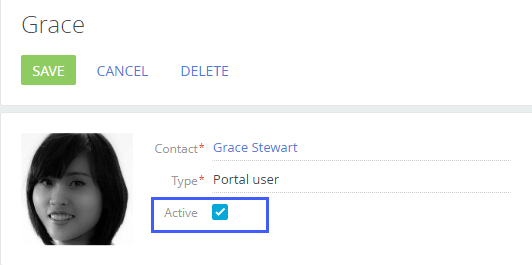
2.Clear the [Active] checkbox an save the changes (Fig. 6).
Fig. 6 Add individual portal users
Deactivate a portal user from the organization page
1.Click  —> [Organizational roles] —> “All portal users”.
2.Go to the [Organizations] detail and click the needed organization. Locate the user to deactivate.
3.Clear the [Active] checkbox an save the changes (Fig. 7).
Fig. 7 Deactivating a portal user in an organization

As a result, the user will be suspended and will not be able to access the portal. You can reactivate a user at any time.
See Also