How to add a button to a section
Glossary Item Box

Introduction
During the process of section customization, you may need to create a custom action and add the appropriate button to the section. For this, use the container of action buttons (ActionButtonsContainer) with the the new record button and the button with drop-down action list. More information can be found in the “Section actions” article.
To add a custom button to the view model, you need to change the following properties:
- diff array of configuration objects. Add a configuration object for setting up location of the component on the edit page.
- methods collection. Add an implementation of the handler method, that will be called on button click, and other auxiliary methods necessary for the work of the control. These can be methods that will regulate the visibility or availability of the control, depending on the conditions.
More information about button visualization can be found in the “Adding a button to the edit page” article.
Case description
Add a button to the [Accounts] section. The button should open the edit page of the primary contact of the account selected in the list.
NOTE
Access to the selected record is performed through the ActiveRow attribute of the section view model, that returns the value of the primary column of selected record. This value can be used to get values loaded into the list of the fields of selected object, for example, from the list data collection that is stored in the GridData property of the list view model.
Source code
You can download the package with case implementation using the following link.
Case implementation algorithm
1. Create a replacing edit page of the [Accounts] section
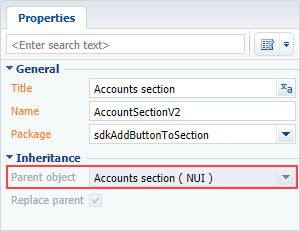
Create a replacing client module and specify the [Accounts section] schema as parent object (Fig. 1). The procedure for creating a replacing page is covered in the “Creating a custom client module schema” article.
Fig. 1. Properties of the [Accounts] section replacing schema
2. Add a string with the button title to the collection of localizable strings of the replacing schema
Create a new localizable string (Fig. 2).
Fig.2. Adding localizable string to the schema

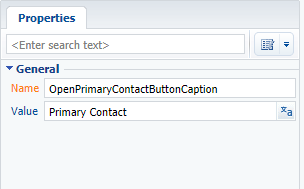
For the created string specify (Fig. 3):
- [Name] – “OpenPrimaryContactButtonCaption"
- [Value] – "Primary Contact".
Fig. 3. Properties of the custom localizable string
3. Add the implementation of the following methods to the method collection of the section view model
- isAccountPrimaryContactSet() – checks if the [Primary contact] field is filled.
- onOpenPrimaryContactClick() – button click handler method. Opens the edit page of the primary contact.
4. Add a configuration object with the settings determining the button position in the diff array
Add an object with the settings determining the button position on the page in the diff array.
The replacing schema source code is as follows:
define("AccountSectionV2", [], function() {
    return {
        // Name of the section object schema.
        entitySchemaName: "Account",
        // Method of the section view model.
        methods: {
            // Button click handler method.
            onOpenPrimaryContactClick: function() {
                // Getting the id of the selected record.
                var activeRow = this.get("ActiveRow");
                if (!activeRow) {
                    return;
                }
                // Defining the id of the primary contact.
                var primaryId = this.get("GridData").get(activeRow).get("PrimaryContact").value;
                if (!primaryId) {
                    return;
                }
                // Creation of the address string.
                var requestUrl = "CardModuleV2/ContactPageV2/edit/" + primaryId;
                // Publication a message about updating the navigation history of pages and
                // opening to the primary contact edit page.
                this.sandbox.publish("PushHistoryState", {
                    hash: requestUrl
                });
            },
            // Checks if the [Primary Contact] field of the selected item is filled.
            isAccountPrimaryContactSet: function() {
                var activeRow = this.get("ActiveRow");
                if (!activeRow) {
                    return false;
                }
                var pc = this.get("GridData").get(activeRow).get("PrimaryContact");
                return (pc || pc !== "") ? true : false;
            }
        },
        //Display button in the section.
        diff: /**SCHEMA_DIFF*/[
            // Metadata for adding a custom button to a section.
            {
                // The operation of adding a component to the page is in progress..
                "operation": "insert",
                // The meta name of the parent container to which the button is added.
                "parentName": "ActionButtonsContainer",
                // The button is added to the parent component's collection.
                "propertyName": "items",
                // The meta-name of the button to be added.
                "name": "MainContactSectionButton",
                // Properties passed to the component's constructor.
                "values": {
                    // The type of the component to add is the button.
                    itemType: Terrasoft.ViewItemType.BUTTON,
                    // Bind the button header to the localizable string of the schema.
                    caption: { bindTo: "Resources.Strings.OpenPrimaryContactButtonCaption" },
                    // Bind the button click handler method.
                    click: { bindTo: "onOpenPrimaryContactClick" },
                    // Binding the button availability property.
                    enabled: { bindTo: "isAccountPrimaryContactSet" },
                    // Setting the location of the button.
                    "layout": {
                        "column": 1,
                        "row": 6,
                        "colSpan": 1
                    }
                }
            }
        ]/**SCHEMA_DIFF*/
    };
});
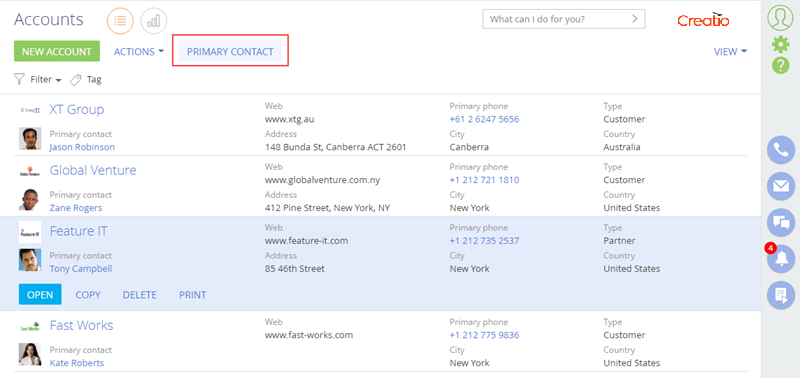
After saving the schema, clearing the browser cache and updating the application page, the [Primary Contact] button will be displayed in the [Accounts] section. The button will be enabled after selecting the account with the specified primary contact (Fig. 4).
Fig. 4. Case result