How to bind existing package to SVN
Glossary Item Box

ATTENTION
You can bind an existing package to SVN only in an on-site application. Working with such a package is possible only in the file system development mode.
NOTE
After binding a package to SVN in the file system, it can be installed in a different application using bpm’online built-in tools (“Installing packages from repository”).
Introduction
Simple custom functions can be developed by a single developer. The package in which the development is performed often is not connected to the version control repository (SVN).
As the complexity grows, more developers are required to work with the package, which makes it necessary to bind the package to SVN.
The general sequence for binding a package to the repository is as follows:
1. Switch to the file system development mode
2. Export the package to the file system.
3. Create the catalogs for the package in the SVN repository.
4. Create a working copy of the package branch.
5. Commit the package catalog in the repository.
As an alternative, you can use direct SQL queries to the database for binding packages to the repository. To do this:
1. Add information about the SVN repository in the [Configuration] section.
2. Bind the repository to the package. To do this:
- In the SysRepository table, read the record ID, which contains the SVN repository address.
- In the SysPackage table, add the obtained Id to the SysRepositoryId for the unbound package.
Case description
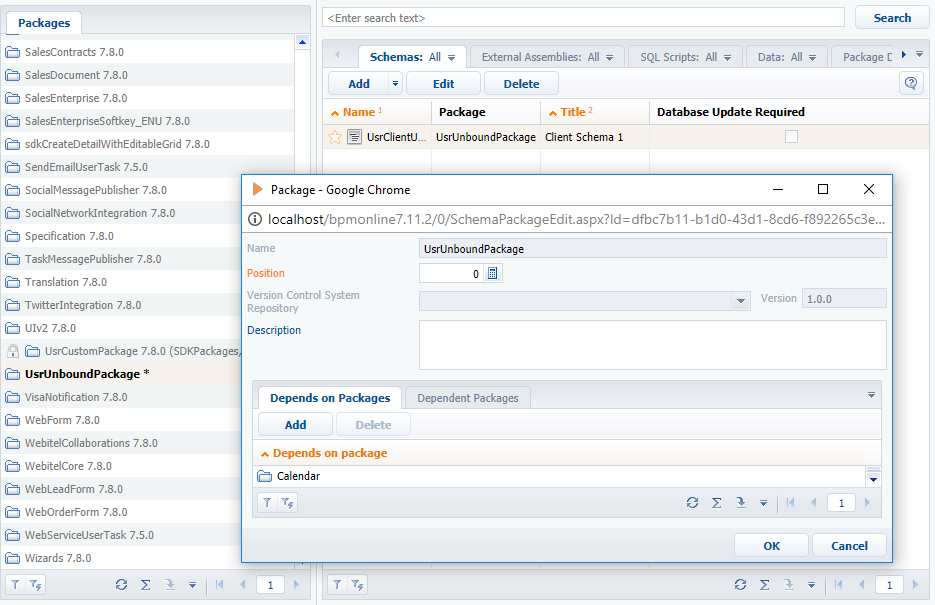
Bind the custom UsrUnboundPackage package (Fig. 1) to the repository.
Fig. 1. Custom package properties
You can obtain SVN access via the following URL:
http://svn-server:8050/SDKPackages
Case implementation algorithm
1. Switch to the file system development mode.
For more information about the file system development mode, see the “Development in the file system” article.
2. Export the package to the file system.
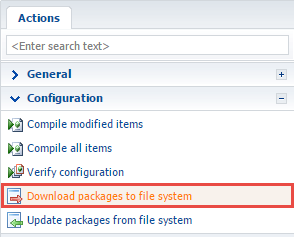
In the [Configuration] section, run the [Download packages to file system] command (Fig. 2).
Fig. 2. The [Download packages to file system] command
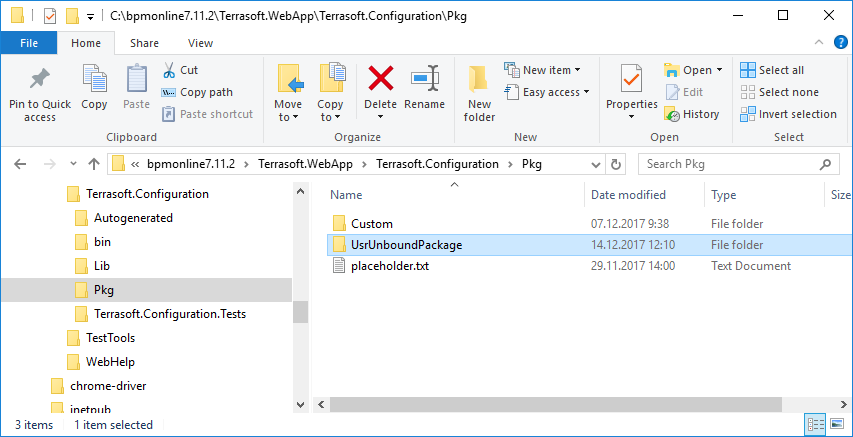
As a result, the package will be exported to the following catalog: ...\Terrasoft.WebApp\Terrasoft.Configuration\Pkg\UsrUnboundPackage (Fig. 3).
Fig. 3. The package in the file system
3. Create the catalogs for the package in the SVN repository.
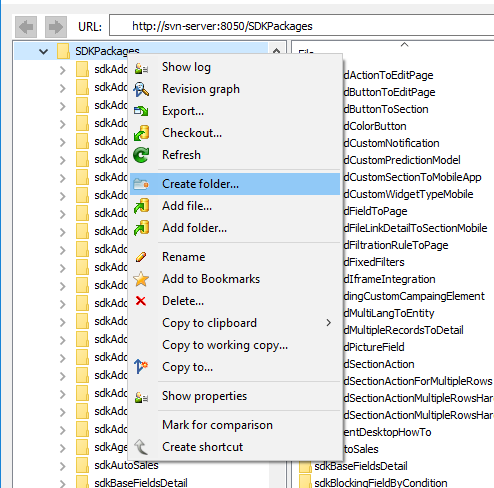
To create the package catalogs using an SVN client (such as TortoiseSvn), go to the repository and add a catalog (Fig. 4) with the same name as the package.
ATTENTION
This article contains only general instructions for working with the SVN client. For in-depth instructions on working with the repository via TortoiseSvn are available in the official TortoiseSvn documentation.
Fig. 4. Creating a catalog in the SVN repository
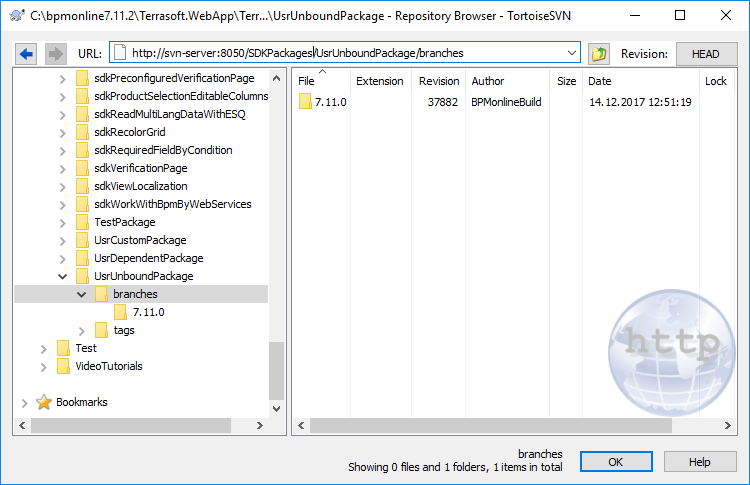
Create the branches and tags sub-folders in the package catalog, i.e., reproduce bpm’online flat package structure. In the branches catalog, create a package version catalog, i.e., 7.11.0 (Fig. 5).
Fig. 5. Flat package structure in the repository
NOTE
Reproducing the flat package structure is required only if you plan on using bpm’online built-in tools for working with SVN.
4. Create a working copy of the package branch.
To create a working copy if the version-controlled package branch, export the catalog whose name matches the package version number (the [SVN Checkout...] command, Fig. 6) to the package's catalog in the file system.
Fig. 6. Running the [SVN Checkout] action
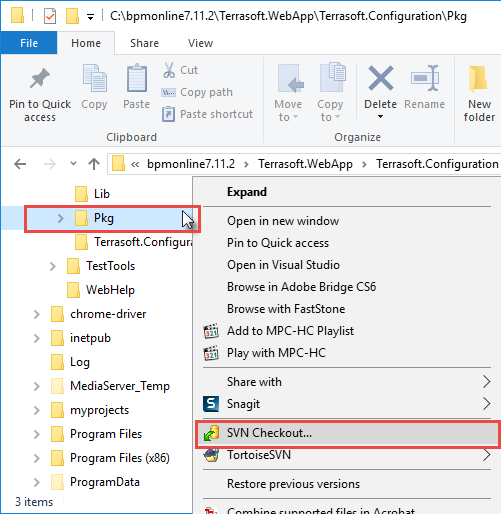
Fig. 7. Exporting working copy of a version-controlled package branch
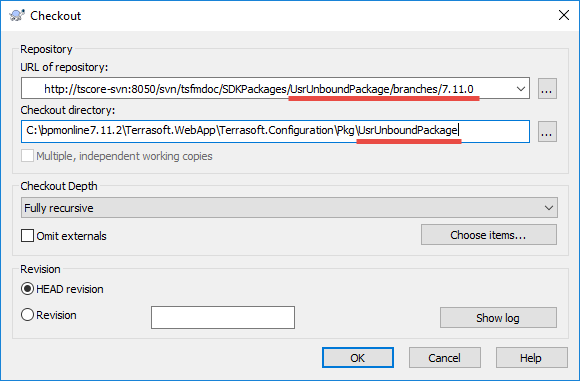
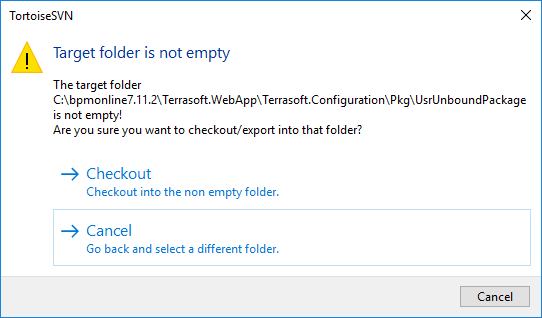
Fig. 8. Confirming the export to an existing catalog
As a result, the package catalog in the file system (...\Terrasoft.WebApp\Terrasoft.Configuration\Pkg\UsrUnboundPackage) will become a working copy of a 7.11.0 package in the repository (Fig. 9).
Fig. 9. A catalog, connected to the SVN repository

5. Commit the package catalog in the repository.
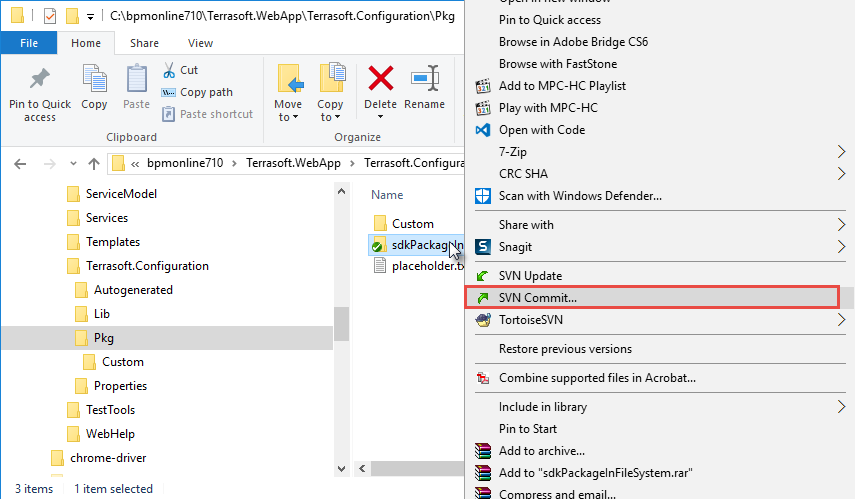
To commit the contents of a package catalog to the repository, run the TortoiseSVN [Add...] command (Fig. 10 and 11), then run the [SVN Commit...] command (Fig. 12).
Fig. 10. The [Add] command
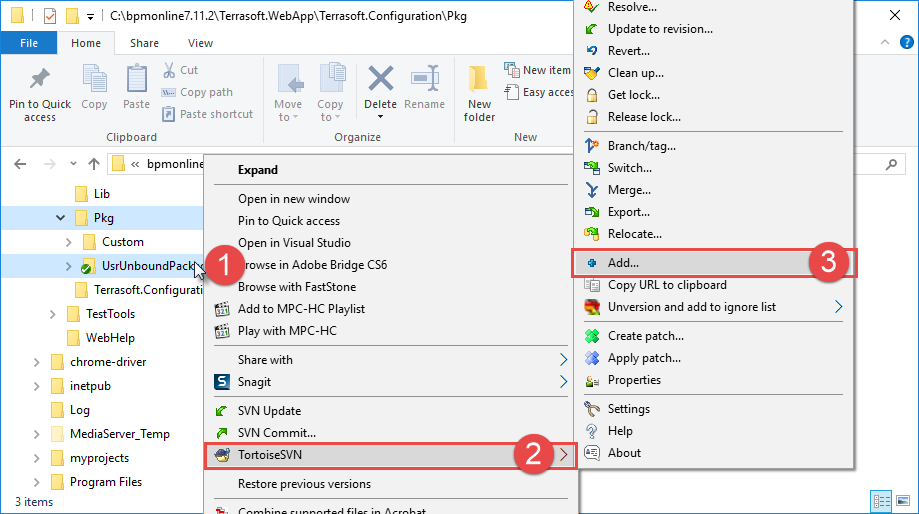
Fig. 11. Dialog for selecting items to add to the repository
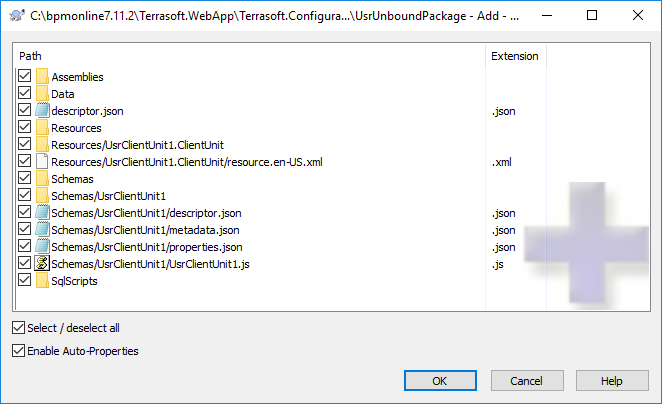
Fig. 12. Committing to the repository
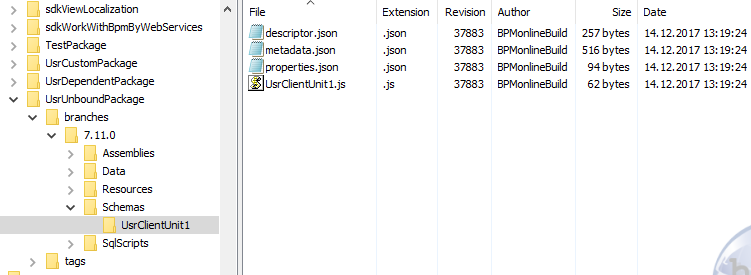
As a result, all package contents will be bound to the SVN repository (Fig. 13).
Fig. 13. A package in SVN
NOTE
Repeat step 5 to commit new package schemas in the SVN repository.
Alternative implementation
1. Add information about the SVN repository in the [Configuration] section.
If the information about the needed repository has not been added in the [Configuration] section:
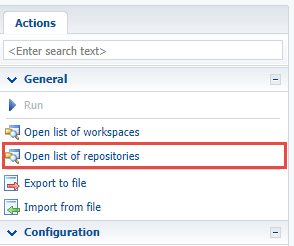
1. Run the [Open list of repositories] command (Fig. 14).
Fig. 14. The [Open list of repositories] command
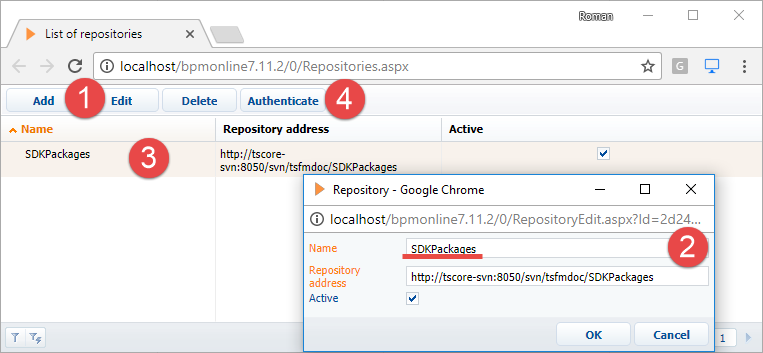
2. In the opened [List of repositories], use the [Add] command (Fig. 15, 1) to add necessary repository (Fig. 15, 2). After this, repository information will display in the [List of repositories] window (Fig. 15, 3). Select the string with information on the repository anf perform authentication (Fig. 15, 4).
Fig. 15. The actions of the [Open list of repositories] window
2. Bind the repository to the package.
Execute repository binding SQL query. Example of the SQL query to binding repository to a package is as follows:
UPDATE SysPackage
SET
    [SysRepositoryId] =
    (
        select top 1 Id from SysRepository
        where Name = 'SDKPackages'-- Repository name.
    )
where [Name]='UsrUnboundPackage'-- Name of the custom package.
In this query, “SDKPackages” is the repository name (Fig. 15, 2), and "UsrUnboundPackage” is the name of the custom package.
ATTENTION
To apply the changes in the repository, log out from the application and then log back in.
3. Export the package to the file system.
See also
- Working with SVN in the file system
- Creating a package in the file system development mode
- How to install an SVN package in the file system development mode
- Updating and committing changes to the SVN from the file system
- Creation of the package and switching to the file system development mode


