How to add a custom section to a mobile application
Glossary Item Box
Introduction
One of the most common development tasks is adding a custom section to the mobile bpm'online application. Use the mobile application wizard for this task. Using the wizard, not only can you add an existing section to the necessary workplace, but also pre–configure the display of the list, the edit page and the details of the added section.
The result of the mobile application wizard will be a set of client modules automatically created by the system added to the current user package:
- The mobile application manifest schema is a schema that extends the MobileApplicationManifestDefaultWorkplace manifest of the Mobile package that describes the base version of the mobile application. This module is the main one and, in addition to other data, contains an array of names of the remaining modules in the Models section, or schema extensions of the model pages and action utilities. Here, you can also specify the main bpm’online application synchronization settings. For example, the content of schema model columns, which will be imported to the mobile application, and filters used to synchronize data. The name of the manifest scheme is formed using the MobileApplicationManifest mask. For example, for the [FieldForce] workplace, the system generates the MobileApplicationManifestFieldForceWorkplace manifest name, and for the [DefaultWorkplace] workplace, the name MobileApplicationManifestDefaultWorkplace.
 |
NOTE The model should be viewed as an object, e.g. the main section object. |
- List page extension schema – implements additional settings for the base list page. Here, the user can select what will be displayed in the list of the added section of the mobile application. The name of this schema is generated by the Mobile[Model name]GridPageSettings[Workplace name] mask. For example, for an object named “Book” in the custom [Books] section of the [Field Sales] workplace, the system will generate the following list page extension schema name: MobileBookGridPageSettingsFieldForceWorkplace.
|
NOTE Add the prefix specified in the [Prefix for object name] system setting to the name created by the wizard. |
- Edit page extension schema – implements additional settings for the base edit page, e.g., which columns of the model can be edited in the mobile application. The name of this schema is generated by the Mobile[Model name]RecordPageSettings[Workplace name] mask. For example, for an object named “Book” in the custom [Books] section of the [Field Sales] workplace, the system will generate the following edit page extension schema name: MobileBookRecordPageSettingsFieldForceWorkplace.
- Action extension schema – implements the actions of the section. By default, the [Edit], [Copy] and [Delete] actions are implemented in the mobile application for the edit page, and only the [Add] action is added to the section list. The name of this schema is generated by the Mobile[Model name]ActionsSettings[Workplace name] mask. For example, for an object named “Book” in the custom [Books] section of the [Field Sales] workplace, the system will generate the following action extension schema name: MobileBookActionsSettingsFieldForceWorkplace.
If necessary, the user can add other modules to the package, in which the additional settings for the section or model (business rules, events, default values, etc.) will be implemented.
General sequence of adding a section to the mobile application
- Create (if necessary) and configure the section in the main bpm'online application.
- Add a custom section to the desired workplace of the mobile application using the mobile application wizard. Configure the display of the section, its edit pages and details.
- Add advanced settings.
Case description
In the mobile application, add a custom [Claims] section with the following characteristics:
1. The schema of the claim object must contain (in addition to the columns inherited from the base object) the [Content] column of the (String) string type. In the [Content] column, the multi–line text must be stored (the contents of the claim).
2. Of all claims stored in the main application database, the mobile application must download only the claim created by the current user. In this case, you should consider the mode of the application – online or offline.
3. On the section list page of the mobile application, the user should see the claim topics and the claim creation dates. On the edit page – the title, the date of creation, and actual claim content. In this case, the creation date field must be locked for editing, and the content field must be multi–line.
|
NOTE We do not recommend downloading all section data to the mobile application, since mobile devices have limited memory resources. It is recommended to only synchronize the data related to the current user. |
Case implementation algorithm
1. Create and configure a custom section in bpm’online
Use the Section Wizard to create a new custom section.
|
ATTENTION If the created sections needs to be transferred to another application, do the following:
Otherwise, the wizard will create schemas and data bindings in the [Custom] package, which will lead to problems with the transfer of the section. |
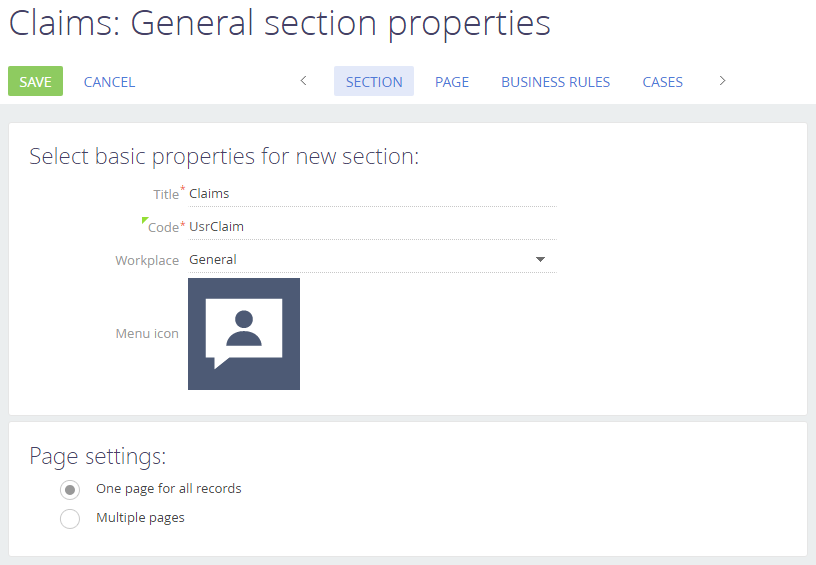
In the first step (“Section”) of the section wizard, in the [Code] field, enter "UsrClaim", and in the [Title] field, enter "Claims" (Fig. 1).
Fig. 1. Section properties setup
In the second step of the section wizard (“Page”), you need to rename the existing UsrName column and add a new one. Specify the following properties for the columns.
| Title | Name in DB | Type |
|---|---|---|
| Title | UsrName | String |
| Content | UsrContent | Multi-string text |
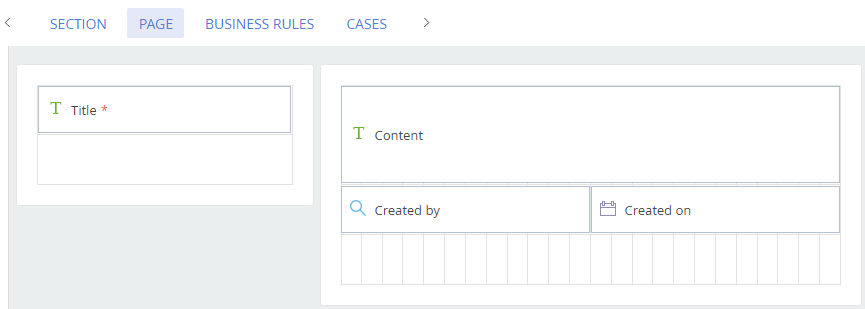
The placement of the columns on the page of the section in the wizard is shown in Fig. 2.
Fig. 2. The placement of the columns on the section page
After saving the configuration results, the system will automatically create all necessary diagrams of objects and pages in the current user package. Log in to the application again to make the section appear in the workplace.
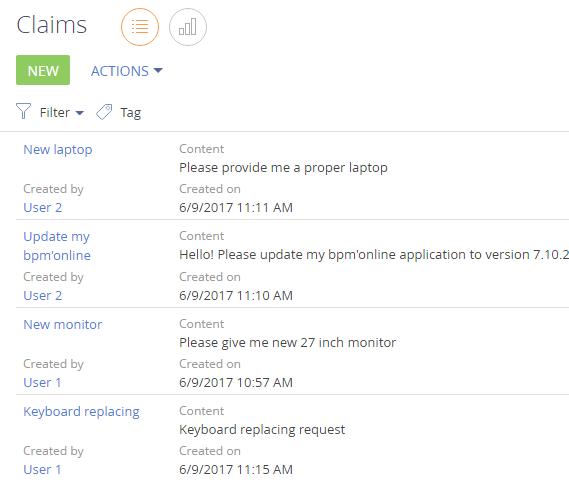
To check the synchronization with the mobile application, you need to add several records on behalf of different users to the section (Fig. 3).
Fig. 3. Section records
2. Add a custom section to the desired workplace of the mobile application using the mobile application wizard
Use the mobile application wizard to add a custom [Claims] section to the mobile application. Open a workplace in the wizard (e.g. [Main workplace]).
Click [Set up sections] and then click [New] (Fig. 5).
Fig. 4. Configuring a workplace
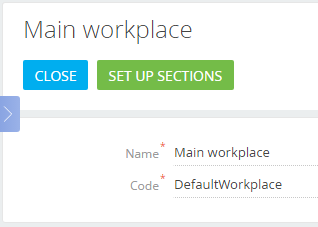
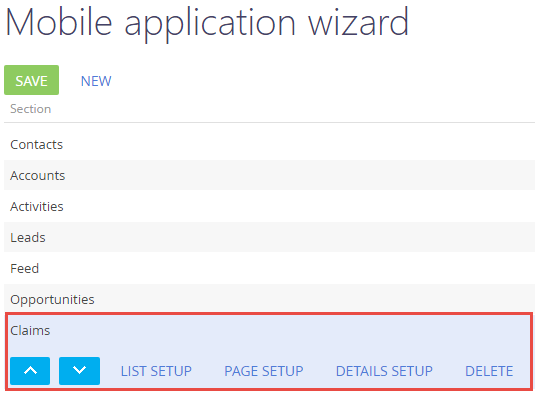
Fig. 5. Configuring sections

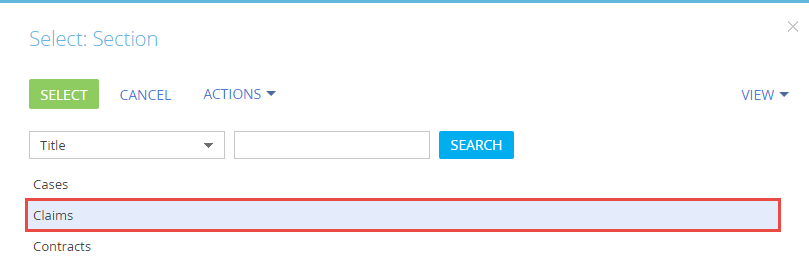
In the window that appears, select the [Claims] section from the list and then click the [Select] button (Fig. 5). Click the [Save] button (Fig. 6).
Fig. 6. Adding a section to a workplace
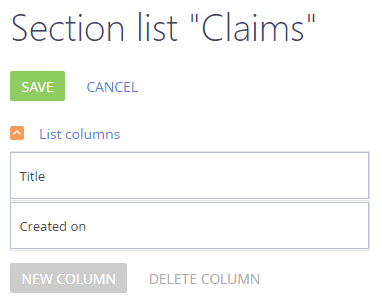
Configure the list for the selected [Claims] section. Access the list edit page by clicking [List setup].
Fig. 7. Actions in the selected record
By default, the only column displayed in the list is the [Title] column. Add the [Created on] column and save the changes.
Fig. 8. Configuring a list in the mobile application
|
NOTE In the mobile application list (Fig. 8), you can add up to two columns using the wizard. By default, only two columns are displayed on the mobile application's list page - primary and secondary. |
The final step of adding a custom section to the workplace of the mobile application is to set up an edit page for a claim in the [Claims] section. To set up integration:
1. After selecting the [Claims] section in the mobile application wizard, click [Page Setup] (Fig. 7).
2. Add two columns – [Created on] and [Contents] (Fig. 9).
3. Save the changes.
Fig. 9. Configuring a claim edit page

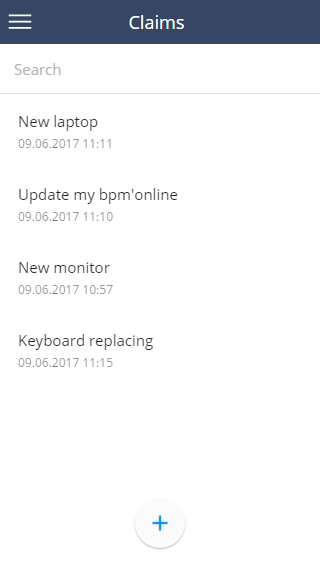
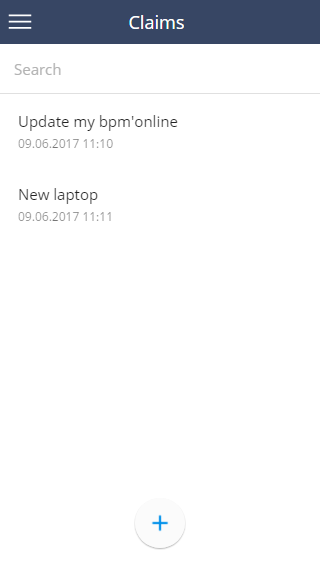
As a result, the new [Claims] section will be displayed in the mobile application.
Fig. 10. The [Claims] section in the mobile application
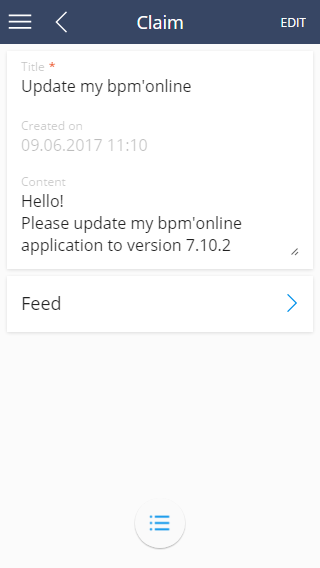
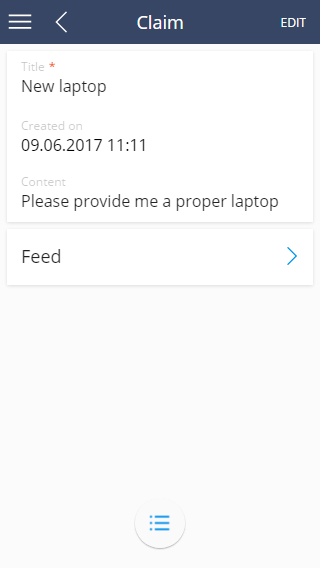
At this step, the [Claims] section is fully functional in the mobile application. However, the application loads all data from the main bpm’online application, regardless of the mode it is used in – online or offline. Additionally, on the claim edit page, the content field is only one-line, and the [Created on] field allows you to change the existing creation date (Fig. 11).
Fig. 11. The claim edit page in the mobile application
3. Filtering the synchronized data for the offline mode
|
NOTE To switch the mobile application to offline or online mode, specify the necessary application in the [Mobile application operation mode] system setting of the main bpm’online application. The default mode for a new user is online. |
In order to only download data related to the current user during offline synchronization, it is necessary to make the following changes to the manifest schema:
1. In the array of the ModelDataImportConfig property, change the configuration object for importing data related to the UsrClaim object. Add the corresponding configuration object to the SyncFilter property and add the CreatedBy column to the SyncColumns property array.
{
    "SyncOptions": {
        ...
        "ModelDataImportConfig": [
            {
                "Name": "UsrClaim",
                "SyncFilter": {
                    "property": "CreatedBy",
                    "valueIsMacros": true,
                    "value": "Terrasoft.ValueMacros.CurrentUserContact"
                },
                "SyncColumns": [
                    "UsrName",
                    "CreatedOn",
                    "UsrContent",
                    "CreatedBy"
                ]
            },
            ...
        ]
    },
    ...
}
2. In the array of the ModelDataImportConfig property, change the configuration object for importing data related to the Contact object. Because the Id column is sufficient for data filtering the SyncColumns property array should be left blank.
{
    "SyncOptions": {
        ...
        "ModelDataImportConfig": [
            ...
            {
                "Name": "Contact",
                "SyncColumns": []
            }
        ]
    },
    ...
}
3. In the RequiredModels array of the configuration object of the UsrClaim model, add the Contact model (required for filtering). It is required because the CreatedBy column of the UsrClaim object contains the contact's identifier.
{
    ...
    "Models": {
        "UsrClaim": {
            "RequiredModels": [
                "UsrClaim",
                "SocialMessage",
                "Contact"
            ],
        ...
    }
}
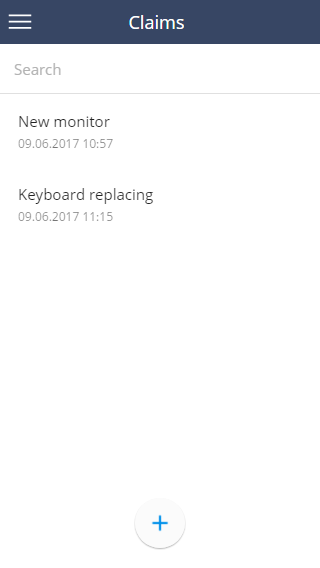
As a result, while the mobile application is offline, only the claims associated with the current user will be displayed on the section list (Fig. 12).
Fig. 12. User1 user claims in offline mode
4. Filtering the synchronized data for the online mode
In order to only display the records associated with the current user in the online mode, do the following:
1. Create a new module for the additional settings of the [Claims] section. It is recommended to name the module using a [Object Name Prefix]Mobile [Unit Object Name]ModuleConfig[Workplace Name] mask. For the [Claims] section, the recommended module name is UsrMobileUsrClaimModuleConfigDefaultWorkplace. The procedure for creating a replacing client schema is covered in the “Creating a custom client module schema” article.
2. Add the following code to the created module:
// Adding a filter for the UsrClaim model.
Terrasoft.sdk.Module.addFilter("UsrClaim", Ext.create("Terrasoft.Filter", {
    // Filter name.
    name: "UsrClaimCustomFilter",
    // The  model property used to perform the record comparison operation.
    property: "CreatedBy",
    // Is the comparison value a macro?
    valueIsMacros: true,
    // Value for comparison with the model property.
    value: "Terrasoft.ValueMacros.CurrentUserContact"
}));
3. Register the module in the manifest schema by adding its name to the PagesExtensions array:
{
    ...
    "Models": {
        "UsrClaim": {
            ...
            "PagesExtensions": [
                "UsrMobileUsrClaimActionsSettingsDefaultWorkplace",
                "UsrMobileUsrClaimGridPageSettingsDefaultWorkplace",
                "UsrMobileUsrClaimRecordPageSettingsDefaultWorkplace",
                "UsrMobileUsrClaimModuleConfigDefaultWorkplace"
            ]
        },
        ...
    }
}
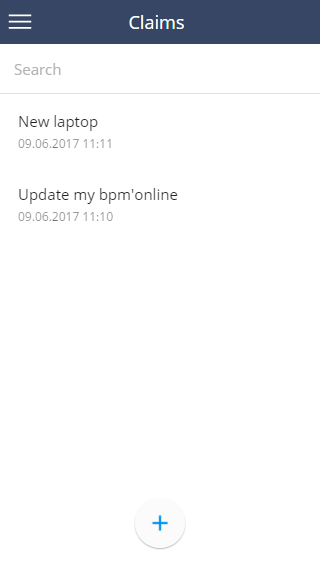
As a result, while the mobile application is online, only the claims associated with the current user will be displayed on the section list (Fig. 13).
Fig. 13. User1 user claims in online mode
5. Add advanced settings
5.1 Add sorting in the section list
To sort the records of the custom section by their creation date, you need to add the following source code to the UsrMobileUsrClaimModuleConfigDefaultWorkplace module, created in the previous step:
...
// Sorting a section list.
Terrasoft.sdk.GridPage.setOrderByColumns("UsrClaim", {
    // Sorting by creation date column.
    column: "CreatedOn",
    // Ascending order.
    orderType: Terrasoft.OrderTypes.ASC
});
As a result, the records will be displayed in ascending order and sorted by the creation date (Fig. 14)
Fig. 14. Displaying User2 claims in ascending order and sorting by creation date
5.2 Change the edit page field to a multi-line field
On the edit page of the claim, make the [Content] input field multi-line by adding the following source code to the UsrMobileUsrClaimModuleConfigDefaultWorkplace module, created in step 4:
// Set properties for the [Content] column on the order edit page.
Terrasoft.sdk.RecordPage.configureColumn("UsrClaim", "primaryColumnSet", "UsrContent", {
    // Specify if the field is multi-line.
    isMultiline: true
});
5.3 Make the field read-only
On the edit page of the claim, make the [Content] input field read-only by adding the following source code to the UsrMobileUsrClaimModuleConfigDefaultWorkplace module, created in step 4:
// Set the properties for the [Date of creation] column on the order edit page.
Terrasoft.sdk.RecordPage.configureColumn("UsrClaim", "primaryColumnSet", "CreatedOn", {
    // Specify if the field is read-only.
    readOnly: true
});
As a result, the ability to change the creation date of a claim will be blocked, and the [Content] field will allow you to enter and display multi-line text (Fig. 15).
Fig. 15. A modified claim edit page