


Getting started with Process Designer
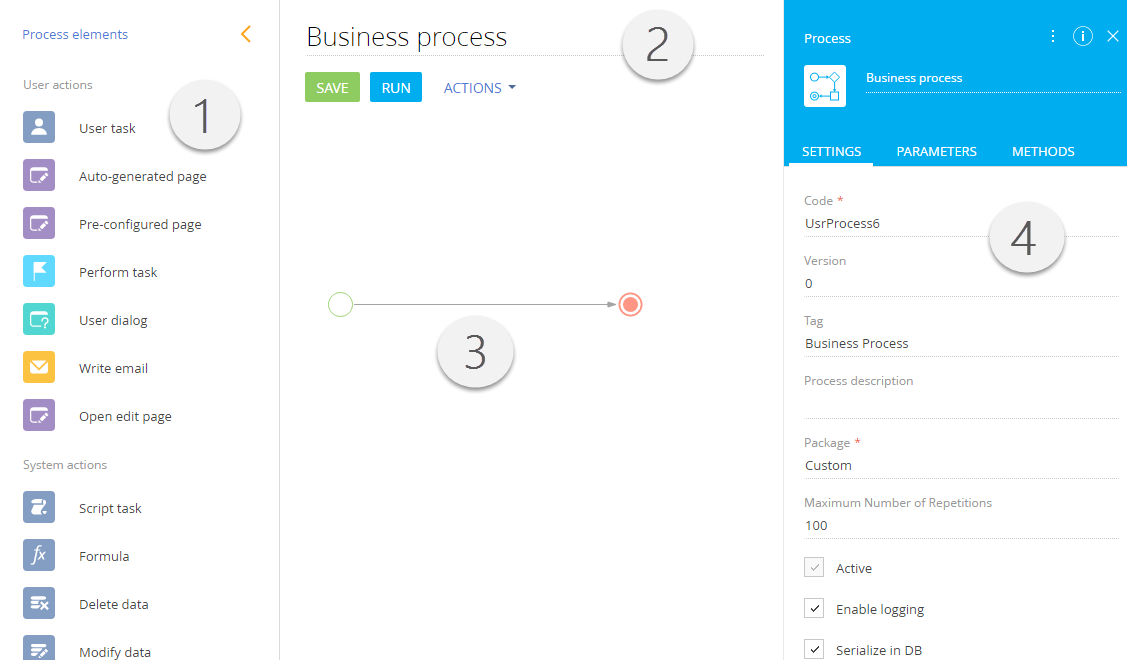
The Process Designer workspace is designed for creating and editing business processes. The workspace (Fig. 1) contains all elements required to create a process.
Contents
The process element area (1) contains the catalog of process elements that you can use to create business processes. The elements are grouped based on their roles in the process. The [User actions] group contains elements that offer users to perform specific activities and then record their results. The [System actions] group contains actions that do not require any input from the user to complete. The [Start events], [Intermediate events] and [Finishing events] groups contain elements that throw and catch events, or react to system events. The [Gateways] group contains logical operators and [Subprocesses] group contains tools for embedding other processes to the current one.
Click the [Process elements] link to collapse the element area. When collapsed, it contains only process element icons.
The toolbar (2) contains [Save] button and [Actions] menu.
[Save] – saves the business process.
Note
The business-processes are automatically saved in bpm'online. If a process diagram was closed without saving, when you reopen it you can recover unsaved data.
[Run] – start the business process.
The [Actions] menu of the Process Designer contains the following commands:
-
[Source code] – opens the source code of the business process.
-
[Metadata] – opens the metadata of the case.
-
[Process parameters] – opens the list of process parameters.
-
[Copy diagram] – creates a copy of the business process.
-
[Copy element] – creates a copy of the process element.
-
[Paste element] – pastes a copied element to the Process Designer workspace.
 – opens the element settings page.
 – opens help on the Academy.
 – searches for process elements.
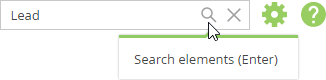
Searching for elements in the Process Designer
The search function in the Process Designer simplifies navigation and switching between the diagram elements during the business process setup and configuration. The search is done by the element name or code.
To open the search field (Fig. 2), click the  button or press Ctrl+F on your keyboard.
Fig. 2 Search field in the Process Designer

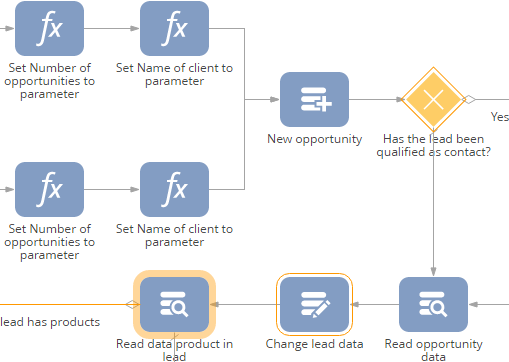
Enter searched text in the search string and press Enter. The number of found process elements will be displayed on the right side of the field (Fig. 3).
Fig. 3 Searching for process elements and displaying search results
Use the  buttons to toggle between the found elements on the diagram. You can go to the next element by pressing the Enter or F3 keyboard keys. To go back to the previous found element, press Shift+F3 on your keyboard (Fig. 4).
Fig. 4 Toggling between the found process elements

All found process elements are highlighted with a frame. Additionally, the currently selected element will be highlighted in orange (Fig. 5).
Fig. 5 Found elements highlighted on the process diagram
The setup area will open for the currently selected element.
Press Esc to hide the search field.
The Process Designer working area (3) is where the process diagram is built. You can add process elements on the working area by dragging them from the process element area.
Use the element setup area (4) to specify parameter values for processes and process elements. The list of available parameters depends on the type of the currently selected element.
The base mode
In the base mode, the element setup area contains the main element parameters and the fields for connecting them with other bpm’online records. The list of fields in the base mode is different for different elements and is covered separately in each element description.
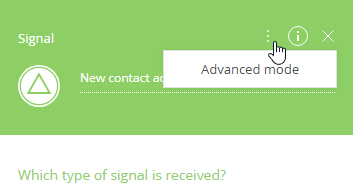
Advanced mode
In the advanced mode, the element setup area contains additional parameters and connections with system records
To access the advanced mode, click the  button in the element setup area and select the [Advanced mode] menu command (Fig. 6).
Note
The advanced mode is used by developers. We recommend using the base mode of element setup area to regular users.
The following parameters are available in the advanced mode:
[Code] – the internal name of a business process element containing a combination of Latin letters and numbers. Bpm’online uses it to identify the business process element. The default code is generated automatically, but you can edit it. The code cannot contain any special characters.
[Enable logging] – enables process execution in the [Process log] section.
[Serialize in DB] – saves parameter values for the running process in the database. Serialization is used for long processes. For example, if a new activity is created in the process and should be completed only after a certain period of time, all process parameters will be saved and the process can be resumed any time, even when you log out of the system.
[Run following elements in the background] – determines how the next elements in the process flow are performed - whether they pop up to the process user or wait until the user activates them.
-
If the [Run following elements in the background] checkbox is cleared for a process element, any user actions that are connected to the element's outgoing flows will open their edit pages immediately, when they are activated in the process flow (for example, population of a record page). For example, if the [Open edit page] element follows an element with the [Run following elements in the background] checkbox cleared, the corresponding page will immediately open for the corresponding user.
-
If the [Run following elements in the background] checkbox is selected for a process element, any user actions that are connected to the element's outgoing flows will appear on the [Business process tasks] tab of the communication panel. Such tasks though will not actively perform any logic (such as opening pages, etc.) until the user clicks them on the [Business process tasks] tab. All system actions connected to the element will be executed in the background without displaying the loading mask, to avoid user waiting for the process to finish. For example, if the [Open edit page] element follows an element with the [Run following elements in the background] checkbox cleared, a new business process task will be displayed on user communication panel. If the [Open edit page] element is followed by the [System actions] group elements that require complicated calculation and long time, all calculations will be preformed in the background without displaying the loading mask. This may cause business process delay issues, for example, if the user responsible for performing the user action is not currently logged in to bpm'online.
The [Run following elements in the background] checkbox is available:
-
for all elements in the [User actions] group
-
for all elements from the [Start events] group except for the [Start timer] element. By default, the checkbox is selected for the [Signal] start event.
-
The checkbox is selected and grayed-out for the [Wait for signal] and [Wait for timer] intermediate events.
Note
The list of parameters in advanced mode can be different for various process elements.
See also