Mini pages in Creatio are “light” versions of regular record edit pages. They show a limited number of fields from regular record pages and provide better control over the UX of your users who work with the section records.
Mini pages enable your users to perform the following operations with fewer clicks:
-
preview section records without having to open standard record pages;
-
quickly add and edit section records;
-
run certain actions right from a record mini page (e.g., making a call or sending an email message);
-
open the linked records displayed on the mini page in one click, etc.
Note
Learn more about working with mini pages of different records in the “Mini pages” article.
After you set up your regular section pages in the Section Wizard, you can start configuring mini pages.
To configure a mini page in Creatio:
1.Open the section, where you need to set up mini pages.
2.In the section, click [View] –> [Open Section Wizard].
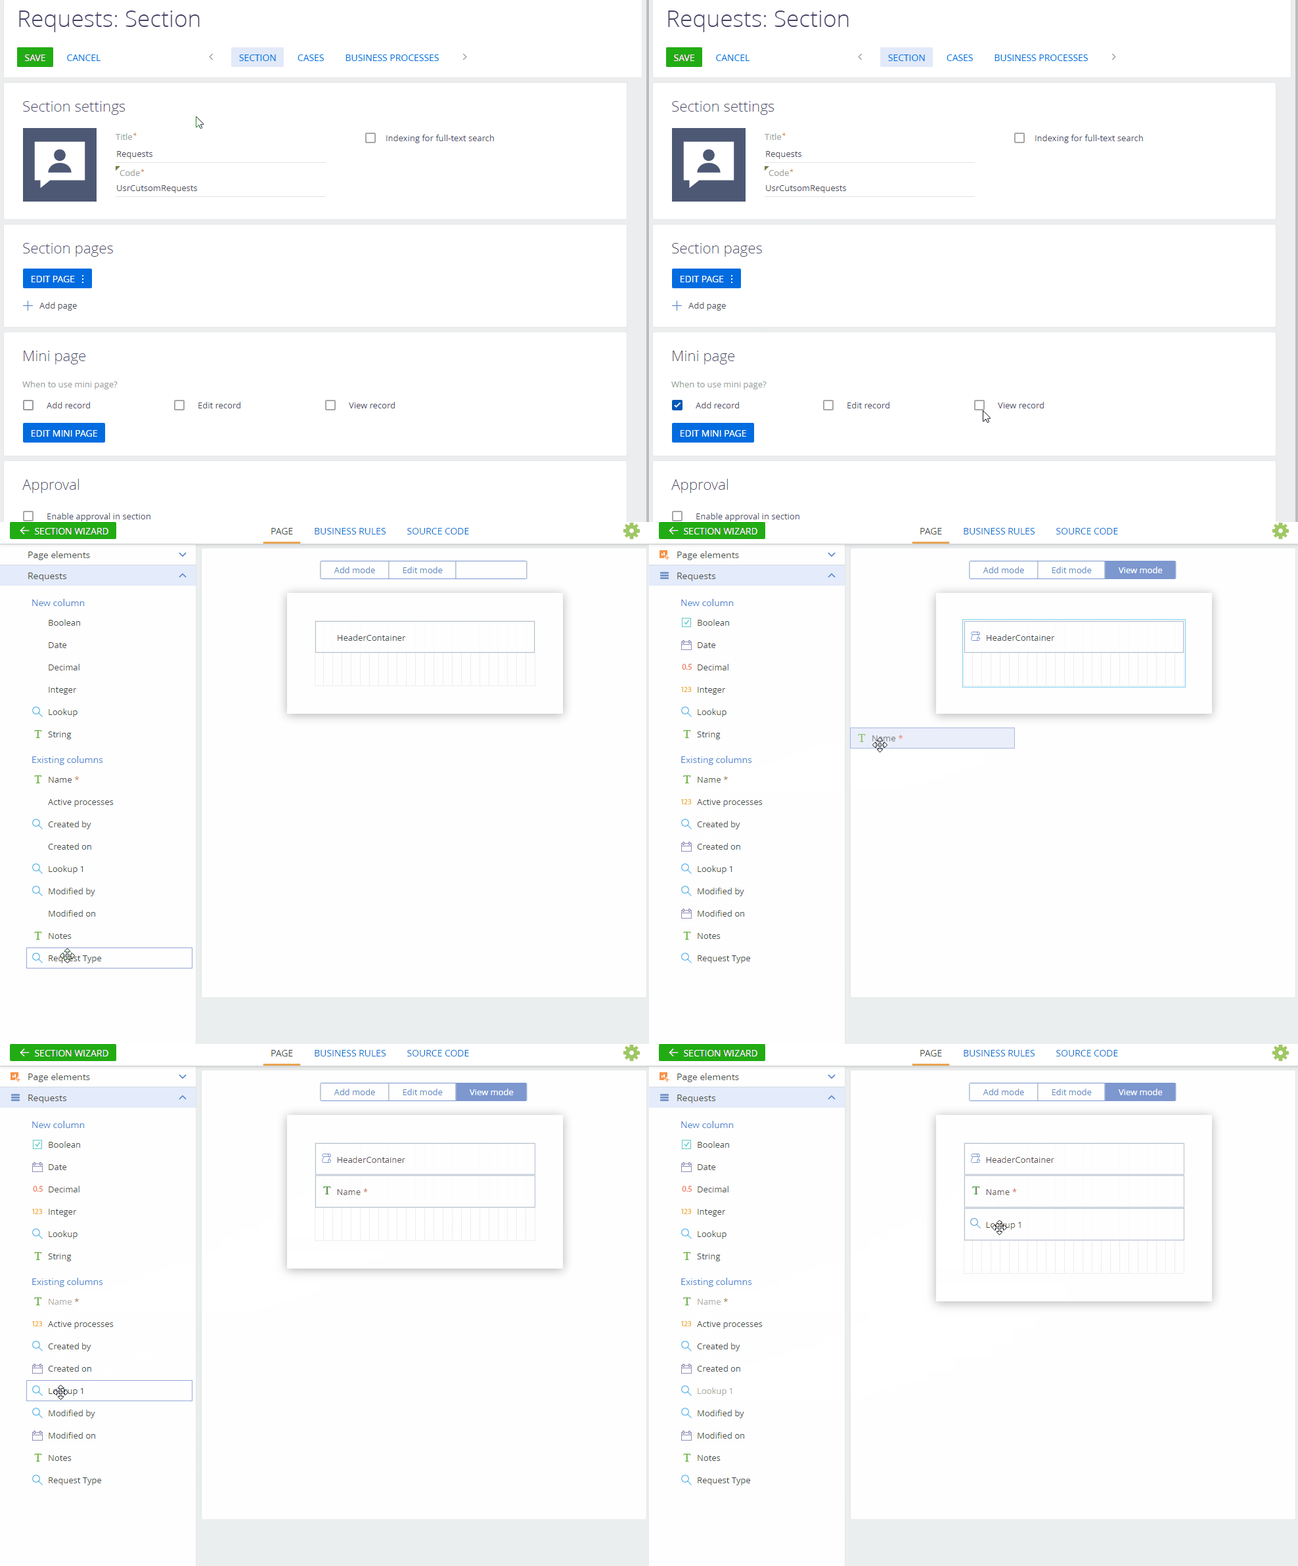
3.In the [Mini page] area, select the functions for the mini pages in this section (Fig. 1):
•[Add record] – the mini page will open when the user clicks the [Add] button in the section. The user can then open standard record page from the mini page. The mini page will open when a user clicks the [Add] button in the section. The user can then open the complete record page by clicking  on the mini page.
•[Edit record] – this will enable the users to edit existing records via the mini page. This option adds an “edit” button to the mini page. The user can click  in the top right corner of the mini page to edit the record.
•[View record] – this will enable the users to preview the record data without opening the standard record edit page. The mini page will pop up when the user hovers their cursor over the record link shown in a list.
Fig. 1 Enabling mini pages for adding and viewing section records

4.Click [Edit mini page] to switch to Mini Page Designer.
5.In the Mini Page Designer, select the mini page mode ([Add mode]/[Edit mode]/[View mode]) for the function(s) selected on step 3.
Note
The “HeaderContainer” element at the top of the field setup area of the Mini Page Designer is non-editable. It is used to display the mini page caption correctly.
6.Set up the layout of the corresponding mini pages:
a.Drag the necessary columns from the [Page elements] area to the field setup area (Fig. 2).
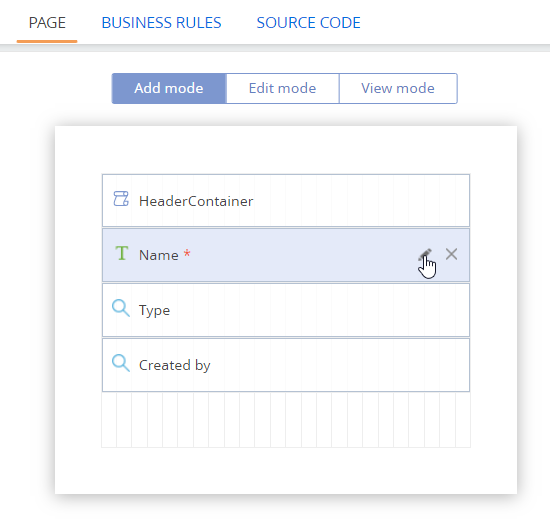
b.Click  to modify column properties (Fig. 3)
Fig. 2 Setting up the layout of a mini page

Note
Working with column properties on mini pages is similar to that of the regular section page. Read more >>>
Fig. 3 Editing the mini page columns

7.To configure the behavior of the fields on the mini page, you can use business rules.
Note
Working with business rules for mini page fields is similar to that of the regular section page fields. Read more >>>
Note
You can use the [Source code] tab to edit the source code of the mini page and customize it even further. The tab displays the source code of the page view module that was generated based on the changes you made during the previous steps. Learn more about working with the source code of Creatio modules in the “Module designer” article.
8.Click  to return to the Section Wizard.
9.Save the changes.
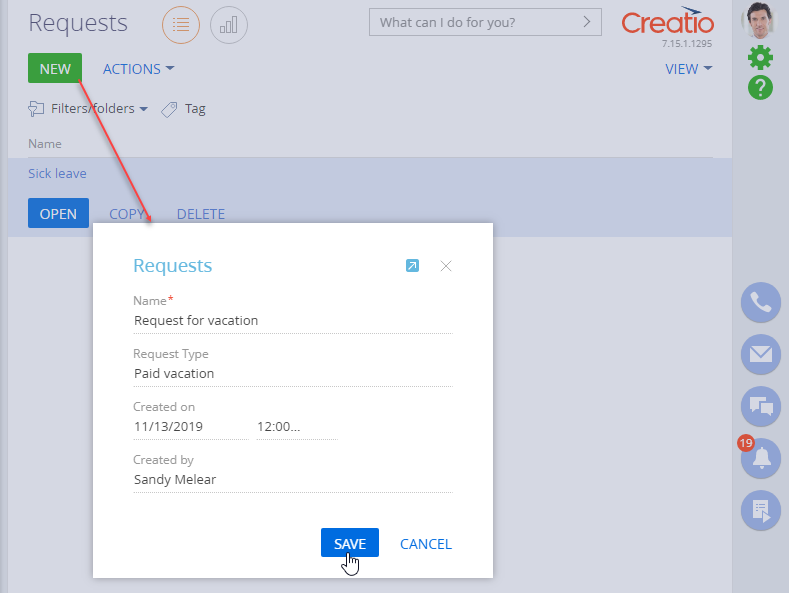
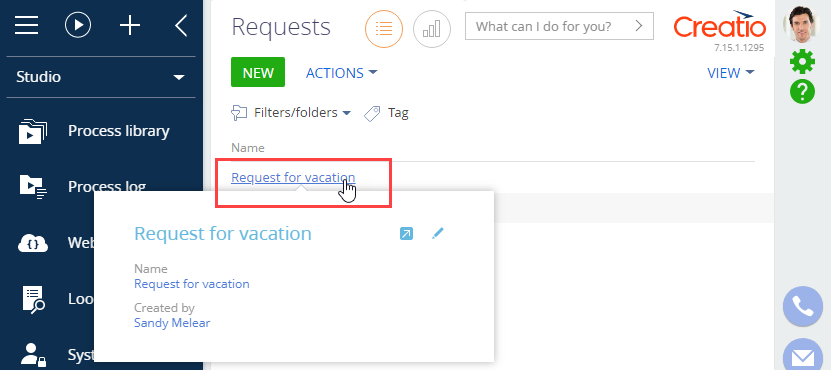
As a result, mini pages will become available in the section for selected functions. For example, if you enabled and set up the “Add mode” - a mini page will open when a user clicks [New…] in the section (Fig. 4). If you enabled and set up the “View mode” - the preview mini page will pop up when a cursor hovers over the section record link in any list that shows this section’s records (Fig. 5).
Fig. 4 Example of a mini page for adding a section record

Fig. 5 Example of a mini page for previewing a section record

See also
•Add a BPMN business process to a section
Video tutorials


