Add a button to the mobile app
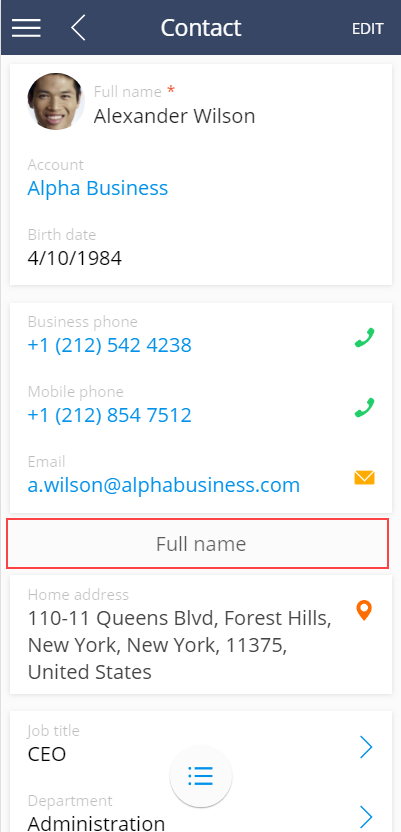
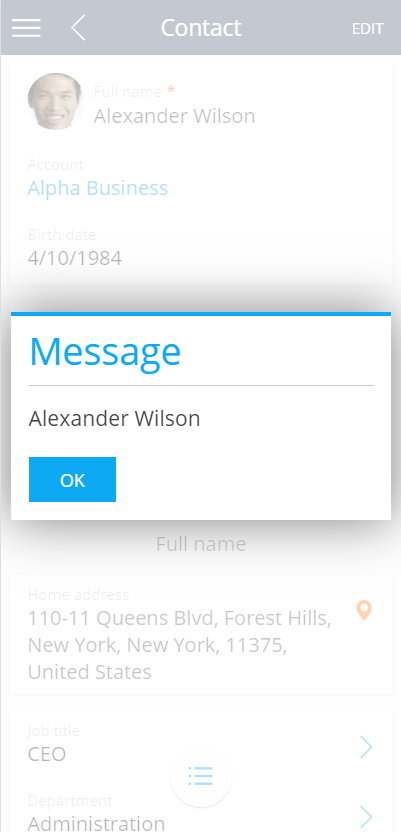
Add a button to the edit page of the Contacts section of the mobile application. Clicking on the button must trigger a message with the full name of the contact.
Example implementation algorithm
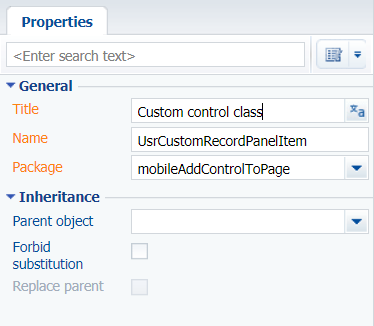
1. Create a custom Terrasoft.RecordPanelItem inheritor class
Use the Configuration section to create a custom module in the user-made package with the following properties:
- Title – "Custom control class."
- Name – "UsrCustomRecordPanelItem."
Add the source code to the method:
Ext.define("Terrasoft.controls.CustomRecordPanelItem", {
    extend: "Terrasoft.RecordPanelItem",
    xtype: "cftestrecordpanelitem",
    config: {
        items: [
            {
                xtype: "container",
                layout: "hbox",
                items: [
                    {
                        xtype: "button",
                        id: "clickMeButton",
                        text: "Full name",
                        flex: 1
                    }
                ]
            }
        ]
    },
    initialize: function() {
        var clickMeButton = Ext.getCmp("clickMeButton");
        clickMeButton.element.on("tap", this.onClickMeButtonClick, this);
    },
    onClickMeButtonClick: function() {
        var record = this.getRecord();
        Terrasoft.MessageBox.showMessage(record.getPrimaryDisplayColumnValue());
    }
});
The class defines a configuration object for the created control element and two following methods:
initialize()– button click event handler method.onClickMeButtonClick()– the method initializes the created element and binds button click events to the handler method.
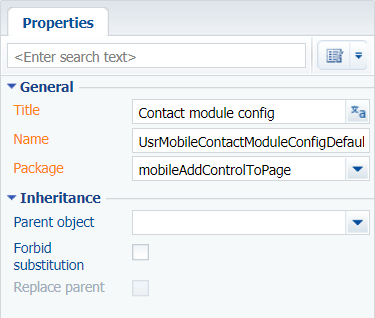
2. Create module schema in which to configure the section page
Use the Configuration section to create a custom module in the user-made package with the following properties:
- Title – "Contact module config."
- Name – "UsrMobileContactModuleConfigDefaultWorkplace."
Add the source code to the module schema:
Terrasoft.sdk.RecordPage.addPanelItem("Contact", {
    xtype: "cftestrecordpanelitem",
    position: 1,
    componentConfig: {
    }
});
The addPanelItem() method of the Terrasoft.sdk.RecordPage class is called at this point. The method adds the created control element to the section page.
3. Connect the module schemas in the mobile application manifest
To apply section page settings implemented in the UsrMobileContactModuleConfigDefaultWorkplace module:
-
Open the schema of the mobile application manifest (
MobileApplicationManifestDefaultWorkplace) in the custom module designer. This schema is created in the user-made package by the mobile application wizard. -
Add the
UsrCustomRecordPanelItemmodule to theCustomSchemassection, and theUsrContactCareerModuleConfigmodule to thePagesExtensionssection of theContactmodel:Modules adding{
"CustomSchemas": [
"UsrCustomRecordPanelItem.js"
],
"SyncOptions": {},
"Modules": {},
"Models": {
"Contact": {
"RequiredModels": [],
"ModelExtensions": [],
"PagesExtensions": [
"UsrMobileContactModuleConfigDefaultWorkplace.js"
]
}
}
} -
Save the schema of the mobile application manifest.
As a result, the contact page will have a control element. A click on the element will trigger a message with the full name of the contact.