Develop C# code in a custom project
Preliminary setup
We recommend using a local Creatio instance to connect the libraries of Creatio classes, deploy the local database from an archive copy, and use the WorkspaceConsole utility. The examples in this article assume Creatio is installed into the C:\Creatio local directory.
The examples for Creatio in the cloud use the Executor utility in the C:\Executor directory. You can download the utility set up to execute the example via the following link: Download the utility.
Write C# code for Creatio on-site
1. Restore the database from backup (if needed)
Deploy the Creatio database from backup. The archived Creatio database backup is in the C:\Creatio\db directory.
2. Set up the WorkspaceConsole utility
To manage the deployed database, set up the WorkspaceConsole utility using Creatio files:
- Open the
C:\Creatio\Terrasoft.WebApp\DesktopBin\WorkspaceConsoledirectory. - Execute the
PrepareWorkspaceConsole.x64.batorPrepareWorkspaceConsole.x86.batbatch file depending on the Windows version.
After the batch file execution finishes, make sure that the file copied the SharpPlink-xXX.svnExe and SharpSvn-DB44-20-xXX.svnDll files to the Terrasoft.WebApp\DesktopBin\WorkspaceConsole directory from the corresponding directory (x64 or x86) as well.
- Specify the database connection parameters in the
Terrasoft.Tools.WorkspaceConsole.exe.configfile in theC:\Creatio\Terrasoft.WebApp\DesktopBin\WorkspaceConsoledirectory. For example, if the CreatioDB database is deployed on thedbserverserver, the connection string looks as follows:
<connectionStrings>
    <add name="db" connectionString="Data Source=dbserver; Initial Catalog=CreatioDB; Persist Security Info=True; MultipleActiveResultSets=True; Integrated Security=SSPI; Pooling = true; Max Pool Size = 100; Async = true; Connection Timeout=500" />
</connectionStrings>
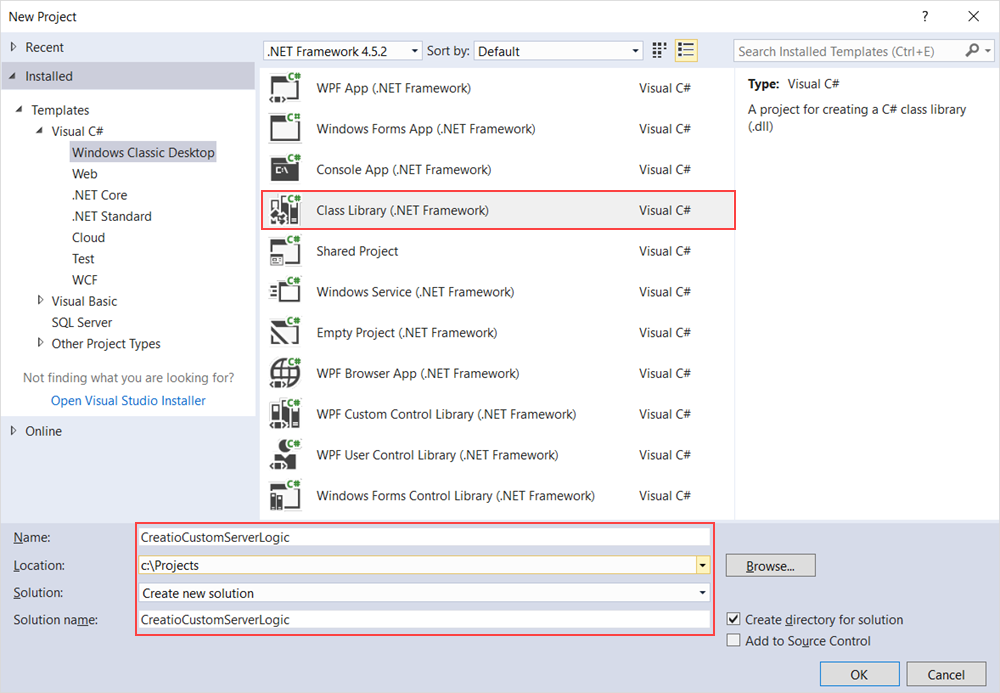
3. Create and set up a Visual Studio project
Create a standard class library project in Visual Studio.
Use the Debug tab of the class library project's properties window to specify the full path to the configured WorkspaceConsole utility in the Start external program property. The WorkspaceConsole utility is used as an external debugger of the developed software logic.
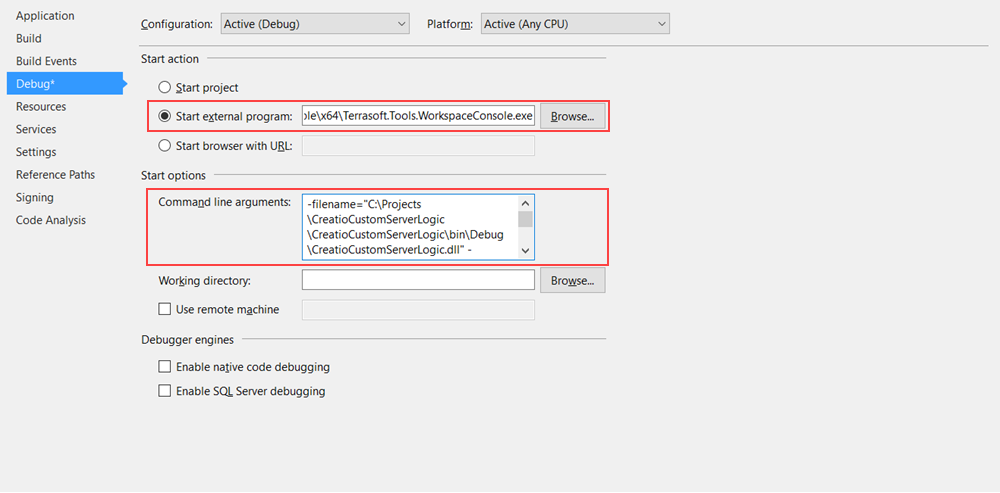
Set the following WorkspaceConsole launch arguments in the Command line arguments property:
- Specify the full path to the debug version of the developed class library in the
-filenameargument, for example, "C:\Projects\CreatioCustomServerLogic\CreatioCustomServerLogic\bin\Debug\CreatioCustomServerLogic.dll." - Specify the full name of the class to implement the developed software logic, including the names of every namespace, in the
-typeNameargument, for example, "CreatioCustomServerLogic.MyContactCreator." - Specify the WorkspaceConsole operation in the
-operationargument, for example, "ExecuteScript." - Specify the workspace name in the
-workspaceNameargument, for example, "Default." - Specify the path to the parent directory of the
confdirectory in the-confRuntimeParentDirectoryargument, for example, "C:\creatio\Terrasoft.WebApp."
-filename="C:\Projects\CreatioCustomServerLogic\CreatioCustomServerLogic\bin\Debug\CreatioCustomServerLogic.dll" -typeName=CreatioCustomServerLogic.MyContactCreator -operation=ExecuteScript -workspaceName=Default -logPath=C:\Projects\Logs -confRuntimeParentDirectory=C:\creatio\Terrasoft.WebApp -autoExit=true
Specify .NET Framework version 4.7 in the Target framework property of the Application tab in the properties of Visual Studio projects that interact with Creatio version 7.11.0 and later.
To use the Creatio core’s server-side classes, set up dependencies from the appropriate Creatio class libraries in the created project. For example, add a dependency from the Terrasoft.Core.dll library.
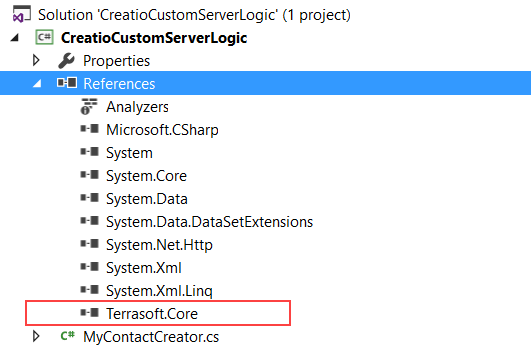
You can find class libraries of the Terrasoft namespace in the Terrasoft.WebApp\DesktopBin\WorkspaceConsole directory of the Creatio distribution.
The class libraries are copied to the Terrasoft.WebApp\DesktopBin\WorkspaceConsole directory when you execute batch files.
4. Develop the functionality
Add a class to the created class library project. The full class name must match the name specified in the -typeName argument of the WorkspaceConsole utility’s launch argument string. For example, "CreatioCustomServerLogic.MyContactCreator." The class must implement the Terrasoft.Core.IExecutor interface.
using System;
using Terrasoft.Core;
namespace CreatioCustomServerLogic {
public class MyContactCreator: IExecutor {
public void Execute(UserConnection userConnection) {
/* Retrieve the instance of the [Contacts] schema. */
var schema = userConnection.EntitySchemaManager.GetInstanceByName("Contact");
var length = 10;
for (int i = 0; i < length; i++) {
/* Create a new contact. */
var entity = schema.CreateEntity(userConnection);
/* Set contact properties. */
entity.SetColumnValue("Name", string.Format("Name {0}", i));
entity.SetDefColumnValues();
/* Save the contact to the database. */
entity.Save(false);
}
/* Display a console message. */
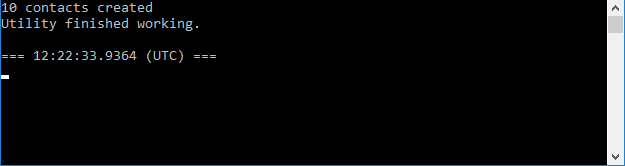
Console.WriteLine($ "{length} contacts created");
}
}
}
After you run the project (F5 key), the WorkspaceConsole window that contains the corresponding message appears.
You can also set a breakpoint on any line of code and see what the values of variables are while the program is running (i. e., debug the program).
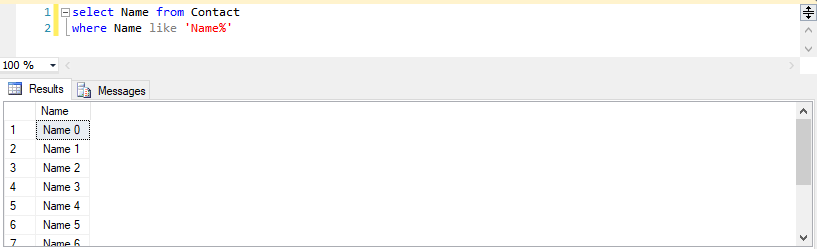
View the execution outcome of the aforementioned code in the Contacts Creatio section or by executing the database request.
Write C# code for Creatio in the cloud
1. Create a class library project
Create a standard class library project in Visual Studio. For example, name the project "CreatioCustomServerLogic.Cloud."
To use the Creatio core’s server-side classes, set up the dependencies from the necessary Creatio class libraries in the created project. For example, add a dependency from the Terrasoft.Core.dll library.
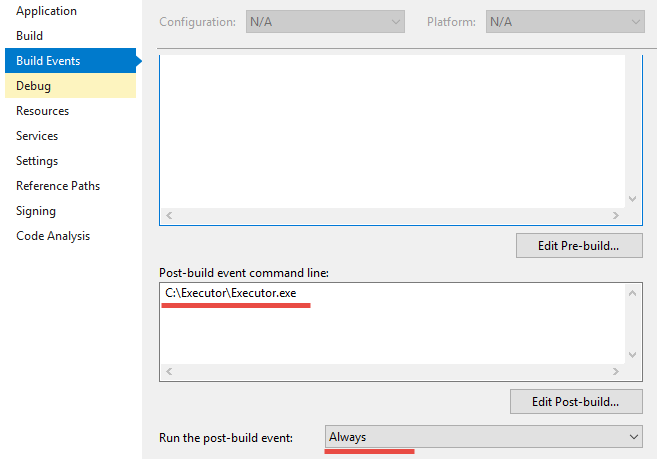
Specify the full path to the configured Executor utility ("C:\Executor\Executor.exe") and select the condition to launch the library build event (Always) in the Post-build event command line property on the BuildEvents tab of the created class library project’s properties window.
2. Develop the functionality
Add the class that implements the Terrasoft.Core.IExecutor interface to the created class library project.
using System;
using System.Web;
using Terrasoft.Core;
using Terrasoft.Core.Entities;

namespace CreatioCustomServerLogic.Cloud {
    public class MyContactReader: IExecutor {
        public void Execute(UserConnection userConnection) {
            /* Retrieve the instance of the [Contacts] schema. */
            var entitySchema = userConnection.EntitySchemaManager.GetInstanceByName("Contact");
            /* Create an instance of the request class. */
            var esq = new EntitySchemaQuery(entitySchema);
            /* Add all schema columns to the request. */
            esq.AddAllSchemaColumns();
            /* Retrieve the collection of [Contacts] section records. */
            var collection = esq.GetEntityCollection(userConnection);
            foreach(var entity in collection) {
                /* Pass the needed values to the HTTP response to the Executor utility request. */
                HttpContext.Current.Response.Write(entity.GetTypedColumnValue <string> ("Name"));
                HttpContext.Current.Response.Write(Environment.NewLine);
            }
        }
    }
}
3. Set up the Executor utility
You can download the utility set up to execute the example via the following link: Download the utility.
Open the directory that contains the installed Executor utility (C:\Executor). Then, set the values of the following setup elements in the configuration file:
- Specify the URL of the Creatio application loader in the
Loaderelement. Usually, this is the Creatio website URL, for example, "https://mycloudapp.creatio.com." - Specify the Creatio application URL in the
WebAppelement. Usually, this is the path to the default Creatio configuration, for example, "https://mycloudapp.creatio.com/0." - Specify the name of the Creatio user in the
Loginelement, for example, "Supervisor." - Specify the password of the Creatio user in the
Passwordelement. - Specify the path to the original class library copy in the
LibraryOriginalPathelement. Usually, this is a path to where the Visual Studio creates a class library after the compilation, for example, "C:\Projects\CreatioCustomServerLogic\CreatioCustomServerLogic.Cloud\bin\Debug\CreatioCustomServerLogic.Cloud.dll." - Specify the path to create a class library copy that interacts with the remote server in the
LibraryCopyPathelement. You can specify any temporary directory or a directory that contains the Executor utility, for example, "C:\Executor\CreatioCustomServerLogic.Cloud.dll." - Specify the full name of the class to implement the developed software logic, including the names of all namespaces, in the
LibraryTypeelement, for example, "CreatioCustomServerLogic.Cloud.MyContactReader." - Enter the name of the class library in the
LibraryNameelement, for example, "CreatioCustomServerLogic.Cloud.dll."
4. Execute the developed code
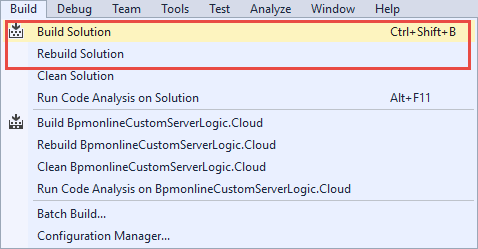
To launch the building process, use the Build Solution and Rebuild Solution menu commands.
View the execution outcome of the developed code in the Output window of Visual Studio after each successful build of the class library.
