Process and close cases
Process Creatio cases in the Cases section.
Start processing a case
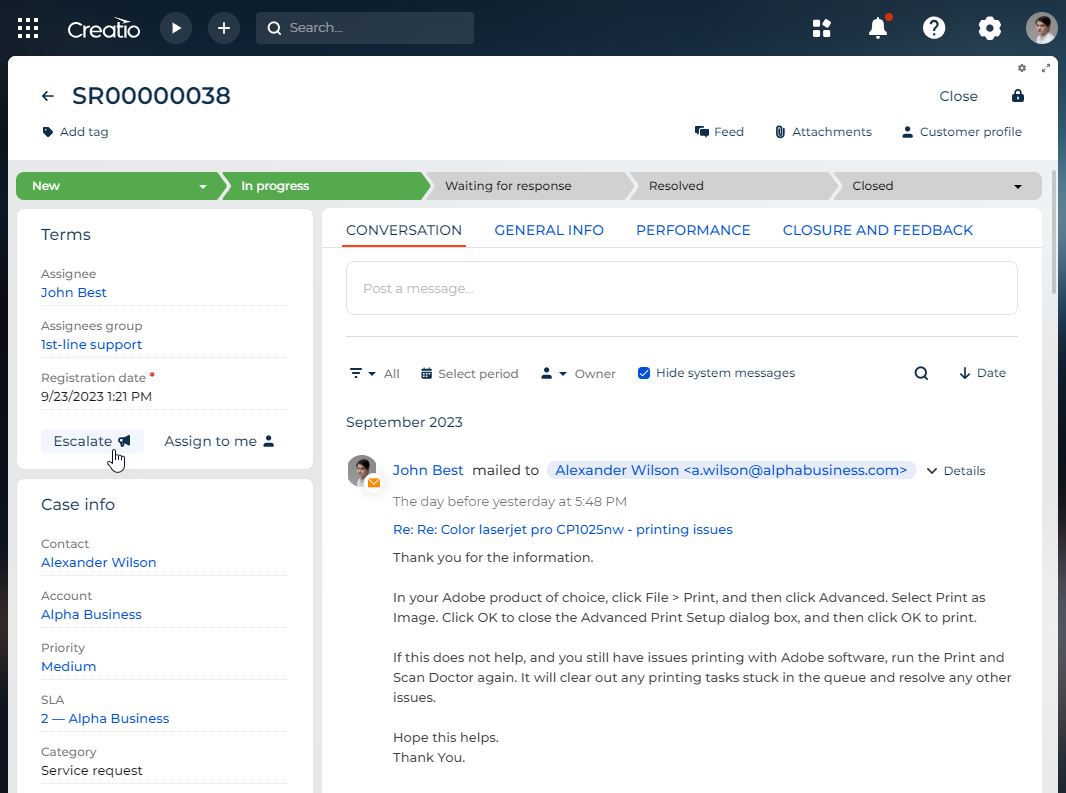
To begin working on a case, select a case in the Cases section list. After you open the case, select the “In progress” status on the progress bar (Fig. 1).

As a result, Creatio will change the case status to “In progress” and specify the current user in the Assignee field. The customer will be notified that you started processing the case and given the resolution deadline via email.
After you resolve the case, transfer it to the following stage using the progress bar.
Notify the assignee/assignee group about the case
If a case that has Assignee and/or Assignees group fields filled out becomes active, Creatio notifies the assignee/assignee group. Creatio also notifies the assignee/assignee group when the assignee/assignee group is specified for an active case.
The case is considered active if its status is “New,” “In progress,” “Reopened.”
If the Assignee field is filled out, Creatio notifies the assignee. The Assignees group field can be either empty or filled out.
If the Assignees group field is filled out and the Assignee field is not, Creatio notifies the assignee group. In this case, the To field is populated with emails of every group member.
Set up the content of the notification sent to the assignee/assignee group in the Message templates lookup. By default, the notification uses the “Specifying case assignee” template.
Escalate a case
To escalate a case to a higher support level, click the Escalate button on the case page.
This opens the escalation page. Specify the new support level as well as the assignee or assignee group on the page.
A new assignee or an agent from the assignee group will continue processing the case.
Reassign a case
To reassign a case, change the value in the Assignee or Assignee group field of the case page.
A new assignee or an agent from the assignee group will continue processing the case.
Reclassify the case
To reclassify the case, click Reclassify on the case page, update the category, SLA, or service, and save the changes.
Communicate with the customer
Use the message composer on the Conversation tab to write and send replies to the customer (Fig. 2). You can either send emails or post feed messages available for external users.
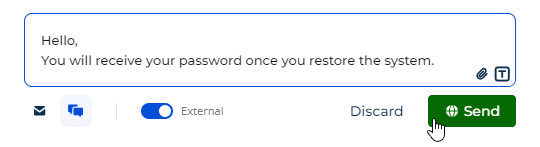
Click the  button to attach a file to an email or feed message.
After you finish processing the case, for example, ask the customer for more information, change the case status to “Waiting for response” (Fig. 3). This indicates that the case is waiting for a customer's reply.

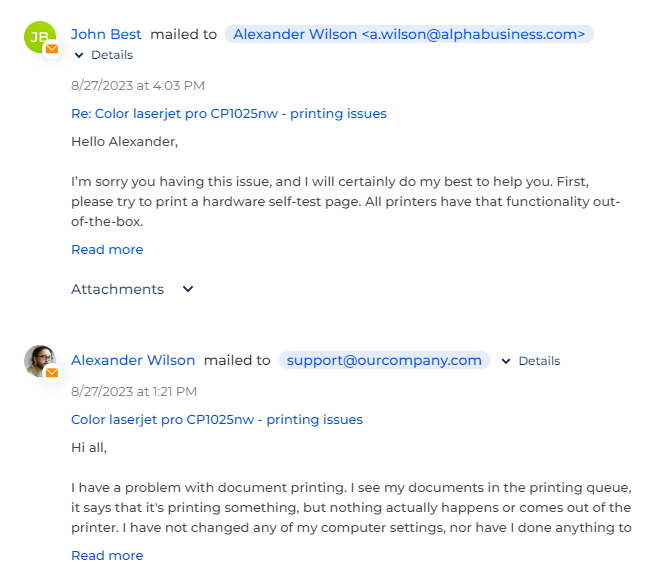
The customer can reply via email or by posting a feed message. The reply appears on the Conversation tab (Fig. 4).
Creatio reopens the case that has a non-final status automatically if the customer sends an email reply. The Assignee field is cleared and the case is returned to the processing queue.
You can dial the customer via the communication panel if needed.
Resolution and feedback
After you provide the customer with the resolution, change the case status to “Resolved.”

Creatio notifies the customer about the case resolution via email. The email also contains the user satisfaction scale. The customer can use it to grade the contact center or support service performance. Learn more: Set up case resolution notification.
Case status changes depending on the customer satisfaction level. For example:
- If the satisfaction level is “1” or “2,” Creatio reopens the case, changes its status to “Reopened,” and clears the Assignee field.
- If the satisfaction level is “3,” “4,” or “5,” Creatio changes the case status to “Closed.”
Configure the relationship between customer satisfaction levels and case statuses in the Satisfaction levels lookup.
Reopen the case automatically when receiving an email
Creatio reopens the case automatically and clears the Assignee field if the following conditions are met:
-
The case status is paused or resolved yet its status is not final.
noteConfigure incident and service request statuses in the Case statuses lookup. In this case, the status must have the Pause status or Resolved status checkbox selected yet the Final status checkbox cleared. By default, “Resolved” and “Waiting for response” statuses meet these criteria.
-
The customer sent a case email.
If Creatio receives an email, the case status is changed to “Reopened” automatically. Creatio also clears the Assignee field. This is done to enable other employees to work with the reopened case.
noteIf the Assignee group field is not cleared, every group member receives a case notification.
Close cases automatically
Creatio closes cases automatically if the following conditions are met:
- The case status is “Resolved.”
- The case's actual resolution time is filled out.
- The waiting period for case evaluation ended.
Specify the waiting period for case evaluation in the “Number of waiting days to reevaluate resolved case” (“FirstReevaluationWaitingDays” code) and “Number of waiting days after second reminder of resolved case” (“SecondReevaluationWaitingDays” code) system settings.
Creatio checks for cases that meet these conditions once a day. The status of every case that meets the conditions is changed to “Closed.” The automatic case closure procedure remains the same regardless of whether case evaluation is on or off.
You can disable the automatic case closure. To do this, clear the “Default value” checkbox in the “Automatically close resolved cases” (“CloseResolvedCases” code) system setting.
Cancel a case
If you created a case by mistake or the case no longer needs a response (for example, the customer resolved the issue on their own or the question is no longer relevant), select the Canceled stage on the progress bar to cancel the case.

As a result, Creatio will change the case status to “Canceled” and notify the customer via email.
See also
Set up response and resolution deadlines
Set up “Junk” case registration