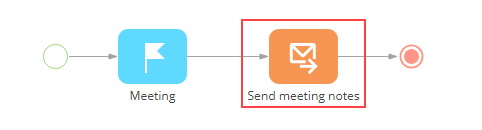
Use the Send Email process element (Fig. 1) for sending email messages as part of a business process. The element can send an email automatically or open a new email page for the process user. It uses all common email integration features available in Creatio, such as macros, templates, and linking emails to section records.
The Send email element provides a means of automating email communications without the developer involvement. For example, with the help of this element you can:
-
Move on to the next step in the business process while Creatio automatically sends emails to multiple recipients on your behalf.
-
Automatically send important system messages, notifications, and updates.
-
Use macros to personalize emails with information available in other process parameters.
-
Automatically assign email-related activities to other employees in your company.
-
Attach files to your emails.
If you choose to send emails manually, all due email tasks (drafts) will be displayed on your communication panel.
Element activation
If the email is sent manually:
-
A new email window will open for the process user if the Show page automatically checkbox is selected and if the element is not run in the background. All properties populated in the Send Email element (e. g., the email template, the mailbox account, etc.) will be used in the draft.
-
The email task will be displayed on the communication panel for the process user if the Show page automatically checkbox is cleared in the element properties.
If the email is sent automatically, Creatio will create a message based on the properties of the Send Email element (e. g., the email template, the mailbox account, etc.) and send it automatically from the email account specified in the From field.
Element execution
The completion of the Send email element depends on how the message is sent.
If the email is sent manually, the element will be deemed complete as soon as the email is successfully sent.
If the email is sent automatically, the element does not require any user actions and will be deemed complete as soon as the email is sent.
If any errors occur while sending, the completion of the Send Email element is determined by the Ignore errors on sending checkbox:
-
If the Ignore errors on sending checkbox is selected, the element is deemed complete as soon as the first sending attempt is made, regardless of its result. For example, if the email server returns a sending error, the element will still be successfully completed and activate its outgoing flows.
-
If the Ignore errors on sending checkbox is cleared, the element is deemed complete only if the email is sent successfully. If email-related errors occur, the element will end with errors and the process will not progress to the next element on the diagram. You can view any process-related errors in the Process log section.
Upon completion, the element will update the values of its parameters according to changes made by the user on the email page and activate its outgoing flows.
Set up common element properties
The following Send Email element properties will be displayed regardless of how the email is sent (automatically or manually) and how the message text is generated (template message or custom message):
|
From |
An email account integrated with Creatio and used for sending emails. This parameter is populated with the values from the Mailbox synchronization settings lookup. There are several ways you can populate this parameter:
If the email is sent automatically, the From parameter is required. If the email is sent manually, this parameter is optional: a process user may select an email account from the available list on the email page. Please note that email server integration is required to send emails directly from Creatio. |
|
To Cc Bcc |
The recipient's email addresses. Click the You can choose one of the following options in each of the To/Cc/Bcc parameters:
If either a contact or an account is selected, the email address will be pulled from the Communication options detail. If there are multiple emails specified for an account/contact, Creatio will use the most recent email added to the detail. |
|
What is the message? |
Select “Custom message” in this field to create a unique email for the business process using the Content Designer. Select “Template message” in this field to use one of the email templates from the Email templates lookup. |
|
How is the message sent? |
If the “Send email manually” option is selected in this field, the email edit page will open (or the email activity will be created) for the process user once the Send Email element is activated on the process diagram. If the “Send email automatically” option is selected in this field, the email will be sent automatically from the mailbox specified in the From field once the Send Email element is activated on the process diagram. |
|
Subject |
Enter the subject of the email. You can choose one of the following options in this field:
The subject text is also displayed on the Business process tasks tab of the communication panel. If you select a template, this field will be automatically populated with the subject specified in the template. |
 button to add carbon copy (Cc) and/or hidden copy recipients (Bcc).
 button and specify additional addresses in each field.
Set up custom message properties
The following properties will be displayed if you select “Custom message” in the What is the message? field:
|
Email body |
The area below the Subject field displays a snapshot of your email text. Hover over this area and click |
 to open the
 Set up template message properties
The following properties will be displayed if you select “Template message” in the What is the message? field:
|
Template message |
Choose an email template from the Email templates lookup. Click |
|
Record for macros |
The record whose values are used for email template macros. For example, if the email template contains macros like #Contact.Name# and #Contact.Mobile phone#, the actual name and phone number in the sent email will be relevant to the contact specified in the Record for macros field. Learn more: Process parameters. This field is linked to the Macro source field in the selected email template record. For example, if “Contact” is specified in the Macro source field, the value in the Record for macros field should be a specific contact record. You can choose one of the following options to select a record that will be used to populate macros in the email template body:
|
 to open the currently selected template in the
 Set up the automatic emailing
The following properties will be displayed if you select “Send email automatically” in the How is the message sent? field:
|
Importance |
The value of this property is used to populate the Priority field of the corresponding email activity. |
|
Ignore errors on sending |
If this checkbox is selected, the process will progress further even if email-related errors occur. If the checkbox is selected, and errors are received, the Send email element will end with an error and will not activate its outgoing flows. You can view any process-related errors in the Process log section. |
|
Run following elements in the background |
If this checkbox is selected, the process element will be performed in the background without displaying the loading mask. |
Set up sending email manually
The following properties will be displayed you select “Send email manually” in the How is the message sent?
|
Who is the sender? |
This parameter is used to assign the user, for whom the email page will open when the Send email element is executed. By default, it is the user who runs the business process. Populate this parameter if the email must be sent by a different user. Once the process reaches the Send Email element, the email task will be displayed on their communication panel or the email edit page will open (if the Show page automatically checkbox is selected). The parameter is populated with the values of the Mailbox synchronization settings lookup. You can map it to a different parameter or a system setting, provided their values are selected from the same lookup. |
|
Hint for user |
A text shown for the user who performs this process task. The user can view their hint by clicking the |
|
Show page automatically |
If this checkbox is selected, the email edit page will open for the user selected in the Who is the sender? property once the process reaches the Send Email element. Please note that if the Run following elements in the background checkbox is selected for the preceding process element, the email edit page will not open once the process reaches the Send Email element even if the Show page automatically checkbox is selected. |
|
Run following elements in the background |
If this checkbox is selected, all process elements connected with the outgoing flows to this element will be performed in the background without displaying the loading mask or opening their windows automatically. |
|
Email connections |
Use this property to connect the created email to other records in Creatio. Connected records will be displayed in the Connected to field block, and in the form of email links on the Email tab of the communication panel. Click the |
 button on the email page.
 button to add different record types.
Properties for sending files as email attachments
To set up sending attachments for the Send email process element, make sure you add and set up a corresponding Process file element for your diagram. It enables mapping a collection of the needed files to your Send email element in the business process.
|
Add attachments |
To attach files to your email, click As a result, the file collection will be sent as email attachments by the Send email process element during the process execution. |

Get the outgoing parameters of an element
|
|
The Id of the task activity, created during element execution. Type: “Id.” All manually created emails and drafts in Creatio are considered activities and have a unique identifier in the database. Learn more about identifying records by Id: Work with data in a business process. |
|
|
The value of this parameter is received from the Hint for user field (displayed only for manual send-outs). Type: “Text.” |
|
|
The value of this parameter is received from the Ignore errors on sending property (displayed only for automatic send-outs). Type: “Boolean.” |


