Starting from version 7.12.0 you can use the Timeline tab for quick analysis of customer cooperation, opportunity, case, etc. history in Creatio. This tab is available by default in the Contacts, Accounts, Leads, Opportunities and Cases sections.
The database tables
The following tables are provided in the database for setting up the timeline:
- TimelinePageSetting – for setting up sections and their tiles).
- TimelineTileSetting – for setting up all existing and custom timeline tiles.
- SysTimelineTileSettingLcz – for localizing tile names.
| Column | Details |
|---|---|
| Id | Record identifier. |
| Key | Key – the name of section page schema. For example, AccountPageV2, ContactPageV2, etc. |
| Data | Section timeline setup in JSON format. |
| Column | Details |
|---|---|
| Id | Record identifier. |
| Name | Tile caption that will be displayed in the filter menu. It must have plural form, for example, “Tasks”. Localization is performed via the SysTimelineTileSettingLcz table. If this field is not populated, the tile caption will be derived from the entity or type schema name. |
| Data | Section timeline setup in JSON format. |
| Image | The tile icon that will be displayed in the filter menu and on the left side of the tile on the Timeline tab. |
| Column | Details | If required | Example |
|---|---|---|---|
| entityConfigKey | Tile key. It should match the Id in the TimelineTileSetting table of the corresponding existing tile that should be displayed for the entity. | No | 706f803d-6a30-4bcd-88e8-36a0e722ea41 |
| entitySchemaName | Name of the entity object schema. | Yes | Activity |
| referenceColumnName | Name of the object column that will be used for selecting records. | Yes | Account |
| masterRecordColumnName | Name of the parent record column that will be used for selecting records. | Yes | Id |
| typeColumnName | Name of the type column. | No | Type |
| typeColumnValue | Value of the type column. | Should only be applied when typeColumnName is indicated. | fbe0acdc-cfc0-df11-b00f-001d60e938c6 |
| viewModelClassName | The view model class name of the existing tile. | No. If the value is not populated, the BaseTimelineItemViewModel base class will apply. | Terrasoft.ActivityTimelineItemViewMode |
| viewClassName | Name of the existing tile view class. | No. If the value is not populated, the BaseTimelineItemViewl base class will apply. | Terrasoft.ActivityTimelineItemView |
| orderColumn | Column for sorting. | Yes | StartDate |
| authorColumnName | Column for the author. | Yes | Owner |
| captionColumnName | Column for the caption. | Yes, if the messageColumnName column is not indicated. | Title |
| messageColumnName | Column for messages. | Yes, if the captionColumnName column is not indicated. | DetailedResult |
| caption | Tile caption that will be displayed in the filter menu. It must have plural form, for example, “Tasks”. It is used for setting a tile caption that would differ from the one indicated in the Name field of the corresponding tile setting in TimelinePageSetting. | No | My Activity |
| columns | Setup array for additional tile columns. | No | |
| columnName | Path to the entity object column. | Yes | Result |
| columnAlias | Column alias in the tile model view. | Yes | ResultMessage |
| isSearchEnabled | Indicates the capability of text search according to the column value (for text columns only). | No | true |
Adding the Timeline tab to the section
To add the Timeline tab to the section page and display records thereon:
- Add a new record to the TimelinePageSetting table.
- Populate the corresponding columns. Indicate the section page schema name in the Key column. For example, if you need to add a tab to the Accounts section, the Key column value will be "AccountPageV2". The Data column contains the configuration of timeline tiles that are displayed on the indicated section tab in JSON format.
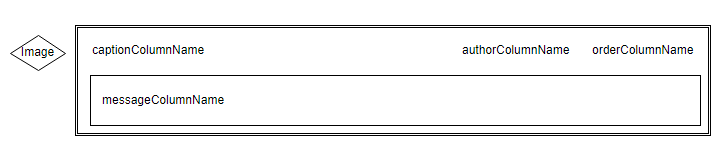
To start using the timeline in a section, perform base tile configuration. The base tile compound elements:
- icon;
- caption;
- author;
- date (sorting);
- message.
Example implementation algorithm
- Add a new record (or update an existing record) in the TimelinePageSetting table.
- Set the "AccountPageV2” value for the Key column and populate the Data column with the following JSON object:
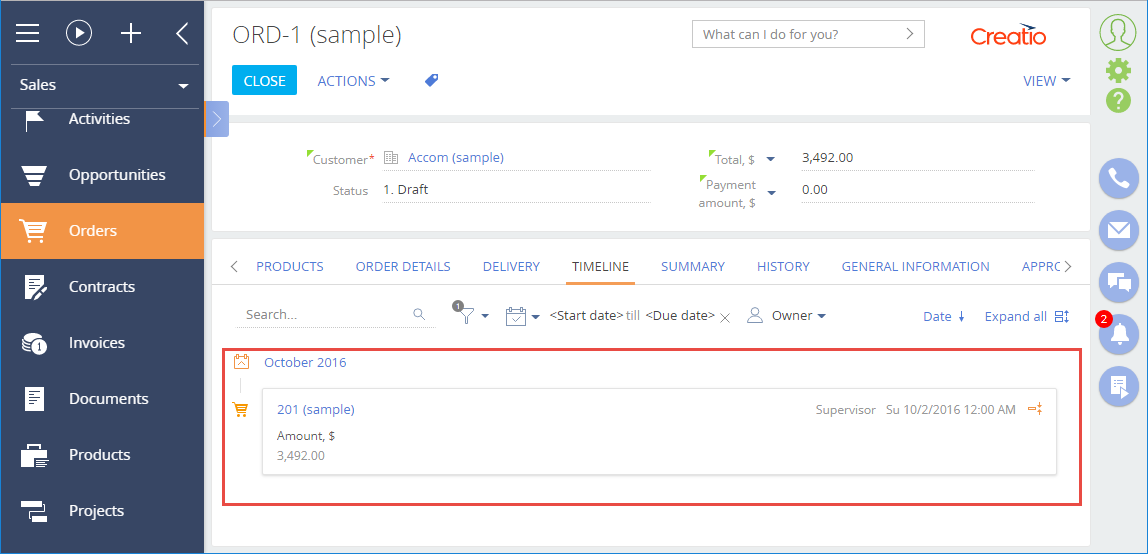
The Orders base tile is used in the following case. This tile has a record in the [TimelineTileSettings] table with the 0ef5bd15-f3d3-4673-8af7-f2e61bc44cf0 Id.
The result of the base tile usage on the Timeline tab in the Accounts section:
Starting from version 7.12.0 you can use the Timeline tab for quick analysis of customer cooperation, opportunity, case, etc. history in Creatio. This tab is available by default in the Contacts, Accounts, Leads, Opportunities and Cases sections.
Tile setup
You can set up a tile using the [TimelinePageSetting] table settings as shown in the example with the base tile. In such a case you will use the following for your tile:
- the default icon;
- the BaseTimelineItemView and BaseTimelineItemViewModel base view and view model modules;
- author field;
- tile caption field;
- message field.
You can use one and the same tile for different sections if needed. However, we recommend to use the [TimelineTileSetting] table and set up your tiles for different sections.
The [TimelineTileSetting] table contains tile configurations that already exist in Creatio. The section, however, will only display the tiles indicated in the [TimelinePageSetting] table for this particular section.
For example, the [TimelinePageSetting] contains three pre-configured tiles: Tasks, Leads and Calls. The [TimelinePageSetting] table contains the Tasks and Calls tiles that are pre-configured for usage in the Accounts section, and only the Calls tile that is pre-configured for usage in the Contacts section. The Leads tile in this case will not be displayed in any section.
The algorithm for creating a pre-configured tile
- Add a new section (if needed).
- Add a module schema to your custom package and determine the tile view class, bound to the new section. The class should be the inheritor of BaseTimelineItemView.
- Add a module schema to your custom package and determine the tile view model class, bound to the new section. The class should be the inheritor of BaseTimelineItemView.
- Add a record with the tile view settings bound to the new section into the [TimelineTileSetting] database table.
- In the [TimelinePageSetting] table add or edit the record enabling the tile display on the Timeline tab in the necessary section.
Example implementation algorithm
1. Adding a new Books section
Use the archive containing the needed function package to add the new Books section. Install the package via the marketplace application installation function from the *.zip-archive.
The Books section will be available in the General workplace after you install the package.
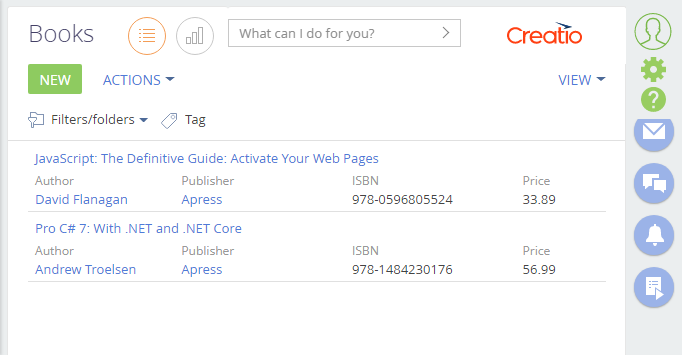
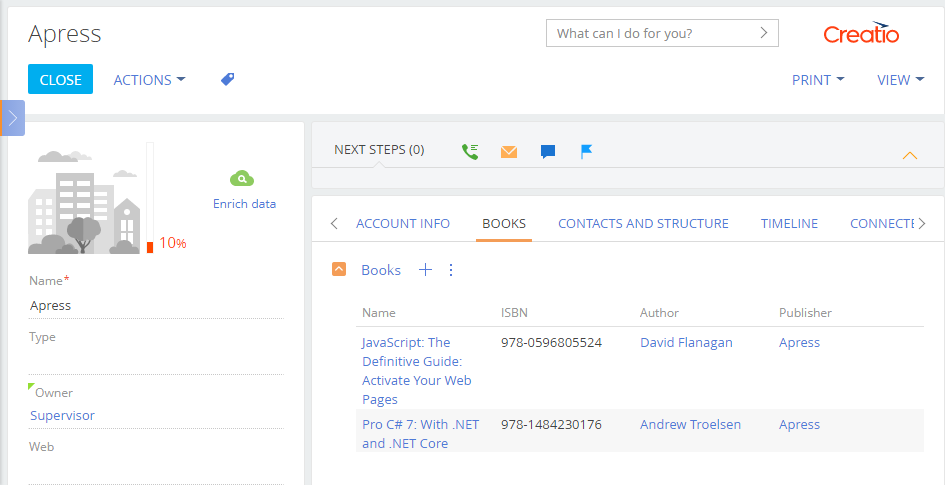
You will also see a detail displaying the linked records from the Books section on the Books tab of the Accounts section record edit page.
2. Adding a tile view module
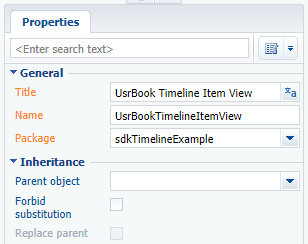
Add a client module schema containing dependencies from the Timeline package to the custom package.
For the created module schema specify:
- Name – "UsrBookTimelineItemView";
- Title – "UsrBook Timeline Item View”.
Add the following module source code to the Source Code tab of the schema:
Here you can define the configuration of the UsrISBN and UsrPrice fields that are additionally displayed on the tab. The standard configuration is defined in the BaseTimelineItemView module.
3. Adding a tile view model module
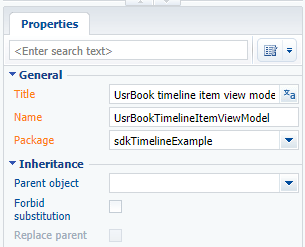
Add a client module schema containing dependencies from the Timeline package to the custom package.
For the created module schema specify:
- Name – "UsrBookTimelineItemViewModel";
- Title – "UsrBook timeline item view model”.
Add the following module source code to the Source Code tab of the schema:
You define the Terrasoft.configuration.UsrBookTimelineItemViewModel class here. Since this class is defined as the inheritor of Terrasoft.BaseTimelineItemViewModel, it enables using all functions of the base class.
4. Adding the record with tile view settings to the [TimelineTileSetting] table
The [TimelineTileSetting] table is used to set up the timeline tile properties.
Add a new record to the [TimelineTileSetting] table. You can add a new record via the following SQL query:
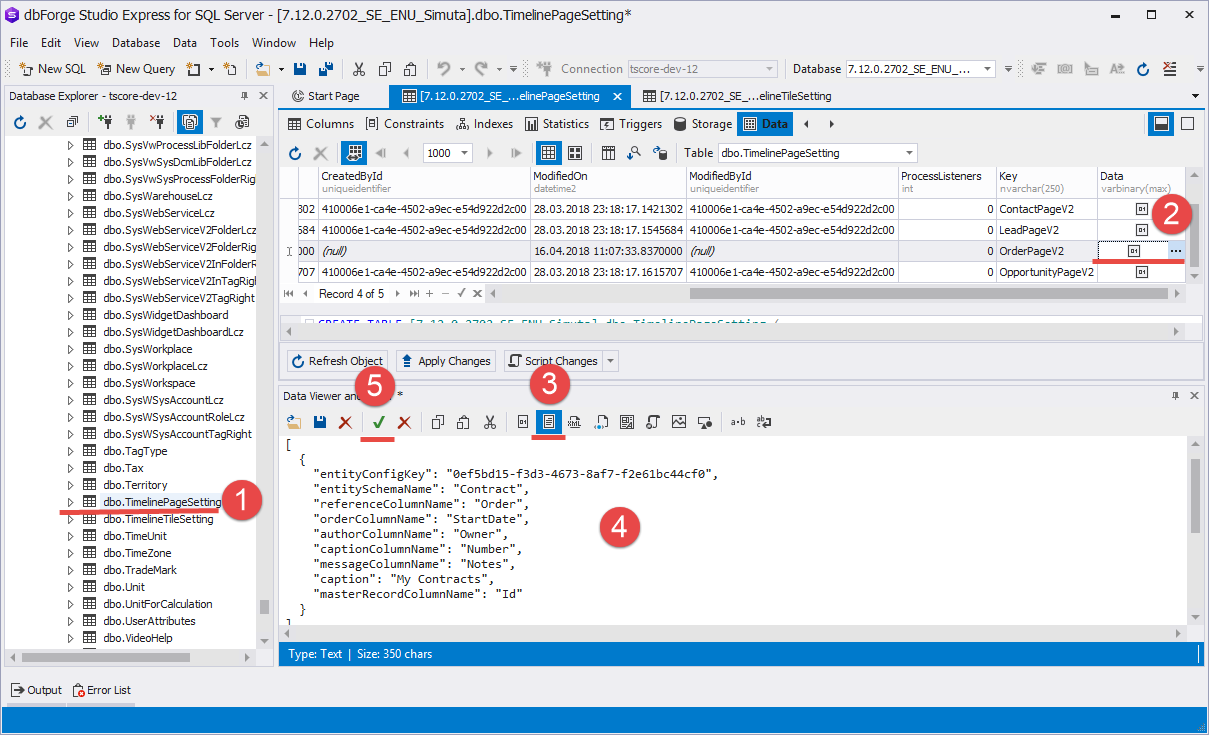
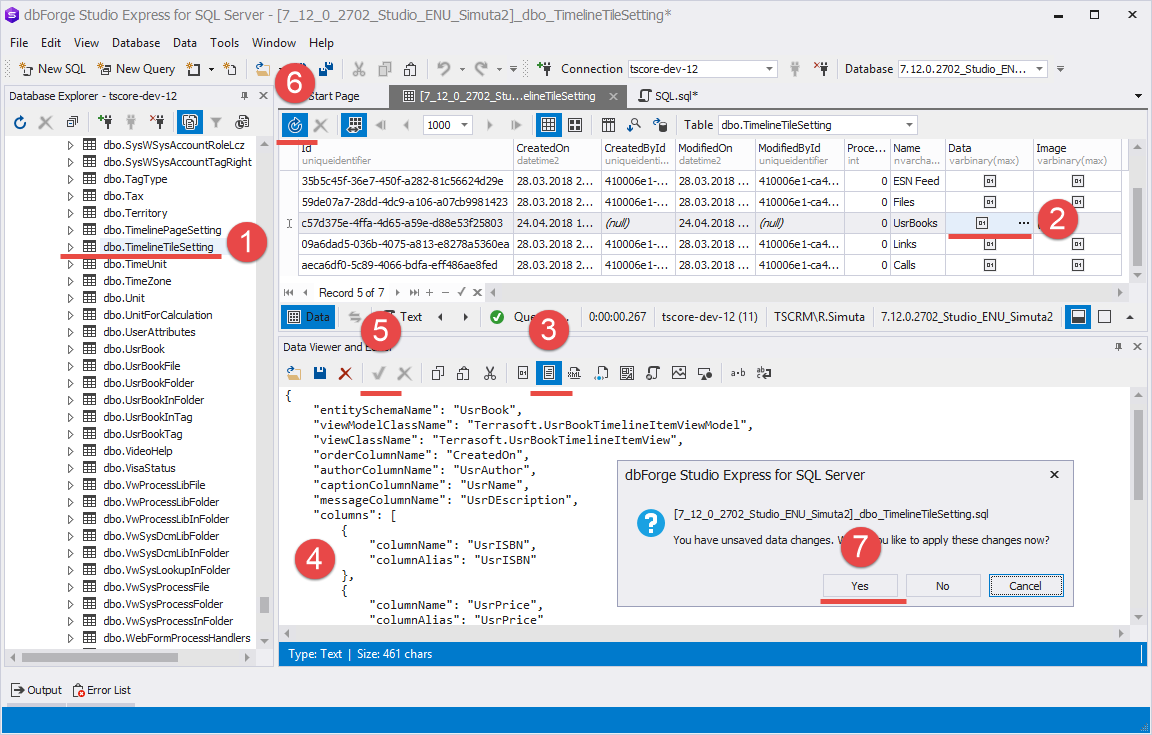
Since data in the Data and Image columns are stored in the varbinary(max) format, use specific editors (such as dbForge Studio Express for SQL Server) to modify them. To do this:
- Select a table.
- Select the necessary record column and click the edit button.
- Enter the text data display mode in the data editor.
- Add necessary data.
- Save the changes in the data editor.
- Click the data update button.
- Click OK in the popped up checkout window to apply the modifications.
Add the following configuration object to the Data column using the above mentioned algorithm:
You need to indicate the additional field array whose display is configured in the UsrBookTimelineItemView view model in addition to the primary fields inherited from the base tile (see step 2).
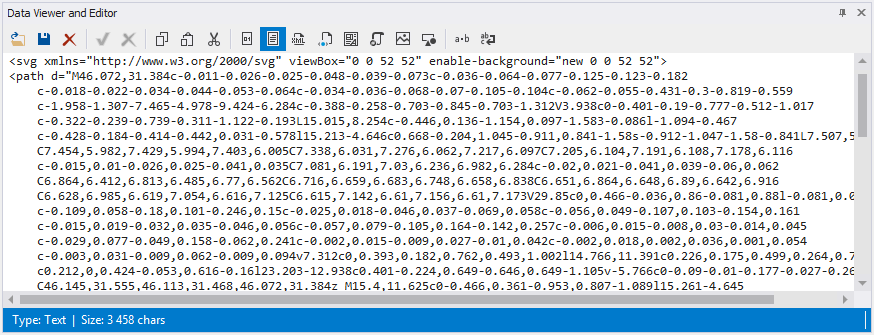
Add SVG-format data to the Image column to display the icon that corresponds to the section icon.
5. Editing the record that enables the tile display on the Timeline tab of the account page in the [TimelinePageSetting] table
For the Accounts section there already exists a record in the [TimelinePageSetting] table with settings of tiles bound to other sections. This is the record containing the "AccountPageV2” value in the Key column.
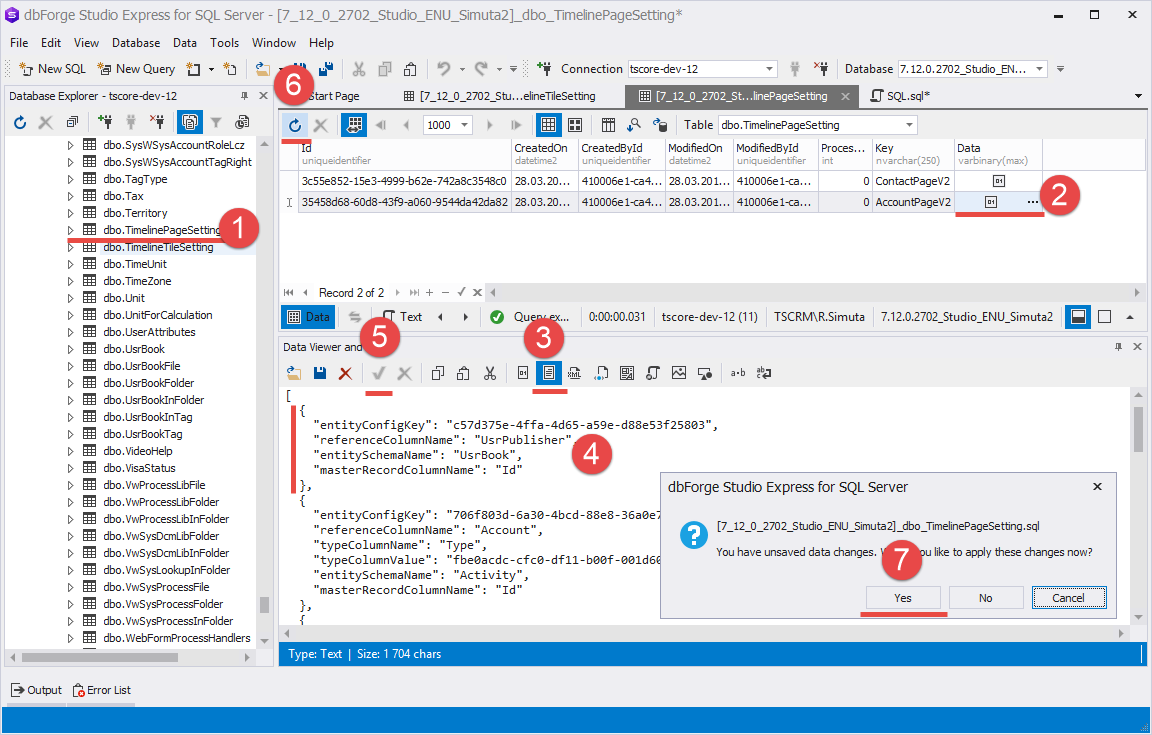
Using the algorithm mentioned in step 4, change the configuration object array by adding a new record to it.
Here the "entityConfigKey” property: "xxxxxxxx-xxxx-xxxx-xxxx-xxxxxxxxxxxx” should contain the [TimelineTileSetting] table record identifier created on step 4. In our case it is the "c57d375e-4ffa-4d65-a59e-d88e53f25803” value.
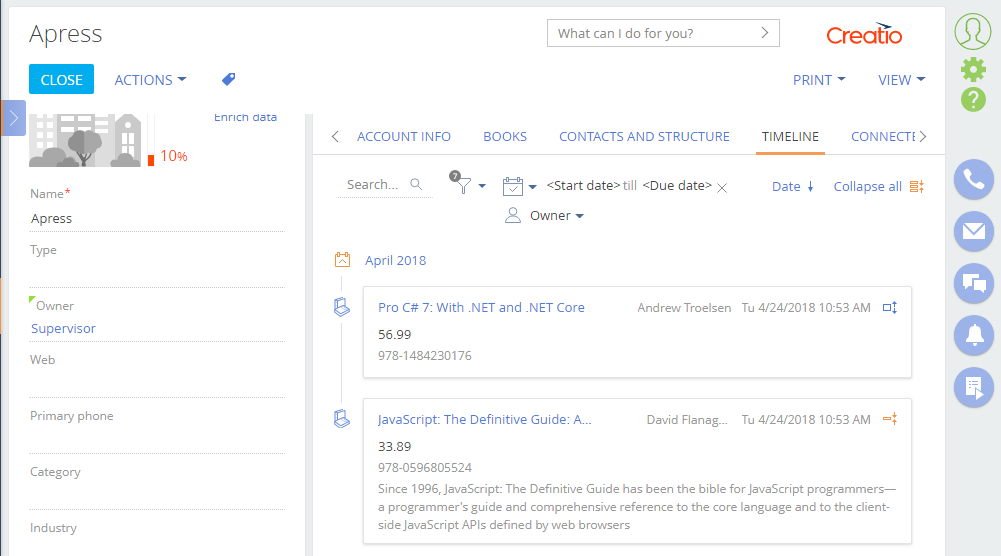
As a result of case implementation you will have the tiles bound to the Books custom section displayed on the Timeline tab of the Accounts section page. These tiles contain all the fields we described in our case conditions. The short book description will only be displayed when you deploy the tile.