
A section is a UI element that represents a specific business entity and contains a set of records. For example, Accounts, Contacts, Activities, etc. Sections are available from the side panel. You can group sections into workplaces to improve usability for particular roles. Learn more about sections in the user documentation guide: Section.
Section containers
Creatio stores section UI elements in the corresponding containers. Containers are configured in the base schema of the section or replacing view model schema of the section. Containers depend on the section view.
Sections have the following views:
- Section list
- Section analytics
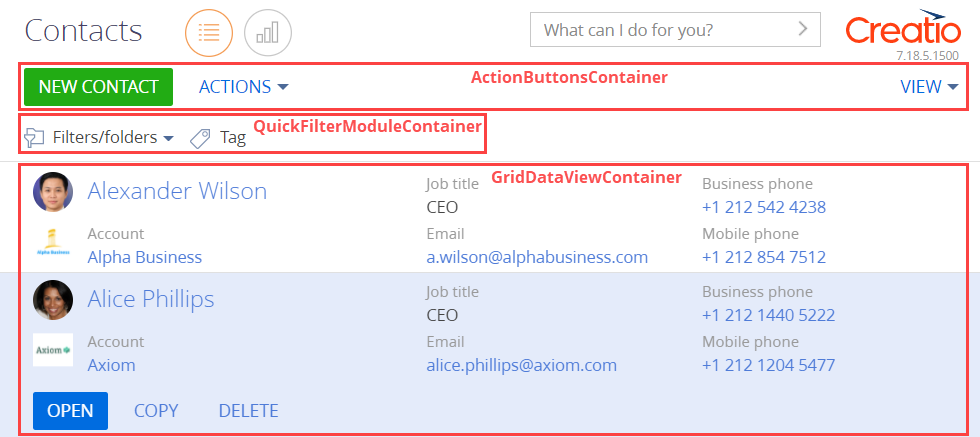
View the main section list containers in the figure below.
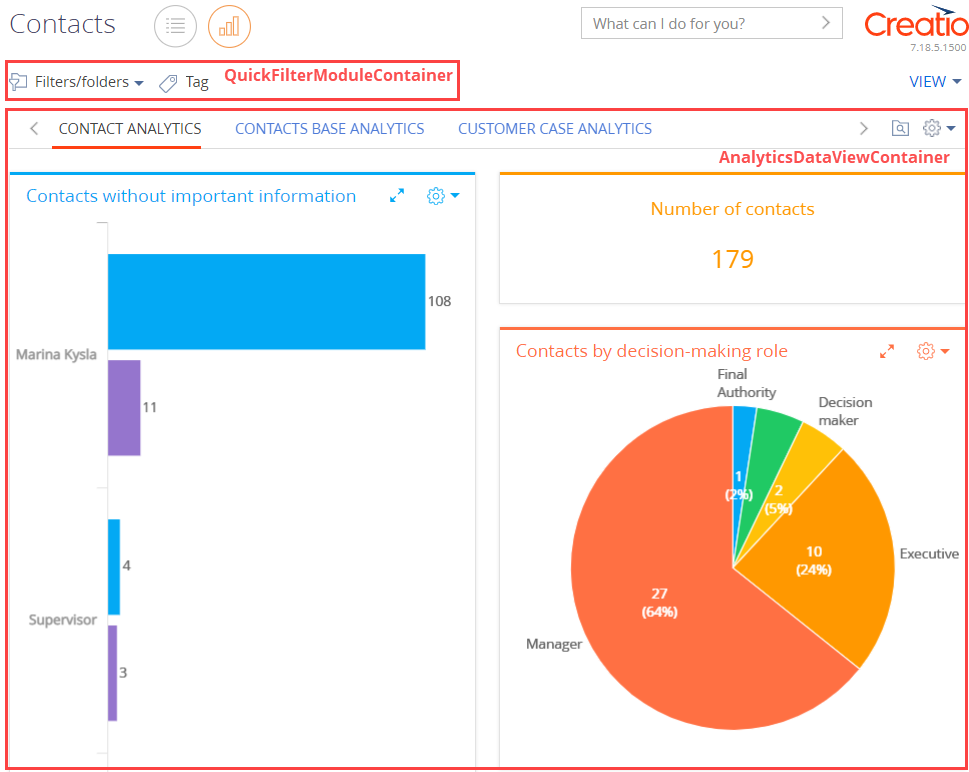
View the main section analytics containers in the figure below.
- The action button container (ActionButtonsContainer) contains the section action button and the drop-down action list button.
- The filter container (QuickFilterViewContainer) contains filters and tags.
- The container of the section list view (GridDataViewContainer) contains section records. Record edit, copy, and delete action buttons reside in the active list record. Displayed in the section list.
- The section analytics view container (AnalyticsDataViewContainer) contains the section dashboards. Displayed in the section analytics.
Section structure
Sections have the following components:
- List. A component that displays the section record index in tile or list view. Displayed in the GridDataViewContainer container.
- Analytics. A component that visualizes statistical data using charts, singular metrics, or lists. Dashboard blocks and custom dashboards are displayed in the AnalyticsDataViewContainer container.
- Actions. A functional element that represents a set of operations with the active section list record. Call actions using buttons located in the ActionButtonsContainer container and active section list record.
- Filter. A tool for condition-based data search and segmentation. Displayed in the QuickFilterViewContainer container.
- Tag. A label for manual record segmentation. Displayed in the QuickFilterViewContainer, similar to the filter.
List
A list is a UI element that displays the index of records added to the section or detail. For example, a contact index in the Contacts section.
Section lists come in the following types:
- Vertical list. Enables users to switch between records without closing the page.
- Editable list. Enables users to edit records directly in the list without opening the pages.
A section list has the following views:
- Tile view. Displays list record fields over multiple rows. Default view.
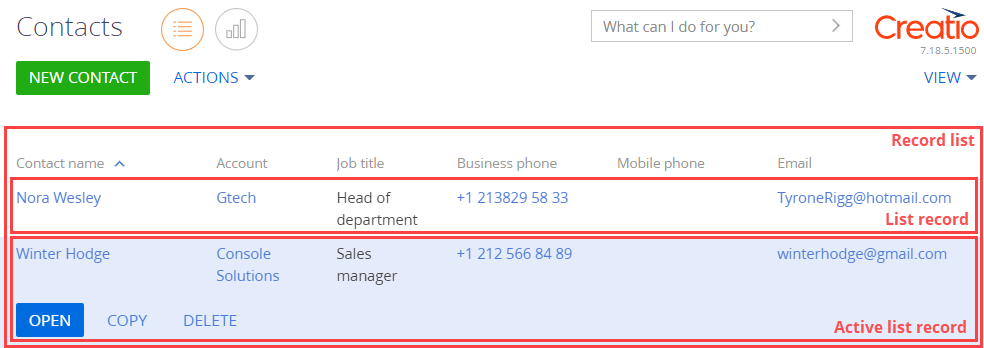
- List view. Displays records as a simple table. Each record corresponds to a single row. The display order of fields can differ between the list and tile views.
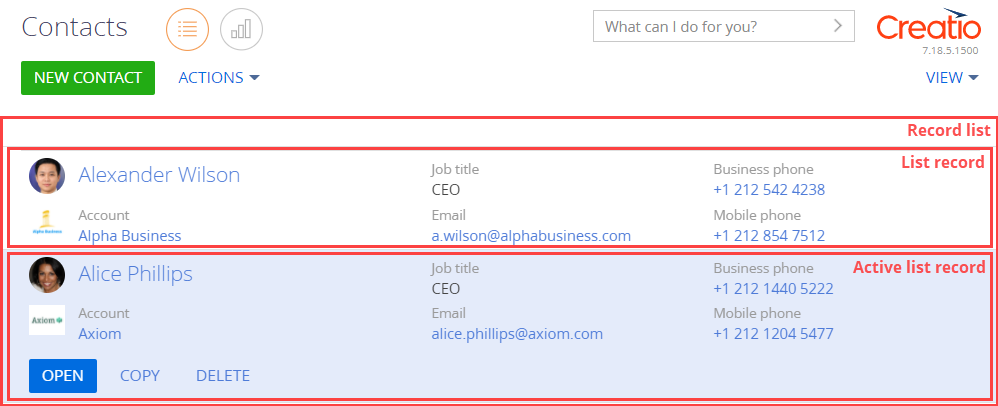
View the tile view of the Contacts section list in the figure below.
View the list view of the Contacts section list in the figure below.
Each section corresponds to a configuration schema. The schema describes the structure of the corresponding database table with record data and contains specific instructions on processing the data. For example, the ContactSectionV2 schema configures the Contacts section. All section schemas inherit from the BaseSectionV2 base section schema. Each table row loosely corresponds to a section list record. For example, the Contacts section corresponds to the Contact business object schema that contains the index and properties of the [Contact] table rows. By default, the section list does not display every column of the corresponding database table. This is done to keep the displayed data easily digestible. You can view every column on the section record page.
Edit the appearance of the list, the index of displayed fields, and the sorting of data in the drop-down menu of the section toolbar’s View button. Learn more in the user documentation: Work with record lists.
Analytics
The purpose of section analytics is to analyze the statistical data of the section. By default, Creatio displays the list section view. To switch to the analytics section view, click the Dashboards button next to the section name. To open the analytics view of all sections, open the Dashboards section.
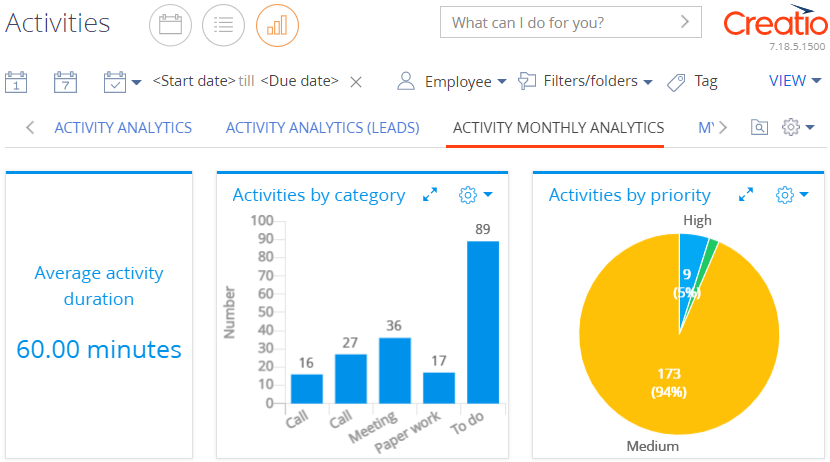
View an example of Activities section analytics in the figure below.
Dashboards display analytical data. Learn more about dashboards in a separate article and the user documentation guide: Dashboard widgets, Analytics. Dashboards are located on dashboard tabs. Learn more about dashboard tabs in the user documentation: Add analytics in section.
Actions
Section actions are functional elements that represent an index of operations with one or more list records. You can run actions using buttons of different types. The buttons are located both in the action container of the current section and the container of the active record.
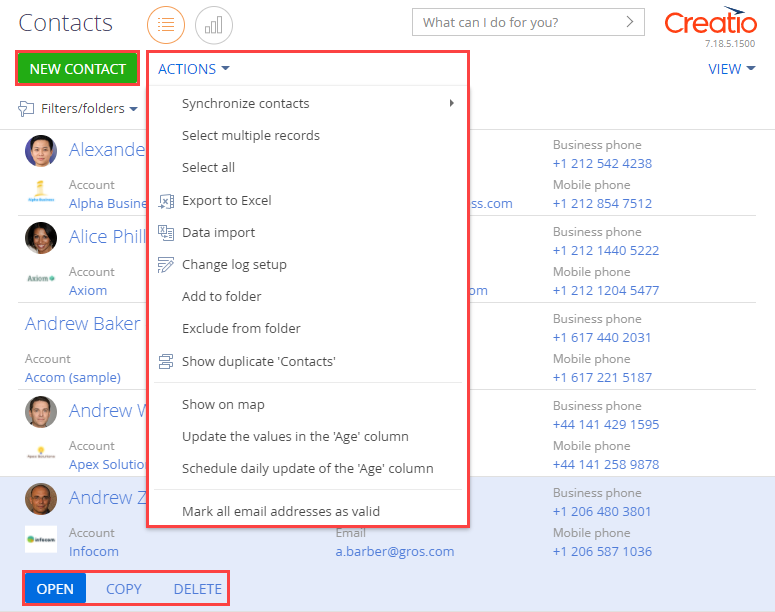
View the Contacts section actions in the figure below.
Section actions have the following types:
- standard
- additional
The standard Contacts section actions are as follows:
- New contact. Opens a pop-up box that lets you add and save a new section record.
- Open. Opens the page of the active section record.
- Copy. Opens a section record page, copies the active record data into the page, and creates a new record when you click Save.
- Delete. Deletes the active record.
- Select multiple records. Selects multiple list records.
- Select all. Selects all list records.
- Export to Excel. Exports all list records of the current section to an *.xlsx file. Learn more about data export in the user documentation: Excel data export.
- Data import. Imports data from an *xlsx file into Creatio. Learn more about data import in the user documentation: Excel data import.
- Change log setup. Opens the logging management page that also lets you select the section columns to log when a record is edited.
Additional actions implement the functionality that depends on the section business logic. Additional Contacts section actions are as follows:
- Synchronize now. Synchronizes Creatio with Google contacts. Creatio synchronizes only records tagged as per the synchronization settings. Learn more about contact synchronization in the user documentation: Synchronize contacts and activities with Google.
- Add new account for synchronization. Synchronizes Creatio Cloud with Google. Learn more about synchronization in the user documentation: Synchronize contacts and activities with Google.
- Add to folder. Opens a pop-up box that lets you select a folder where to place the active record.
- Exclude from folder. Excludes the active record from all of its current folders.
- Show duplicate 'Contacts'. Opens an additional page that contains all likely duplicates of the contacts. Creatio adds records to this page automatically after performing the duplicate search.
- Show on map. Lets you display the location of selected contacts on the map. The action opens a box with a map that marks the contacts selected in the list. If the address fields of the selected contacts are empty, Creatio does not perform the action. If the address fields of some contacts are empty or filled out incorrectly, the box displays the corresponding information.
- Update the values in the 'Age' column. Updates the Age column on the active contact page.
- Schedule daily update of the 'Age' column. Opens a pop-up box that lets you set up the time of the daily contact age update.
- Mark all email addresses as valid. Selects the Valid checkbox for the email address of the active contact record.
Filters
A filter is a tool for condition-based data search and segmentation. You can use filters as an individual tool in Creatio sections. Filters are also available as part of other tools, for example, when you set up dynamic folders, dashboards, or business processes. Creatio displays filter controls above the section list. Learn more about filters in the user documentation: Filters.
Filters have the following types:
- quick filter
- advanced filter
- standard filter
Configure the quick filter on the toolbar. Configure the standard and advanced filters in the Filters/folders menu.

Quick filter is available in certain Creatio sections. Use quick filters to filter data by the most frequently used parameters (typically, by the date and owner). For example, the Activities section includes a quick filter since you most often need to view the activity of a single employee during the specified period. Learn more about the quick filter in the user documentation: Filters.
To set the quick filter, select the period to filter the section list records in the Select period drop-down menu.
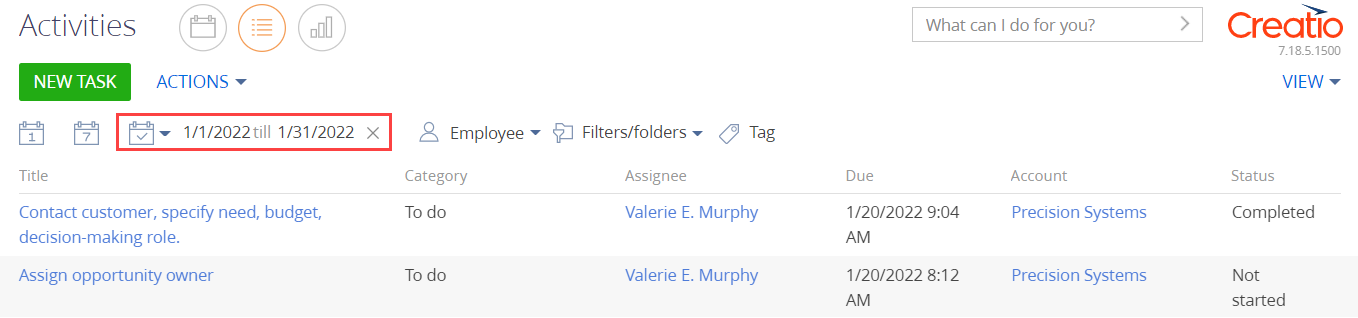
View an example of a quick filter that filters activities by current month (the Select period drop-down menu is set to Current month) in the figure below.
Standard filter lets you search for records by the values of one or more current section columns quickly. Available in most section lists. Learn more about the standard filter in the user documentation: Filters.
To set the standard filter:
- Select Add filter in the Filters/folders drop-down menu.
- Select the field and field value to filter the section list records.
View an example of a standard filter that filters activities by account (the Account field is set to Estron) in the figure below.

Advanced filter consists of several parameters and complex search conditions. For example, you can use the advanced filter to display meetings with new customers in the Activities section. You can also save the parameters and conditions of an advanced filter as a dynamic folder to reuse them later. Learn more about the advanced filter in the user documentation: Filters.
To set the advanced filter:
- Select Switch to advanced mode in the Filters/folders drop-down menu.
- Select the object, object column, and column value to filter the section list records.
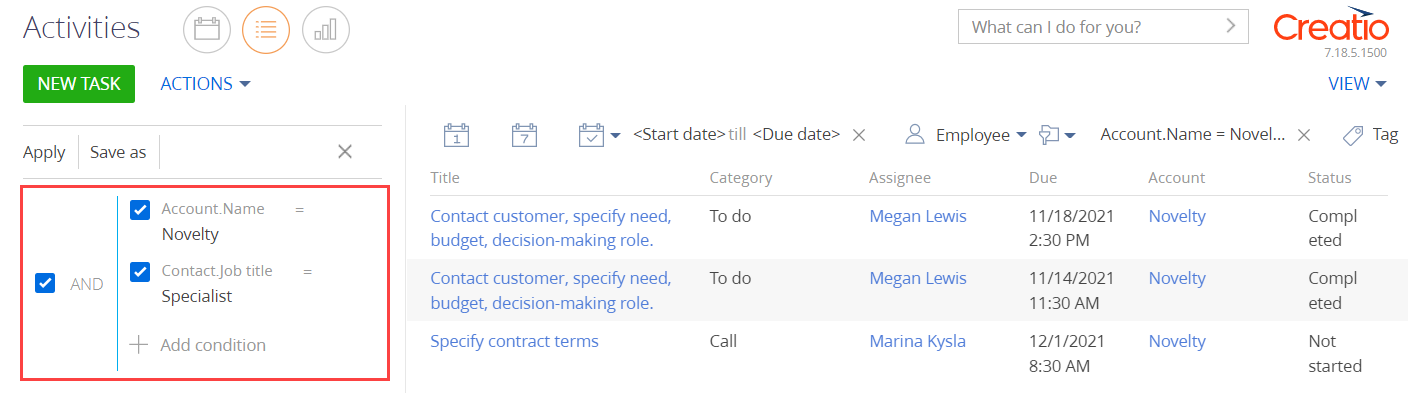
View an example of an advanced filter that filters activities by account (the Name field of the Account object is set to Novelty) and job title (the Job title field of the Contact object is set to Specialist) in the figure below.
A folder is a filtering tool that groups records by specific conditions. Folders can have hierarchical structure. Learn more about folders in the user documentation: Folders.
Folders have the following types:
- Dynamic folders. Contain only the section records that match the specified filter conditions. For example, you can filter records by creation date to create a New customers dynamic folder. Creatio generates and updates the content of such folders automatically.
- Static folders. Contain only the section records added by users, manually or as part of the conversion from a dynamic folder. For example, you can create a VIP customers static folder to ensure sales associates or their managers make personal decisions to add customers to the folder.
You can only add records to or remove them from static folders. Creatio adds a record to a folder automatically if the record meets the filter conditions of the folder. If a record no longer meets the filter conditions of the folder, Creatio removes the record from the folder automatically.
To set up a folder:
- Select Show folders in the Filters/folders drop-down menu.
- Select the folder to filter the section list records.
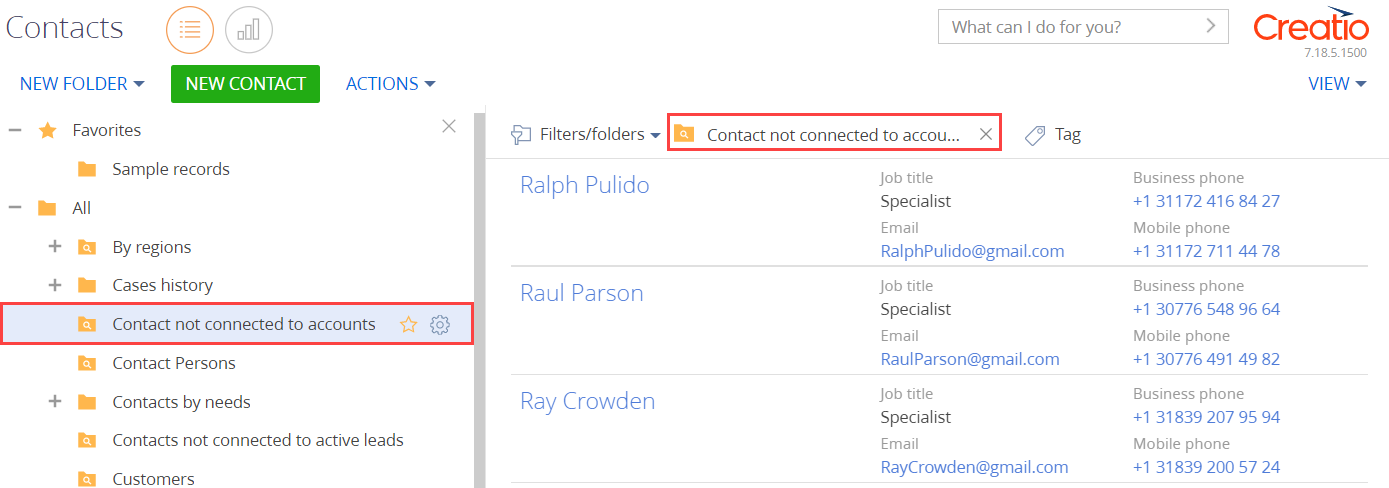
View an example folder that includes contacts not connected to accounts (the Contacts not connected to accounts folder) in the figure below.
Tags
A tag is a special label you can use to segment records manually. For example, you can tag records in the Contacts section to mark VIP customers or ban customers. Tag records manually. To select a tag, click Tag and select a tag to filter the section list records. Learn more about tags in the user documentation: Tags.
Creatio provides the following tag types:
- Private tags. Only visible and accessible to the user who created them. Any user can create any number of private tags. Private tags are not visible to managers and system administrators. Creatio marks private tags green.
- Corporate tags. Visible to the company employees. Any employee can add or remove a corporate tag. Any employee/role that has permissions for the Corporate tags management (CanManageCorporateTags code) operation can create corporate tags. Creatio marks corporate tags blue.
- Public tags. Visible to the company employees, as well as self-service portal users. Any employee can add or remove a public tag. Any employee/role that has permissions for the Public tags management (CanManagePublicTags code) operation can create public tags. Creatio marks public tags red.
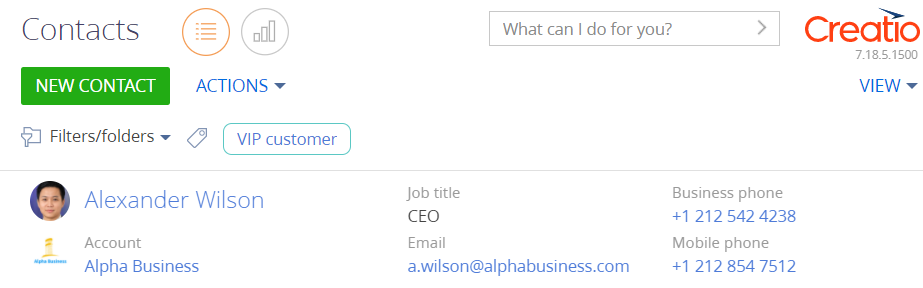
View an example of contacts that are VIP customers (VIP customer tag selected) in the figure below.
Create a section
You can create a section in the Section Wizard. To create a section, follow the instructions in the user documentation: Create a new section.
View object schemas and client schemas that the Section Wizard creates in the custom package when you add a section in the table below.
| Name | Purpose | Parent object |
|---|---|---|
|
|
||
| [Section object name] | The primary section object | BaseEntity base object. |
| [Section object name]Folder |
The object folder. A utility object that ensures the correct grouping of section records. Structures the section folder tree. |
BaseFolder base folder. |
| [Section object name]InFolder |
The object in the folder. A utility object that ensures grouping section records operates as intended. Defines links between section records and their folders. |
BaseItemInFolder base element in the folder. |
| [Section object name]File | The object for the Attachments detail. | File file. |
| [Section object name]Tag | The section tag. | BaseTag base tag. |
| [Section object name]InTag | The tag in the section object. | BaseEntityInTag base tag in the base object. |
|
|
||
| [Section object name]Section | The section schema. |
BaseSectionV2 base section schema. |
| [Section object name]Page | The schema of the section record page. | BaseModulePageV2 base schema of the section record page. |
Add a custom column to the section list
To add a custom column to the section list, add a column to the schema of the section business object. When you add a custom column, Creatio adds a replacing view model schema to the current package. The schema inherits the base object columns. The custom column is added to the schema.
You can use the following tools to add a custom column to the schema of the section business object:
- Section Wizard
- Creatio IDE
To add a custom column to the section list in the Section Wizard, follow the instructions in the user documentation: Work with record lists.
To add a custom column to the section page in Creatio IDE:
- Create a replacing view model schema of the section page to place the custom column. To do this, follow the guide in a separate article: Client module.
- Select the view model schema to replace as the parent object.
- Add a custom column of the corresponding type to the replacing view model schema of the section page.
- Set up the appearance of the custom column in the section list.
Set up the appearance conditions of the section list
Creatio lets you set up the appearance conditions of the section list. Record lists that match the specified conditions are displayed in line with the configured visual styles.
To set up the appearance conditions of the section list:
- Create a replacing view model schema of the section page. To do this, follow the guide in a separate article: Client module.
- Select the view model schema to replace as the parent object.
-
Set up the appearance conditions of the section list. To do this, implement the prepareResponseCollectionItem() method in the methods property. The method overloads the base method and modifies the data row before uploading the row to the list. Implement the assignment of a specific value to the customStyle property in the method. The property controls the list row appearance. The property is an object that has child properties that are similar to CSS properties and generate the visual style of the relevant list records.
View an example of the customStyle property setup below.
Add a section record action
Creatio lets you add custom actions for either a single record or multiple records. The BaseSectionV2 schema of the NUI package implements the base content of the Actions drop-down menu on the section page.
To add an action for a single section record:
- Create a replacing view model schema of the section page. To do this, follow the guide in a separate article: Client module.
- Select the view model schema to replace as the parent object.
-
The section action index is an instance of the Terrasoft.BaseViewModelCollection class. Each item of the action index is a view model. Set up the action in the configuration object that lets you both set the properties of the action view model explicitly and use the base binding mechanism.
Implement the menu item behavior. To do this, implement the getSectionActions() overloaded parent schema method in the methods property. The method returns the collection of section actions. When you replace base sections in the getSectionActions() method of the replacing module, call the parent implementation of the method to initialize the actions of the parent section. To do this, execute the this.callParent(arguments) method that returns the action collection of the base section.
To add an action to the collection, call the addItem() method. The getButtonMenuItem() callback method is passed to the method as a parameter. The method creates an instance of the action view model by the configuration object passed to the method as the parameter.
Reference the selected record via the ActiveRow attribute of the section view model. The attribute returns the primary column value of the selected record. In turn, you can use the primary column value of the selected record to get the values uploaded to the field list of the selected object.
The SelectedRows property of the section view model stores the primary column values of the selected records. You can use these values to get the values uploaded to the field list of selected objects. For example, from a regular list’s data collection stored in the GridData view model property of the list.
View the base implementation of action addition below.
View the properties of the section action’s configuration object that is passed as a parameter to the getButtonMenuItem() method in the table below.
|
|
|
|---|---|
| Type | The type of the Actions drop-down menu item. The property lets you add a horizontal line that separates menu blocks to the action menu. To do this, specify Terrasoft.MenuSeparator as the property value. If you do not specify the property value, Creatio adds a menu item by default. |
| Caption | The title of the Actions menu item. We recommend using localizable strings for titles. |
| Click | Binds an action handler method by the method name. |
| Enabled | The boolean property that controls the menu item availability. |
| Visible | The boolean property that controls the menu item visibility. |
Set up the quick filters block of the section
Creatio lets you implement a custom quick filters block for section list records.
To set up the quick filters block of the section:
- Create a replacing view model schema of the section page. To do this, follow the guide in a separate article: Client module.
- Select the view model schema to replace as the parent object.
- Implement the filtering behavior. To do this, implement the initFixedFiltersConfig() method in the methods property. The method initializes the fixed filters. In the method, create a configuration object that has an array of filters. Assign the object link to the fixedFiltersConfig attribute of the view model.
Delete a section
- Make sure you have access to Creatio configuration and database.
- Unlock the file that corresponds to the relevant section in the SVN repository.
-
Delete the section that is based on the relevant object. To do this, execute an SQL query.
SQL queryMSSQLPostgreSQLReplace ToDelete with the name of the custom section schema.
-
After you clear the database, delete the custom schemas from the Configuration section.
Delete the configuration schemas in this order:
- ToDeleteFile.
- ToDeleteInFolder.
- ToDeleteInTag.
- ToDeleteTag.
- ToDeleteFolder.
- ToDelete.

Create a schema of the replacing section view model
- Go to the Configuration section and select a custom package to add the schema.
-
Click Add → Replacing view model on the section list toolbar.
/scr_add_replacing_module.png)
-
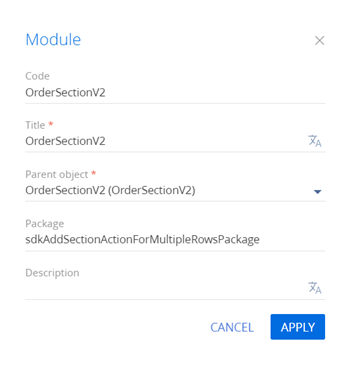
Fill out the schema properties.
- Set Code to "OrderSectionV2".
- Set Title to "Order section".
- Set Parent object to "OrderSectionV2".

-
Add a localizable string that contains the menu item caption.
- Click the
/scr_add_button.png) button in the context menu of the Localizable strings node.
button in the context menu of the Localizable strings node. -
Fill out the localizable string properties.
- Set Code to "CreationDateActionCaption".
- Set Value to "Show creation date".
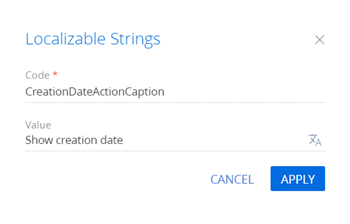
- Click Add to add a localizable string.
- Click the
-
Implement the menu item behavior. To do this, implement the following methods in the methods property:
- isRunning(). Checks whether the order selected in the list is at the In progress stage.
- isCustomActionEnabled(). Determines whether the menu item is available.
- showOrderInfo(). The action handler method that displays the order creation date in a message box.
- getSectionActions(). The overloaded parent schema method that retrieves the section action collection.
Reference the selected record via the ActiveRow attribute of the section view model. The attribute returns the primary column value of the selected record. In turn, you can use the primary column value of the selected record to get the values uploaded to the field list of the selected object.
View the source code of the replacing view model schema of the section below.
- Click Save on the Designer's toolbar.
The outcome of the example
To view the outcome of the example:
- Clear the browser cache.
- Refresh the Orders section page.
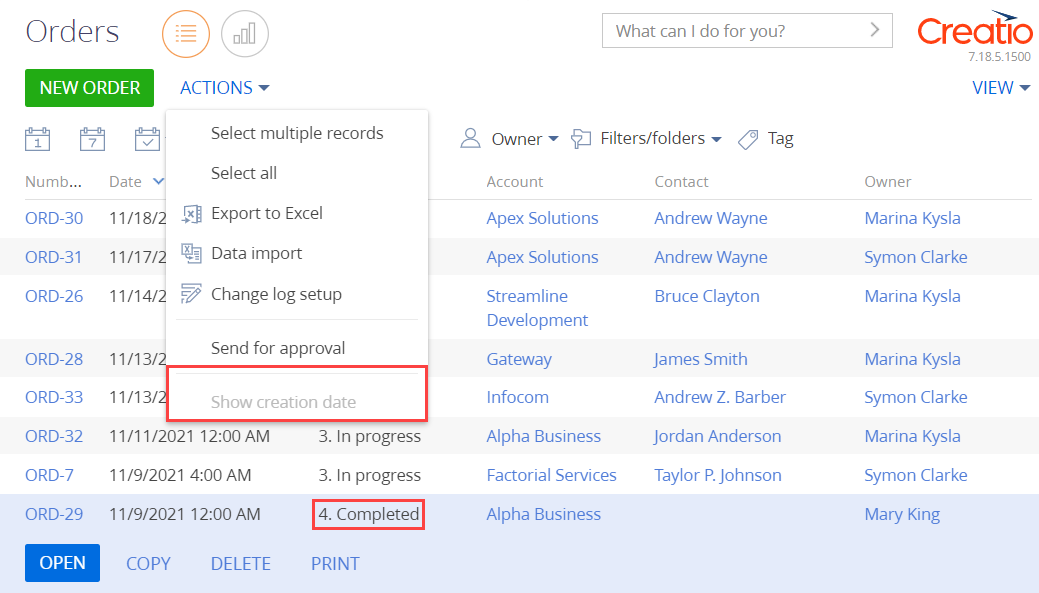
As a result, Creation will add the Show creation date action to the order page.
If the order is at the In progress stage, the Show creation date action will be active.
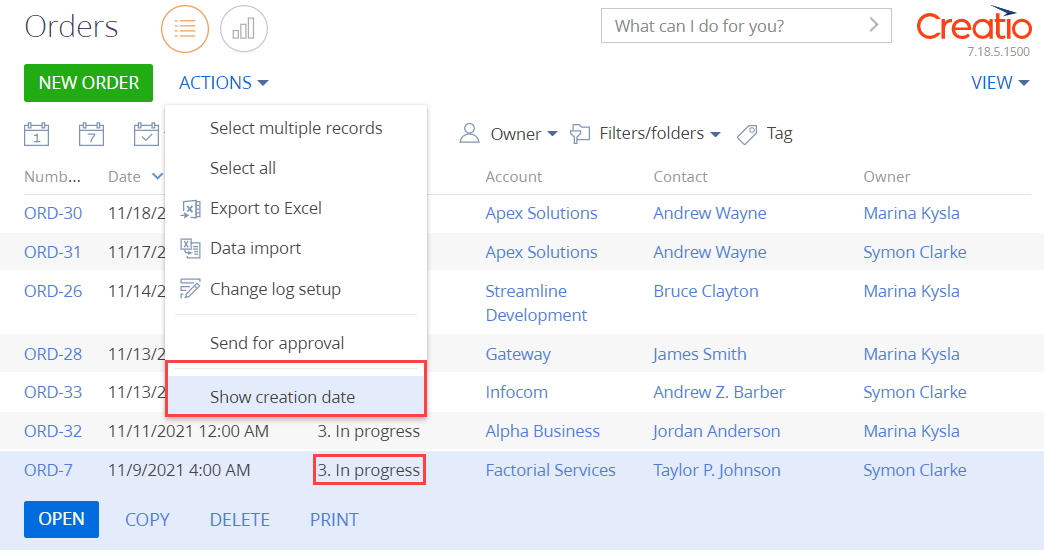
Run the Show creation date action to bring up the message box that displays the order creation date.
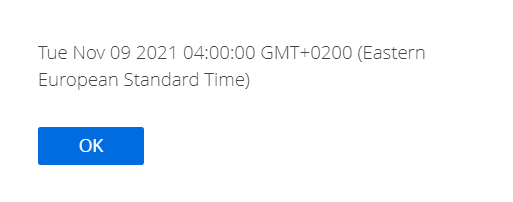
If the order's current stage is not In progress, the Show creation date action will be inactive.
Create a schema of the replacing section view model
- Go to the Configuration section and select a custom package to add the schema.
-
Click Add → Replacing view model on the section list toolbar.
-
Fill out the schema properties.
- Set Code to "OrderSectionV2".
- Set Title to "Order section".
- Set Parent object to "OrderSectionV2".
-
Add a localizable string that contains the menu item caption.
- Click the button in the context menu of the Localizable strings node.
-
Fill out the localizable string properties.
- Set Code to "AccountsSectionAction".
- Set Value to "Accounts for the selected orders".
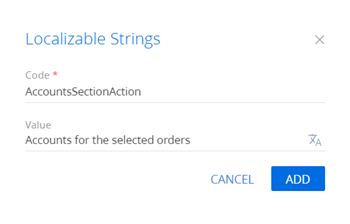
- Click Add to add a localizable string.
- Click the
-
Implement the menu item behavior. To do this, implement the following methods in the methods property:
- isCustomActionEnabled(). Determines whether the menu item is available.
- showOrderInfo(). The action handler method that displays the index of accounts for the selected orders in the message box.
- getSectionActions(). The overloaded parent schema method that retrieves the section's action collection.
The primary column values of the selected records are stored in the SelectedRows property of the section view model. You can use these values to get the values uploaded to the field list of the selected objects. For example, from a regular list's data collection stored in the GridData view model property of the list.
View the source code of the replacing view model schema of the section below.
- Click Save on the Designer's toolbar.
The outcome of the example
To view the outcome of the example:
- Clear the browser cache.
- Refresh the Orders section page.
The section single record mode is used by default. To select multiple list records, click Select multiple records in the menu of the Actions button. This changes the visual view of the list. You will see record selection elements appear.
As a result, Creatio will add the Accounts for the selected orders action to the order page.
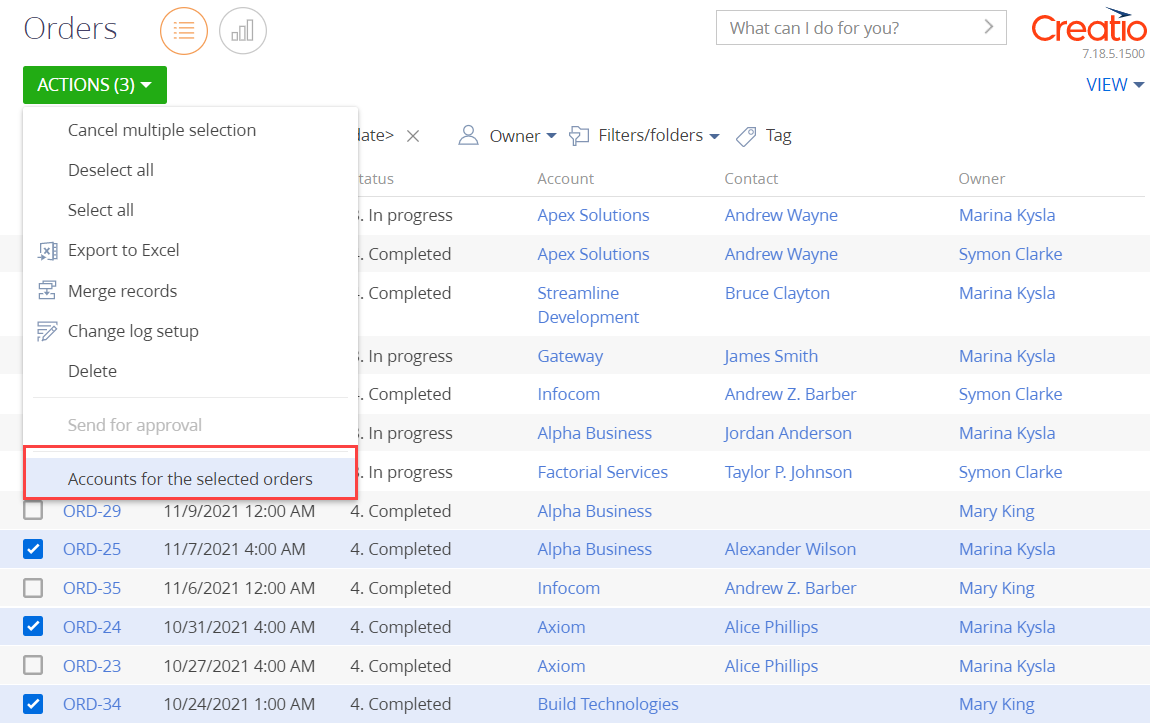
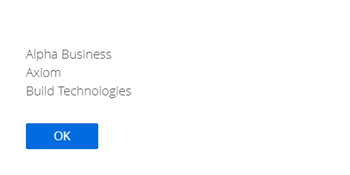
Run the Accounts for the selected orders action to bring up the message box that displays the account list for the selected orders.
To cancel the multiple selection mode, click Cancel multiple selection in the menu of the Actions button.
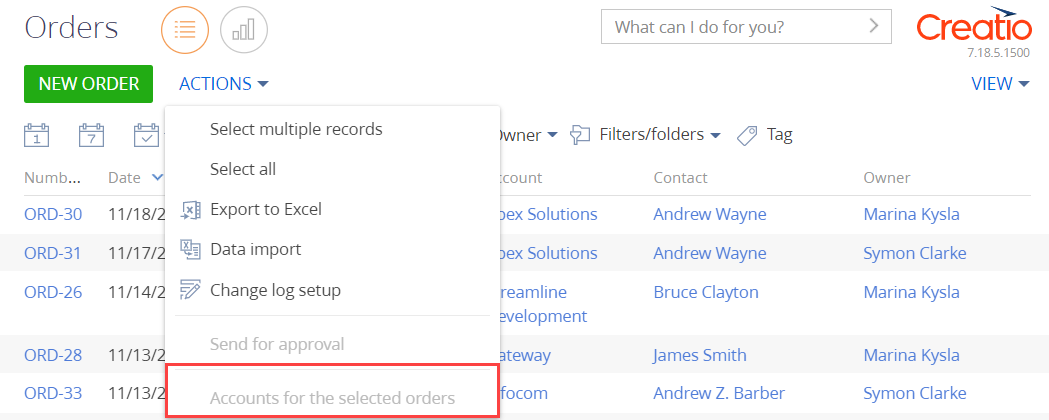
If you do not select any records in the Orders section list, the Accounts for the selected orders action will be inactive.
Create a schema of the replacing section view model
- Go to the Configuration section and select a custom package to add the schema.
-
Click Add → Replacing view model on the section list toolbar.
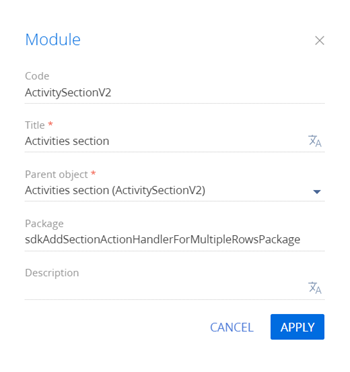
-
Fill out the schema properties.
- Set Code to "ActivitySectionV2".
- Set Title to "Activities section".
- Set Parent object to "ActivitySectionV2".
-
Add a localizable string that contains the menu item caption.
- Click the button in the context menu of the Localizable strings node.
-
Fill out the localizable string properties.
- Set Code to "AllDoneCaption".
- Set Value to "Mark as Completed".

- Click Add to add a localizable string.
- Click the
-
Implement the menu item behavior. To do this, implement the following methods in the methods property:
- isCustomActionEnabled(). Determines whether the menu item is available.
- setAllDone(). The action handler method that sets the Completed status for selected activities.
- getSectionActions(). The overloaded parent schema method that retrieves the section action collection.
View the source code of the replacing view model schema of the section below.
- Click Save on the Designer's toolbar.
The outcome of the example
To view the outcome of the example:
- Clear the browser cache.
- Refresh the Activities section page.
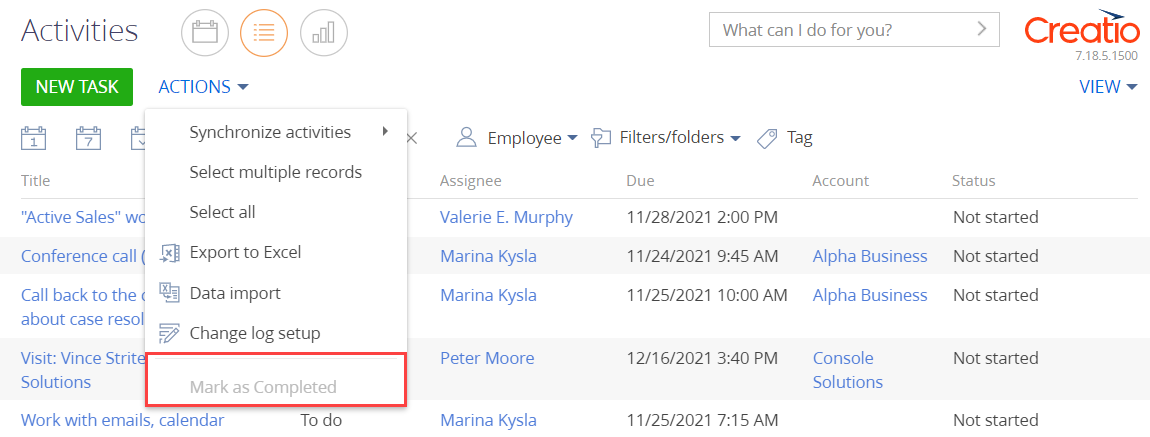
The section single record mode is used by default. To select multiple list records, click Select multiple records in the menu of the Actions button. This changes the visual view of the list. You will see record selection elements appear.
As a result, Creatio will add the Mark as Completed action to the activity page.
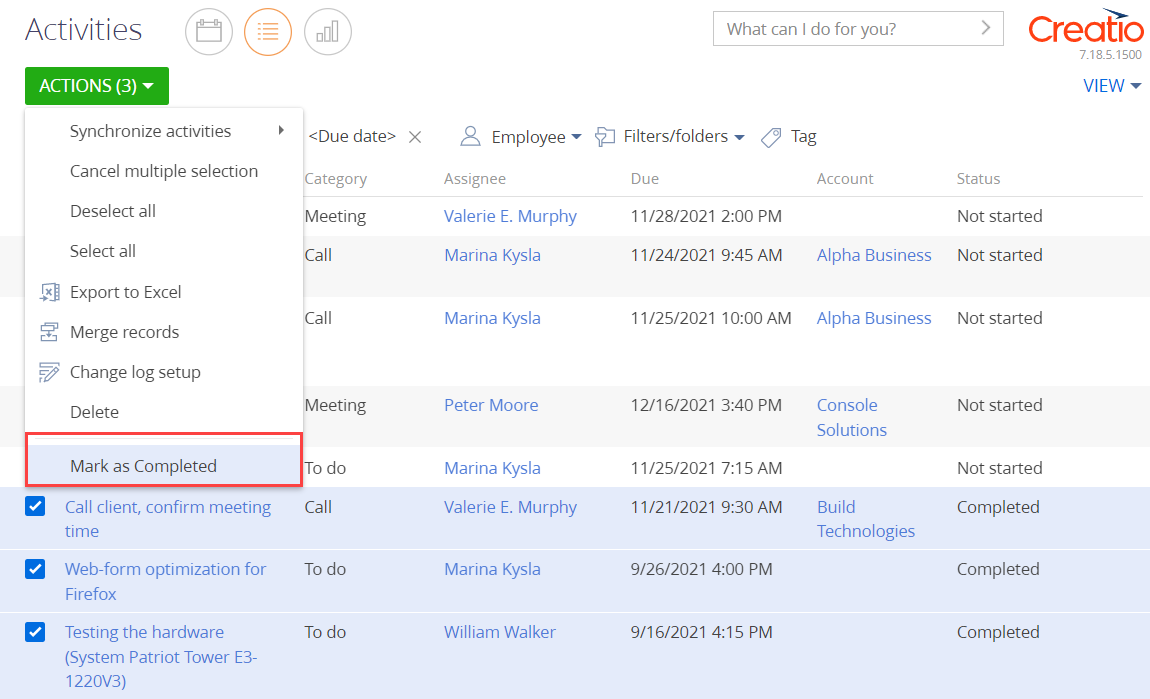
Run the Mark as Completed action to set the Status column of the selected activities to Completed.

To cancel the multiple selection mode, click Cancel multiple selection in the menu of the Actions button.
If you do not select any records in the Activities section list, the Mark as Completed action will be inactive.
Create a schema of the replacing section view model
- Go to the Configuration section and select a custom package to add the schema.
-
Click Add → Replacing view model on the section list toolbar.
-
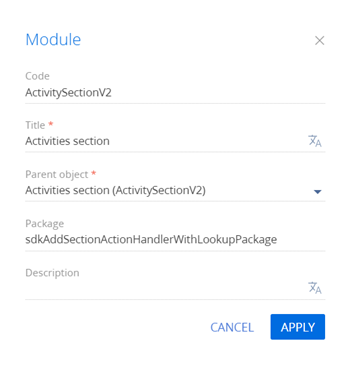
Fill out the schema properties.
- Set Code to "ActivitySectionV2".
- Set Title to "Activities section".
- Set Parent object to "ActivitySectionV2".
-
Add a localizable string that contains the menu item caption.
- Click the button in the context menu of the Localizable strings node.
-
Fill out the localizable string properties.
- Set Code to "SetOwnerCaption".
- Set Value to "Assign Owner".
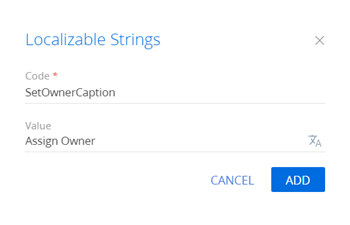
- Click Add to add a localizable string.
- Click the
-
Implement the menu item behavior. To do this, implement the following methods in the methods property:
- isCustomActionEnabled(). Determines whether the menu item is available.
- setOwner(). The action handler method that opens the Contacts lookup.
- lookupCallback(). The callback method that sets the contact selected from the lookup as the owner of the selected activities.
- getSectionActions(). The overloaded parent schema method that retrieves the section action collection.
View the source code of the replacing view model schema of the section below.
- Click Save on the Designer&'s toolbar.
The outcome of the example
To view the outcome of the example:
- Clear the browser cache.
- Refresh the Activities section page.
The section single record mode is used by default. To select multiple list records, click Select multiple records in the menu of the Actions button. This changes the visual view of the list. You will see record selection elements appear.
As a result, Creatio will add the Assign Owner action to the order page.
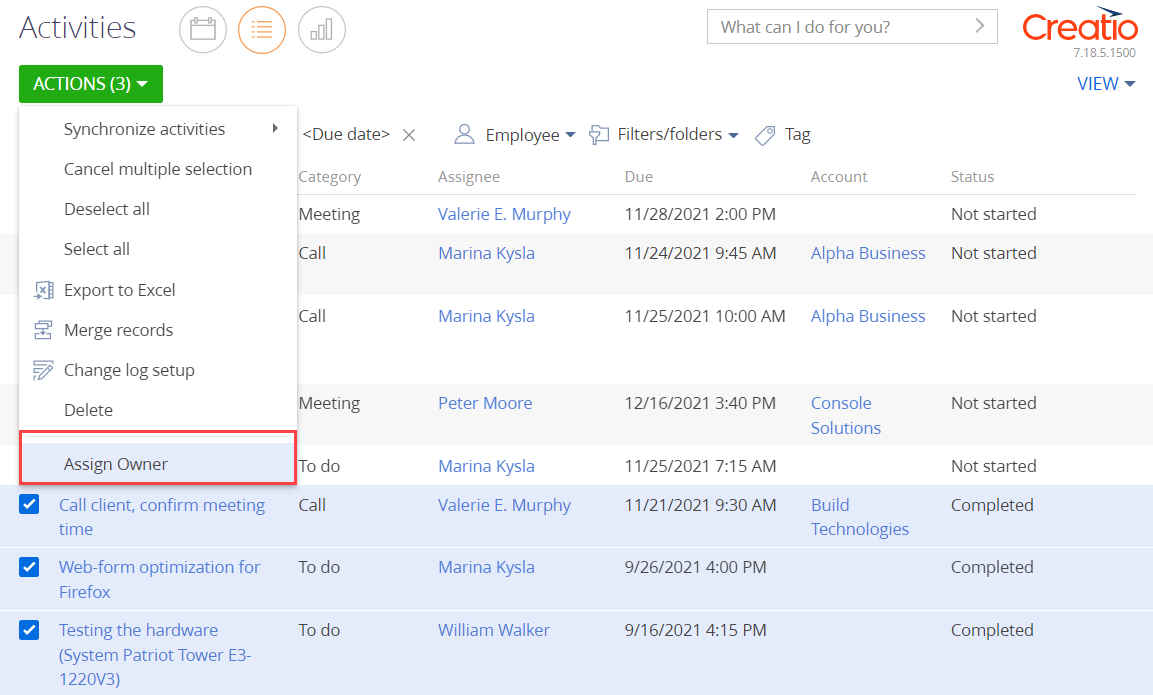
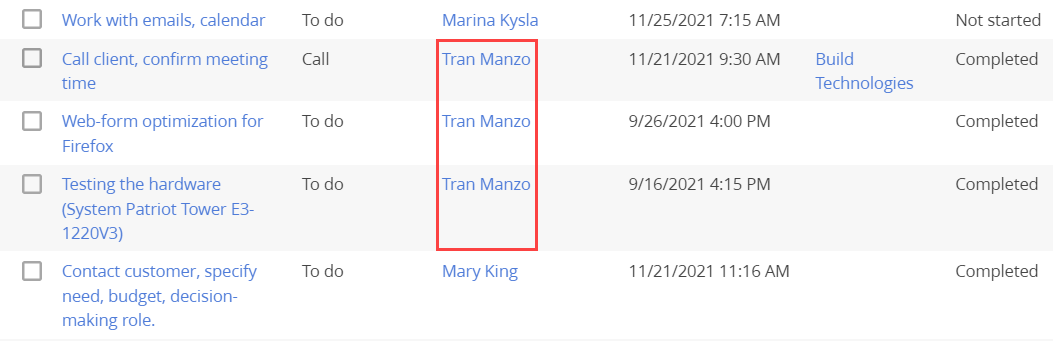
Run the Assign Owner action to open the Contacts lookup box. Creatio sets the selected contact as the owner of the selected activities in the Assignee column.
To cancel the multiple selection mode, click Cancel multiple selection in the menu of the Actions button.
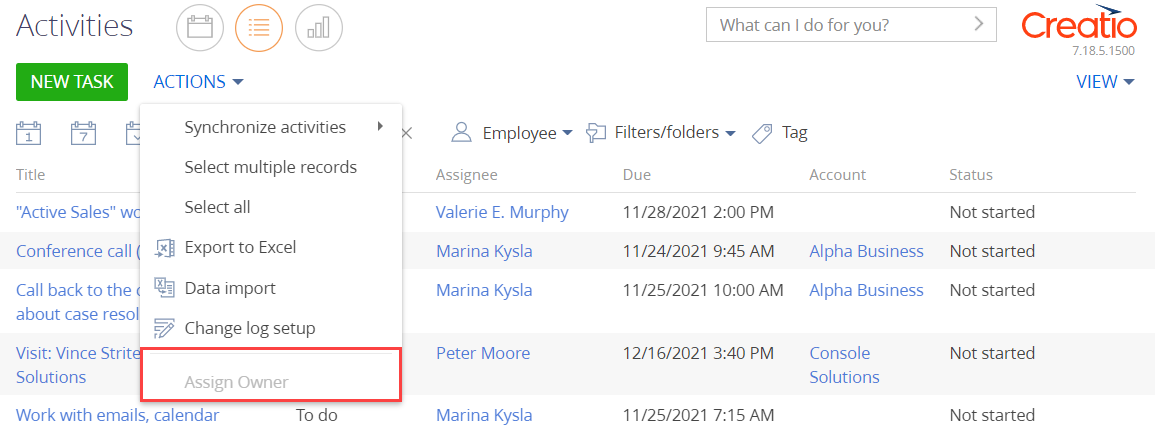
If you do not select any records in the Activities section list, the Assign Owner action will be inactive.
Create a schema of the replacing section view model
- Go to the Configuration section and select a custom package to add the schema.
-
Click Add → Replacing view model on the section list toolbar.
-
Fill out the schema properties.
- Set Code to "OrderSectionV2".
- Set Title to "Order section".
- Set Parent object to "OrderSectionV2".

-
Set up the appearance conditions of the section list. To do this, implement the prepareResponseCollectionItem() method in the methods property. The method overloads the base method, modifies the data row before uploading the row to the list, as well as injects custom styles into specific list rows.
View the source code of the replacing view model schema of the section below.
- Click Save on the Designer's toolbar.
The outcome of the example
To view the outcome of the example:
- Clear the browser cache.
- Refresh the Orders section page.
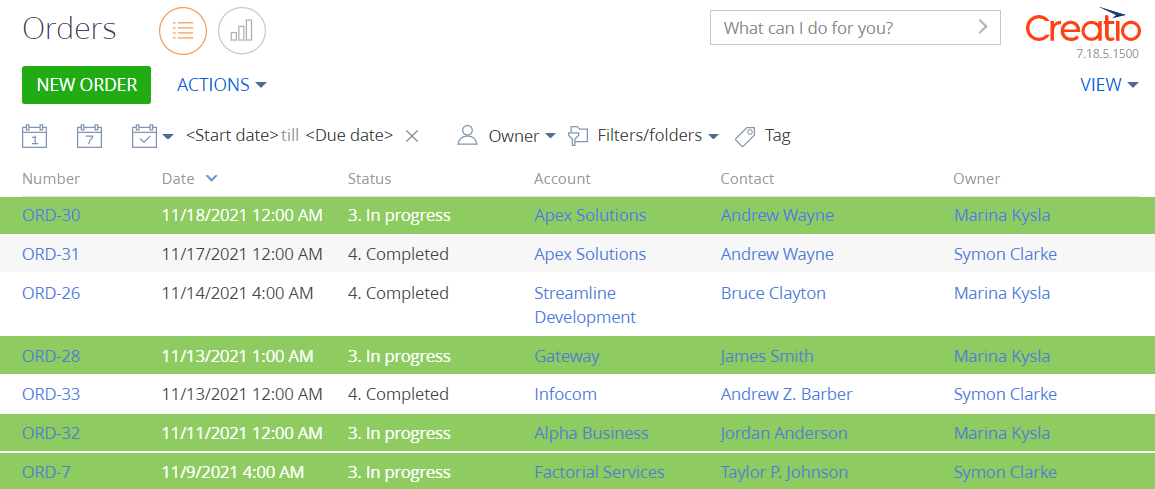
As a result, Creatio will highlight the orders at the In progress stage in green.
Create a schema of the replacing section view model
- Go to the Configuration section and select a custom package to add the schema.
-
Click Add → Replacing view model on the section list toolbar.
-
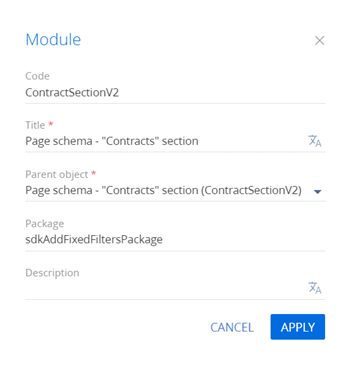
Fill out the schema properties.
- Set Code to "ContractSectionV2".
- Set Title to "Page schema - "Contracts" section".
- Set Parent object to "ContractSectionV2".
-
Add localizable strings that contain filter names.
-
Add a localizable string that contains the name of the filter by owner.
- Click the button in the context menu of the Localizable strings node.
-
Fill out the localizable string properties.
- Set Code to "OwnerFilterCaption".
- Set Value to "Owner".
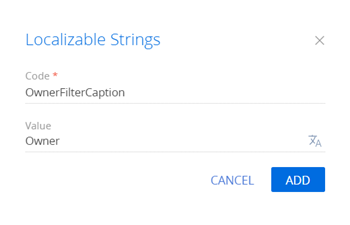
- Click Add to add a localizable string.
- Click the
-
Add a localizable string that contains the name of the filter by period.
- Click the button in the context menu of the Localizable strings node.
-
Fill out the localizable string properties.
- Set Code to "PeriodFilterCaption".
- Set Value to "Period".

- Click Add to add a localizable string.
- Click the
-
-
Implement the filtering behavior. To do this, implement the initFixedFiltersConfig() method in the methods property. In the method, create a configuration object with the array of PeriodFilter and OwnerFilter filters, assign the object link to the fixedFiltersConfig attribute of the view model.
View the source code of the replacing view model schema of the section below.
- Click Save on the Designer's toolbar.
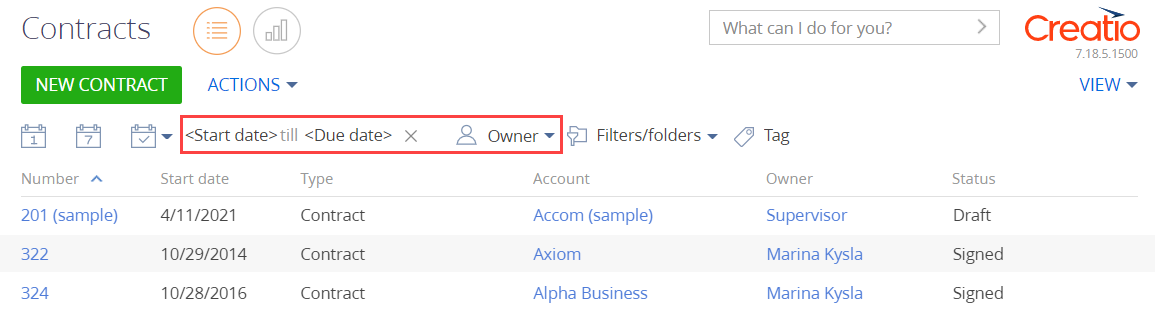
The outcome of the example
To view the outcome of the example, refresh the Contracts section page.
As a result, Creatio will display the fixed filters block in the Contracts section. The block will let you filter contracts both by start date and owner.
BaseSectionV2 is the base section schema. Provides the base section logic. Implemented in the NUI package. This is a view model schema. Learn more about the schema properties in a separate article: Client schema. All section schemas must inherit from the BaseSectionV2 schema.
Messages
| Name | Mode | Direction | Description |
|---|---|---|---|
| Rerender |
Address | Publish | Rerender the message of the dashboard module. |
| Reload |
Broadcasting | Subscription | Whether to reload data on the following launch. |
| Selected |
Address | Subscription | The selected result. |
The Terrasoft.core.enums.MessageMode enumeration represents the message modes, and the Terrasoft.core.enums.MessageDirectionType enumeration represents the message directions. Learn more about the MessageMode enumeration in the JS class library. Learn more about the MessageDirectionType enumeration in the JS class library.
Attributes
The SchemaName editing schema.
The flag that marks the schema as empty.
The active row of the analytics schema
The view collection of the list analytics.
The visibility flag of the button to print out analytical forms.
The analytics data collection.
The visibility flag of the analytics action buttons.
View the name of the analytics section.
The data binding flag.
The Terrasoft.core.enums.DataValueType enumeration represents the attribute data types. Learn more about the DataValueType enumeration in the JS class library.
Methods
Whether the user has permission to execute CRUD operations with the schedule. The Analytics setup (CanManageAnalytics code) system operation manages the access permissions.
Specifies the CanManageAnalytics attribute depending on the queried Display demo links (ShowDemoLinks code) system setting and Analytics setup (CanManageAnalytics code) system operation.