


To create a new user account for a regular employee:
1.In the [Contacts] section, create a contact for the new user (or make sure that the corresponding contact already exists). Learn more in the “Add a new contact” article.
2.In the [System users] section, create a new user, specifying the contact in the user profile. Read more in the “Create a user” article.
3.Assign the user a role, if applicable. Read more in the “Assign a user role” article.
4.Distribute licenses to the user. Read more in the “License a user” article.
1.The [Contacts] section –> [Create contact].
2.Populate the required fields on the contact mini-page and click [Save] (Fig. 1).
As a result, a new contact will be added in bpm’online and you will be able to create a user for this contact.
NOTE
You can also add a new contact directly from the contact lookup page when populating the [Contact] field on the user page. Click  in the [Contact] field, then click [New] in the lookup window that pops up. Populate the contact page that opens. After you save the contact page, you will return to the new user page, with the [Contact] field populated with the newly created contact
1.Click  -> [System users] (Fig. 2).
Fig. 2 Switching to the user management section
2.Click [New] -> [Company employee] (Fig. 3).
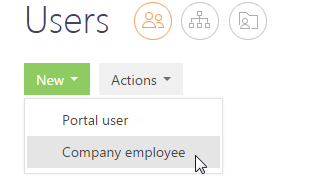
NOTE
You can change the type of user (“Company employee” or “Portal user”) after saving the new user record and reopening the user page.
3.Populate the fields on the [General information] tab of the user page:
[Contact] – select the user’s contact in the [Contacts] section.
[Type] – bpm’online populates the field automatically when you select the user type at step 2. The possible field values are “Portal user” or “Company employee” (Fig. 3).
[Active] – a status checkbox selected automatically for active users. You can clear the checkbox to disable a user.
[Culture] – select interface language for the current user. The user will be able to change the interface language in the user’s profile.
NOTE
The [Culture] field shows active languages. To select other languages, activate them in the [Languages] section of the System Designer. Learn more about bpm’online cultures in the “Localization” article.
[Home page] – select a section that will open by default when the user logs in to bpm’online. If you leave the field empty, the user will be redirected to the Main Menu, and upon subsequent logins – to the last opened page during the previous session.
[Date and time format] – specify the format that will be used to display dates for the user. You can leave the field blank and the user will be able to specify the format later in the user profile.
The [Authentication] detail contains the following fields:
[Username] – enter the login that will be used to authenticate the user in bpm’online.
[Password], [Password confirmation] – specify the password that will be used to authenticate the user in bpm’online;
[Password expiration date] – the field is non-editable and displays the date when the password expires. The date is calculated based on the [Default value] field of the “Password validity term, days” (MaxPasswordAge) system setting. The value is set to “0” by default, in which case the password has no expiration date. The [Password expiration date] field on the user’s page remains blank and locked.
[Reset password] – select this checkbox if you want to force the user to change their password when logging in for the next time. If the checkbox is selected on the user’s page, bpm’online will notify the user that their password has expired and request changing it at the next login attempt.
NOTE
If you use the LDAP authentication, select the [LDAP authentication] checkbox and specify the username from the LDAP lookup in the [Username] field. The lookup in this field contains the list of LDAP users that have not yet been synchronized with bpm’online. Learn more in the “Setting up LDAP integration” article.
4.Save the page.
As a result, a new user will be added in bpm’online.
See Also