


Setting up custom email templates for approval notifications
Use the [Approval] process element to set up custom logic for approving various Creatio records (documents, invoices, orders, etc.) by Creatio users. Both the approver and the user who submits the record for approval will receive email notifications about the approval procedure.
You can set up custom email templates for these notifications. Note that approval notification emails do not require additional [Send email] elements, and are configured in the [Approval] process element.
Example
During a document approval process (Fig. 1), the approver must receive an email notification, containing document type, number and the name of the user who submitted the document for approval. The user who submitted the document for approval, must receive a notification about the approval result.
The instructions below assume that you have enabled approvals in the [Documents] section, added the [Approval] element on the process diagram (Fig. 1) and set up its properties (Fig. 4). More information about the approval process setup is available in a separate article.
Fig. 1 A business process for approving documents
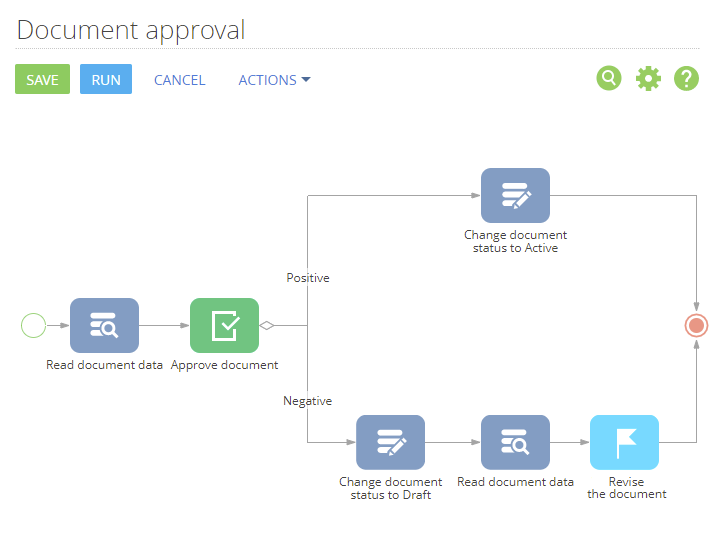
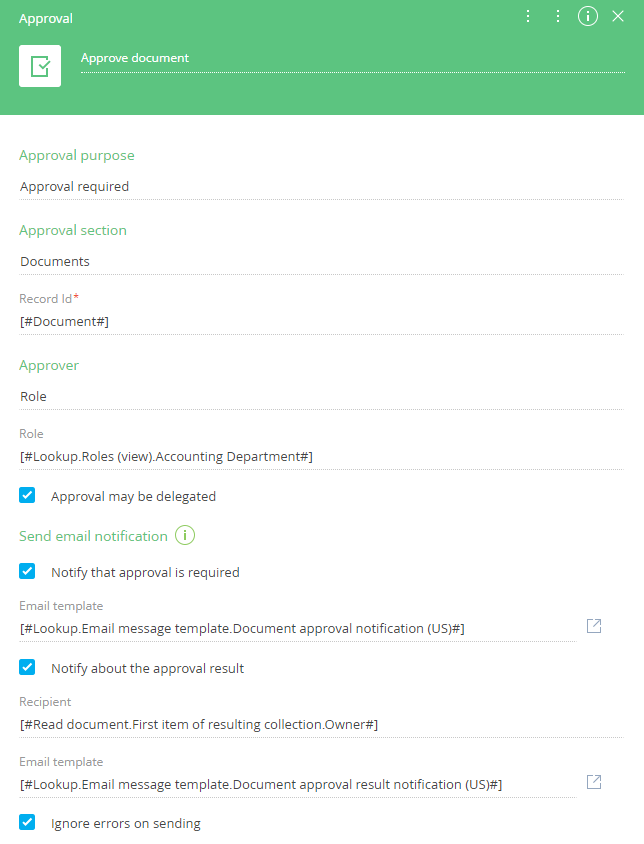
Fig. 2 The [Approval] element parameters
To set up approval email notification templates:
1.Populate the fields of the [Approval] element setup area. If the [Approval section] field is populated, available email templates for approval notification will be filtered according to the selected section.
Note
More information about setting up the [Approval] element as part of an approval process is available in a separate article.
2.Select the [Notify that approval is required] checkbox. As a result, whenever a record is submitted for approval, a notification will be sent to the “approver” user. If “Role” is selected in the [Approver] field, the notification will be sent to all users with the corresponding role.
3.In the [Email template] field, click  (Fig. 3). A new email template window will open on a new tab.
Fig. 3 Opening the email template of an approval notification

4.In the new template window, populate the [Template name] field. Note that if you populated the [Approval section] field earlier, the [Macro source] field will be already populated with the corresponding approval object (in this case – the “Approvals in section Document” object, (Fig. 4).
Fig. 4 Approval notification template settings
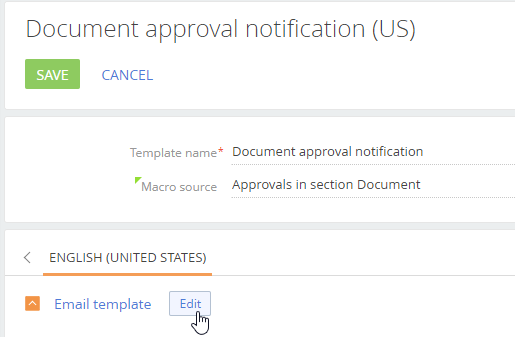
5.Click the [Edit] button. The template will open in the content designer.
Note
Basic instructions on working with the content designer are available in a separate article.
6.Enter the email subject.
7.Drag&drop a content block (e.g., [Text]) to the template. Replace the text in the [Text] block with your own.
8.Add regular email template macros:
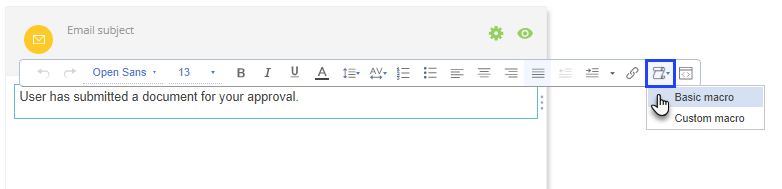
a.Place your cursor in the text block, click  and choose [Basic macro] (Fig. 5). The [Macros selection] window opens.
Fig. 5 Accessing the macros in the content designer
Note
For users of Creatio version 7.13.2 and below, the command names are different. The command for selecting standard macros is called [Select macros], and the [Select column] command is used to create a custom macro.
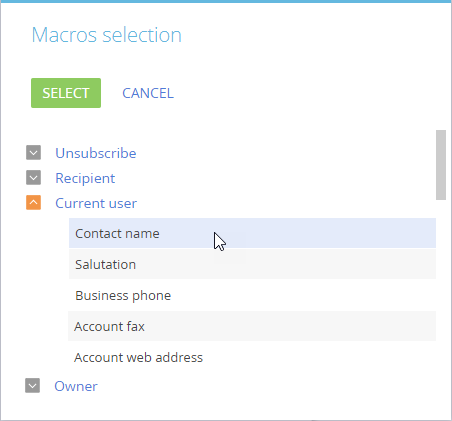
b.In the [Macros selection] window, choose the needed macro and click [Select]. The available macros are divided into several groups.
You can specify data of the email recipient contact ([Recipient] group), information of the user who runs the approval process ([Current user] group) or the owner of the record being approved ([Owner] group). For example, to add the name of the user who submitted the document for approval, select [Current user] > [Contact name] macro (Fig. 6).
Fig. 6 Adding a macro to the email text
The corresponding macro will be added to the email text at the insertion point.
9.Add email template macros that are based on the “Macro source” object.
a.Place your cursor in the text block, click  and choose [Select column]. The [Select column] window (Fig. 7) opens.
b.In the [Select column] window, choose the column of the object (that you specified in the [Macro source] field) whose values must be added to the notification text. The “approval” object is automatically added once you enable approvals in the section wizard and contains data from the approval itself, e.g., Approval purpose, Approver’s name, etc.
c.You can add macros for columns of any object, provided it is linked to the “approval” object, e.g., you can add columns of the document being approved. To select a column of a linked object, Click [+] next to the “approval” object name in the [Select column] window (Fig. 7). For example, to add the approved document’s type and number, add the [Type] and [Number] columns from the linked [Document] object.
Fig. 7 Selecting columns of a linked object as macros
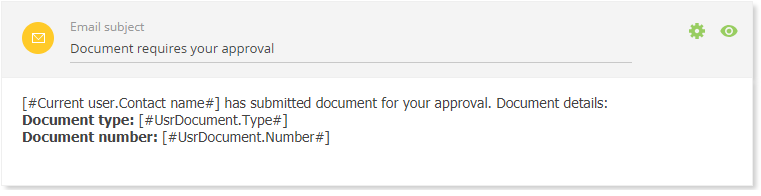
As a result, your template will look like this (Fig. 8):
Fig. 8 Example of approval notification template
10.Save the changes in the content designer and the email template.
11.Select the [Notify about the approval result] checkbox and populate the [Recipient] field. You can specify any Creatio contact, account or a plain email address. For example, you can send approval result notifications to the user who submitted the record for approval, record owner, etc.
12.Repeat steps 3-10 to create an approval notification email template.
13.Save the process diagram.
As a result, whenever a user submits a record for the approval using this process, email notifications will be sent according to the custom templates.
See also
•Configuring a document approval process
Fig. 9 The “Calculate the number of overdue activities” [Read data] element
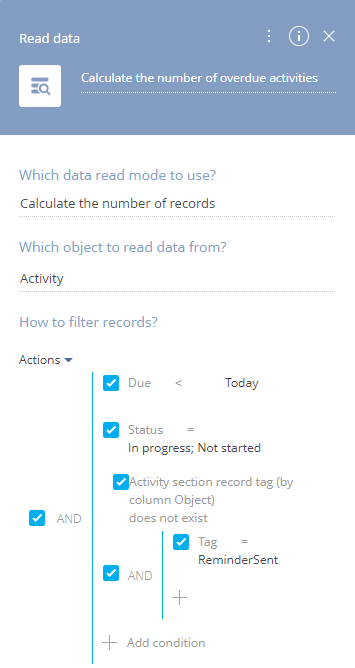
1.In the [Which data read mode to use?] field, select “Calculate the number of records”.
2.In the [Which object to read data from?] field, select “Activity”.
3.Set up the [How to filter records?] filter to include all overdue uncompleted activities, that have not been tagged with the “ReminderSent” tag:
a.To select overdue activities, set the filter by the [Due] column: “Due < Today”.
b.To select uncompleted activities, set the filter by the [Status] column: “Status = In progress; Not started”.
c.To filter activities that have not been tagged with the “ReminderSent” tag, set the filter by the records of a linked “Activity section record tag” object.
Note
To set a filter by the linked “Activity section record tag” object, click [+ Add condition], then click [+] next to [Activity] to select a linked object. Select “Activity section record tag” in the list and click [Select] (Fig. 10). Specify the tag by adding a subordinate filter by the [Tag] column: “Tag = ReminderSent”.
Fig. 10 Setting up filter by the linked “Activity section record tag” object
Properties of the “Number is 0” condition flow (Fig. 404):
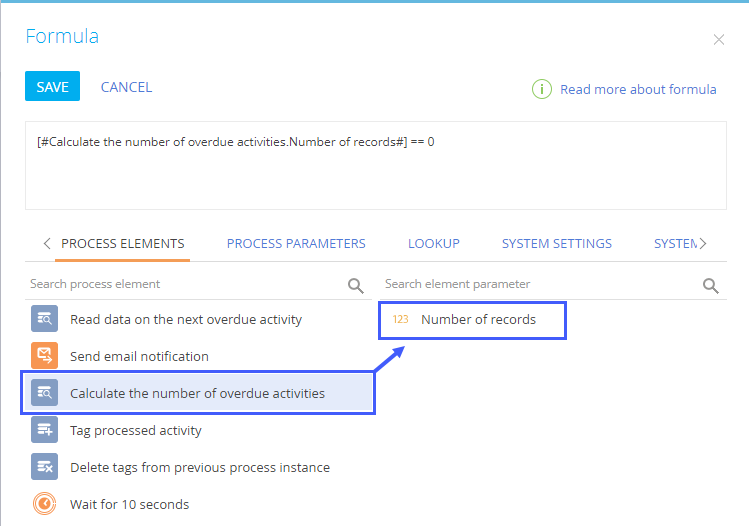
Fig. 11 Specifying formula for the “Number is 0” condition flow
1.In the [Condition to move down the flow] field, click  .
.
2.In the opened [Formula] window, click [Process elements] tab.
3.Select the [Calculate the number of overdue activities] in the left column.
4.Double-click the [Number of records] parameter in the right column. The corresponding variable will be added to the formula:
[#Calculate the number of overdue activities.Number of records#]
5.Modify the formula by adding the formula to look like this:
[#Calculate the number of overdue activities.Number of records#] == 0
6.Click [Save].
Properties of the “Read data on the next overdue activity” element (Fig. 404):
Fig. 12 The “Read data on the next overdue activity” element

1.In the [Which data read mode to use?] field, select “Read the first record in the selection”.
2.In the [Which object to rad data from?] field, select “Activity”.
3.In the [How to filter records?] area, set the same filter as you did for the “Calculate the number of overdue activities” element (step 4).
4.Leave the default value in the [How to sort records?] area
Properties of the “Send email notification” element (Fig. 404):
Fig. 13 The “Send email notification” [Send email] element
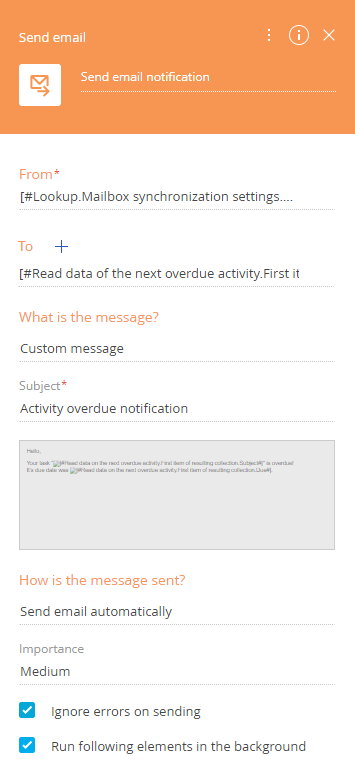
1.In the [From] field, select a mailbox to send notifications from.
2.In the [To] field, map the value to the [Id] parameter of the [Read data of the next overdue activity]:
Fig. 14 Mapping the email recipient parameter to a contact
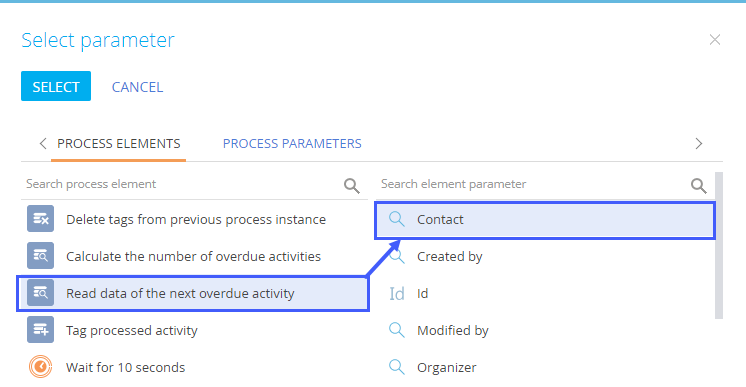
a.In the [To] field, click  .
.
b.In the menu that appears, select [Contact] > [Process parameter]. Parameter selection window opens.
c.Select the [Read data of the next overdue activity] in the left column.
d.Double-click the [Contact] parameter in the right column.
3.In the [What is the message?] field, select “Custom message” and populate the [Subject] field that appears below.
4.Set up the message template:
a.Click the gray bar below the subject field (marked with the  icon) to open your custom message in the template designer.
b.Drag&drop a text block to the message area and add your message text there.
c.To use parameter values in your message, place your cursor in the text block of your message and click  on the toolbar (Fig. 15). In the opened parameter selection window, select an element and its parameter to add to the email text.
Note
More information about sending custom messages as part of a business process flow is available in a separate article.
Fig. 15 Adding parameter values to a an email text
Properties of the “Tag processed activity” element (Fig. 404), which will tag processed activities with the “ReminderSent” tag:
Fig. 16 The “Tag processed activity” [Add data] element
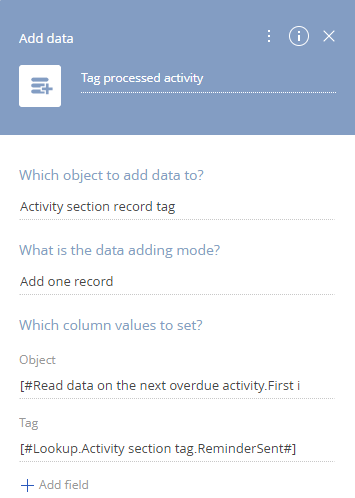
1.In the [Which object to add data to?] field, select the “Activity section record tag” object.
2.In the [What is the data adding mode?] field, select “Add one record”.
3.In the [Which column values to set?] block, click “+”. [Select columns] window opens.
4.Select chekboxes next to the [Object] and [Tag] columns. The [Object] and [Tag] fields will be added to the setup area.
5.Map the [Object] field to the [Id] parameter of the [Read data of the next overdue activity] element:
a.In the [Object] field, click  .
.
b.In the menu that appears, select [Process parameter]. Parameter selection window opens.
c.Select the [Read data of the next overdue activity] in the left column.
d.Double-click the [Id] parameter in the right column.
6.In the [Tag] field, specify the tag that must be set for processed records:
a.In the [Tag] field, click  .
.
b.In the menu that appears, select [Lookup value]. Lookup value selection window opens.
c.Select the [ReminderSent] tag.
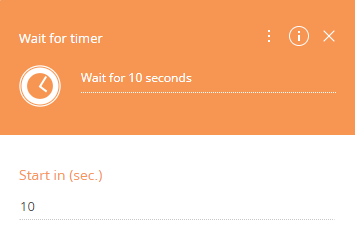
Set up the “Wait for 10 seconds” timer element (Fig. 404), which will set a short pause between the process cycles. Specify the pause duration in seconds in the [Start in (sec.)] field of the element setup area.
Fig. 17 The “Wait for 10 seconds” [Wait for timer] element
As a result:
-
The process will run automatically, every Monday at 8:00 AM.
-
It will delete the “ReminderSent” tag from all activities then calculate the number of uncompleted activities whose due date is earlier than today and that are not tagged with the “ReminderSent” tag.
-
If at least one such activity is found, the process will read its data, send an email to the activity assignee and tag it with the “ReminderSent” tag.
-
Then the process will pause for 10 seconds before calculating the number of overdue unprocessed (untagged) activities again.
-
If no unprocessed activities have been found, the process will end.
See also
•[Delete data] process element