


Binding data to package
Glossary Item Box
Introduction
Once the Section Wizard automatically attaches the data of a custom section to the custom package. However, for the section to show up in a workplace and with demo records, you need to attach additional data.
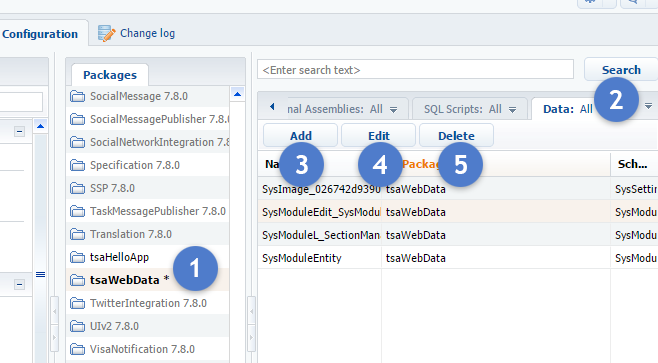
The data is attached in the [Configuration] section. To view the data attached to the package, select the necessary package (Fig. 1,1) and select the [Data] tab (2). You can add (3), edit (4) and delete (5) the data bound to package.
Fig. 1. The [Data] tab of the [Configuration] section
The following data attachment examples are based on the standard approach to creating user sections, described in the “Developing an advanced Marketplace application” article.
Attaching sections to a workplace
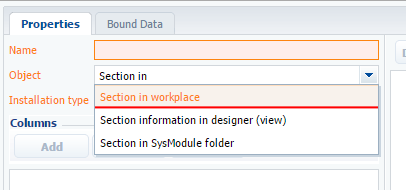
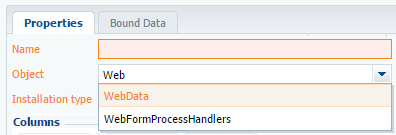
Bind the data of the [Section in workplace] for the section to show up in the [Marketing] workplace. Click [Add], and select the "Section in the workplace” value in the [Object] field of the package data attachment window (Fig 2).
Fig. 2. Selecting an object for data attachment
Click [Yes] in the pop-up window.
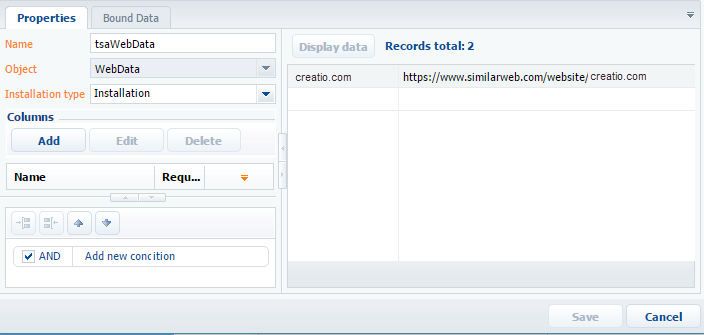
Select the installation type. The universal option is "Installation". If you select "Installation", the data will be attached after the package installation and with subsequent updates.
Click [Display data] (Fig. 3, 1), to view information about all sections and workplaces currently in development.
Fig. 3. Displaying and filtering attached data
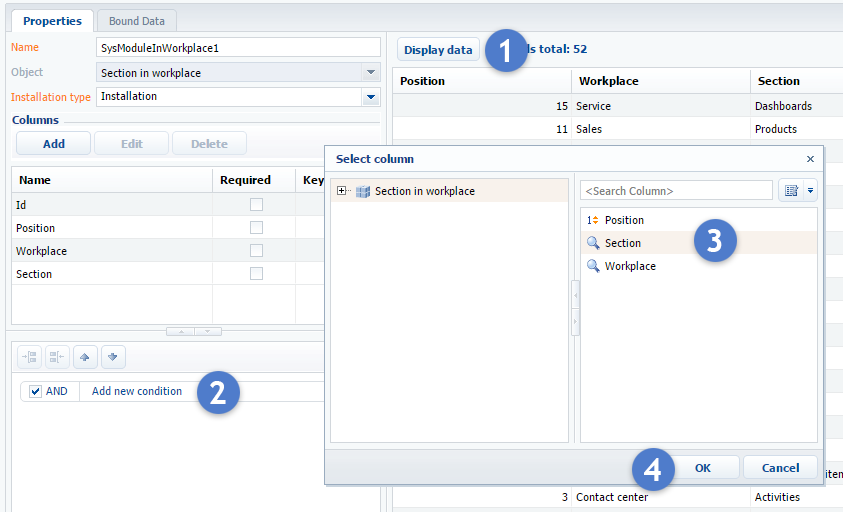
Prior to attaching the data to the created section, you need apply a filter. In the filter area, add a new condition (Fig. 3, 2), select a column to filter by (3) and click [OK] (4).
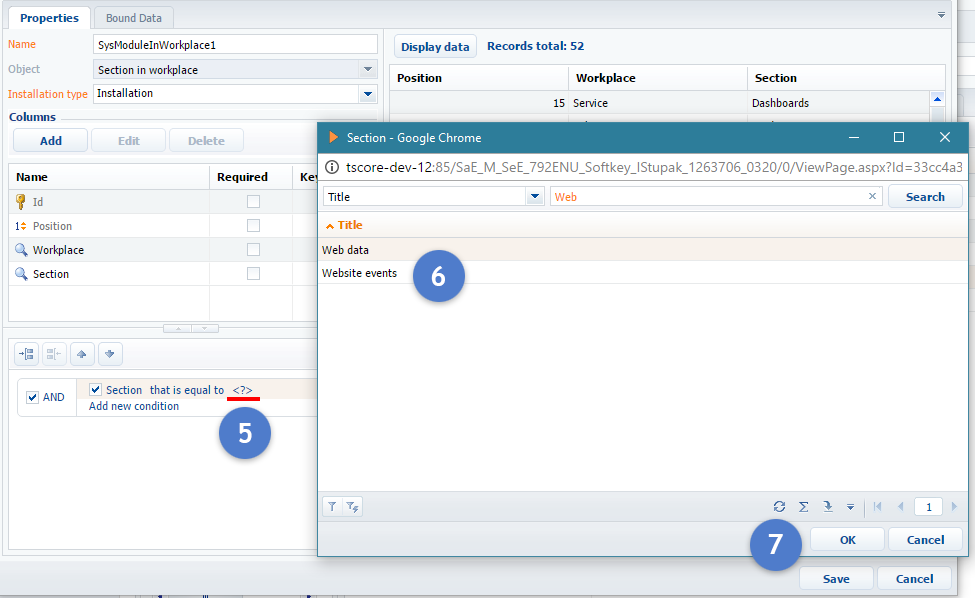
Build the second part of the condition. Click on the condition sign (Fig. 4, 5), select the name of the section (6), and click [OK] (7).
Fig. 4 Constructing a data filtering condition
The filter for selecting the created section is built as the result (Fig. 5, 1).
Fig. 5. Fig. 4 Constructing a data filtering condition
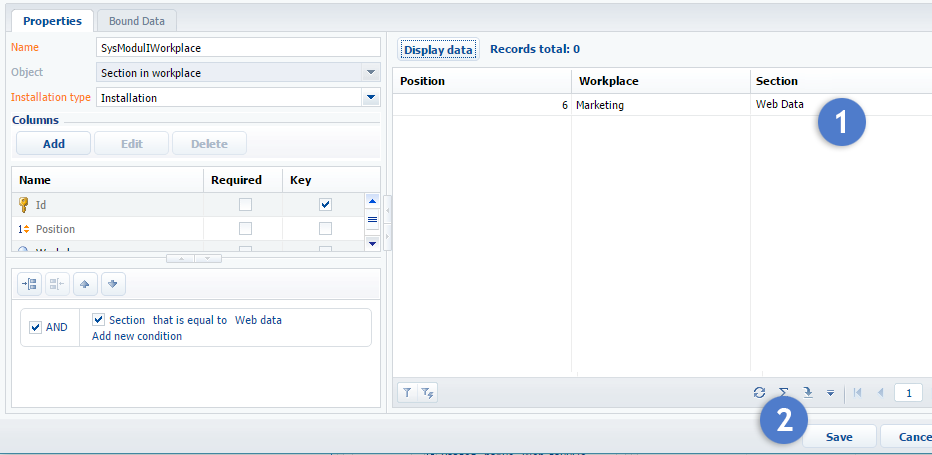
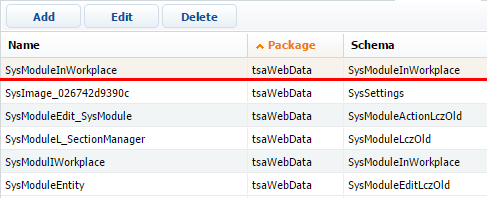
A new entry will show up in the [Configuration] section of the [Data] tab (Fig. 6) after saving the attached data (Fig. 5, 2).
Fig. 6. Attached data of the [Section in workplace] schema
Section data attachment
To attach the demo content of the section (see Fig. 7), you must first determine the title of the main section object schema (see Fig. 8).
Fig. 7. Section demo content
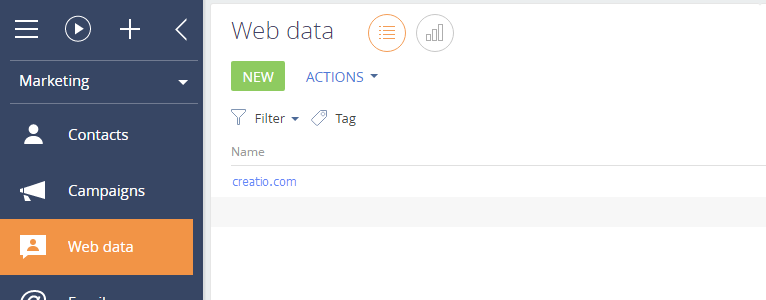
Fig. 8. Section object schema header
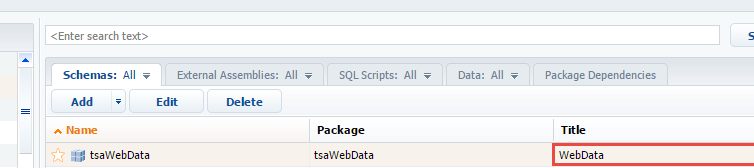
This schema is created automatically by the Section Wizard and the title of the schema should match the section header.
Click [Add], and select the "Section in the workplace” value in the [Object] field of the package data attachment window (Fig 9).
Fig. 9. Selecting an object for data attachment
Click [Yes] in the pop-up window.
Select the installation type “Installation”. Clicking the [Display data] button to view the attached data (Fig. 10). Use filter to select specific records.
Fig. 10. Connected demo data
Click the [Save] button to save and close the data attachment window.