Use CRM automation in the Creatio.ai add-in for Outlook
Use the CRM automation features of the Creatio.ai add-in for Outlook to see the CRM context of an email, file it to Creatio, and create or update records, all without leaving Outlook. These features work automatically as you read or write an email, resolving the sender, showing CRM context, and offering actions, without any chat or prompts involved.
This functionality is available for Creatio 8.3.2 and later. It is currently available to a limited number of clients, with general availability planned in the near future.
See the CRM context of an email
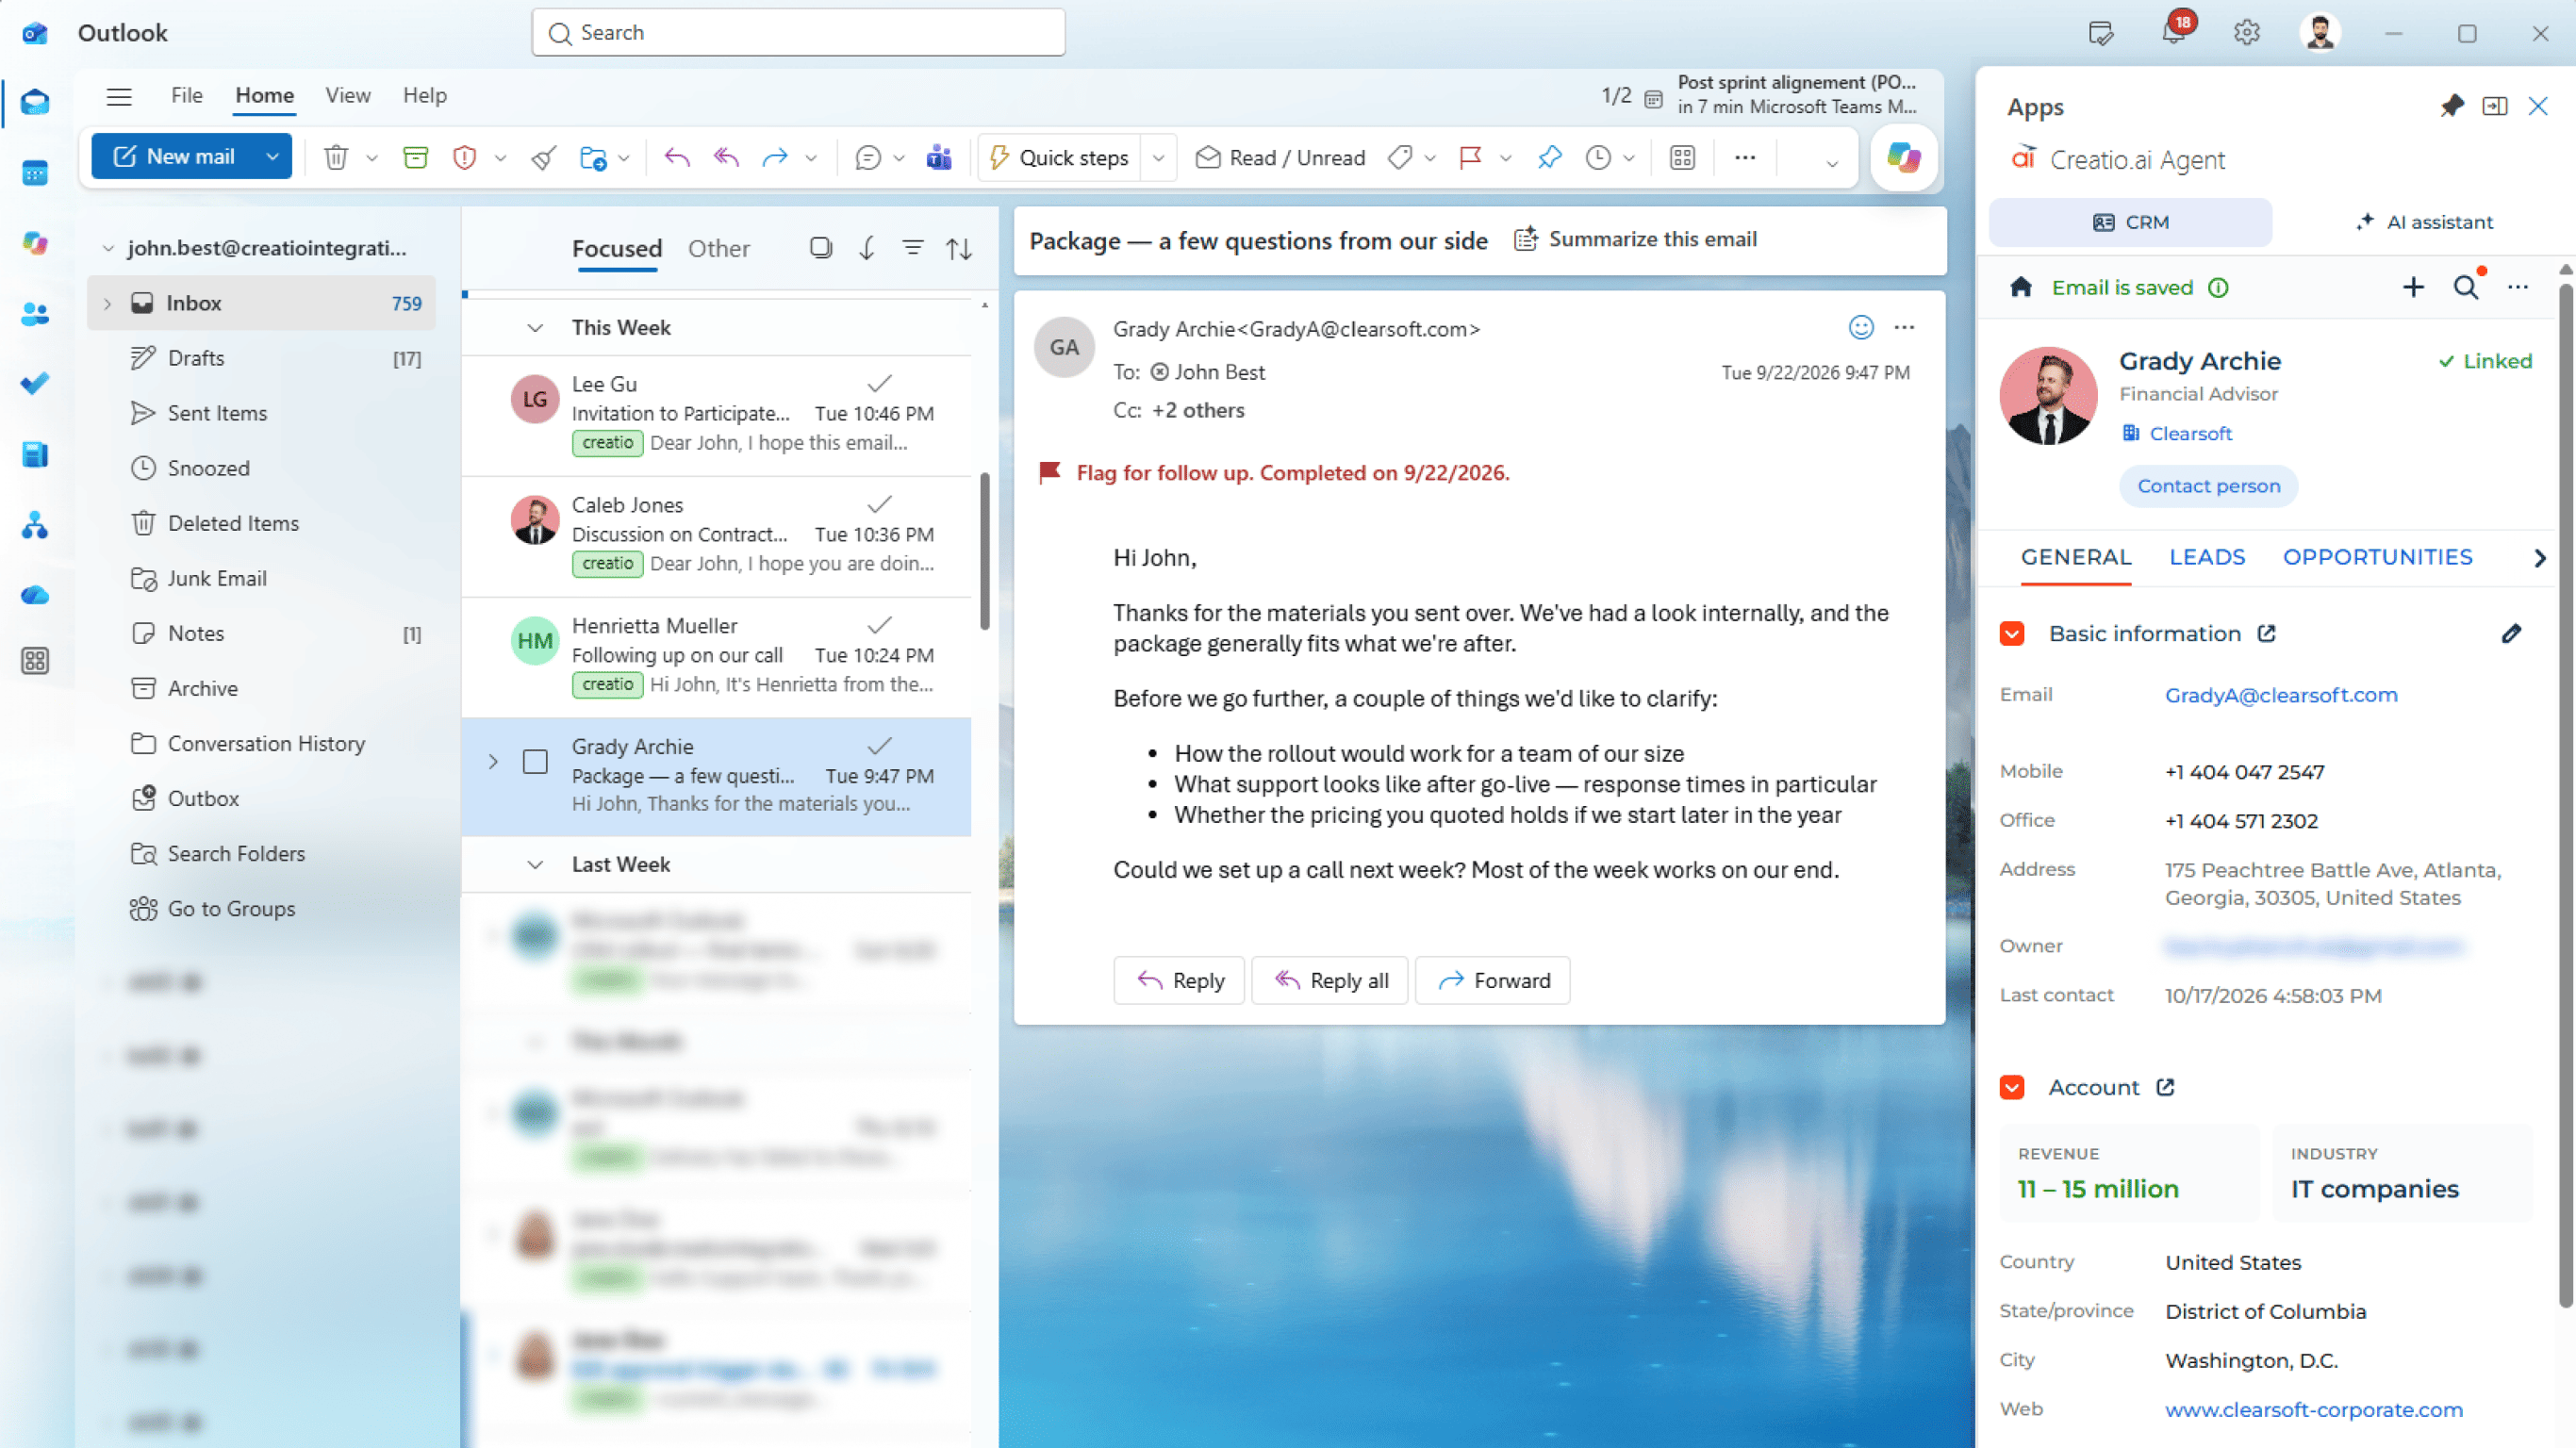
-
Open an email in Outlook, then sign in to the add-in with your Creatio credentials, if you have not already.
-
Let the add-in resolve the person the email is about.
In your inbox, the add-in looks up the sender's address. In Sent Items or in a draft, the From address is your own, so the add-in offers you the people in To and Cc instead. If the sender is a colleague, the add-in ignores them the same way and works with the next participant instead; everything downstream, including the panel's contact resolution and the automatic background search, runs against that person. Open the one the email is about, normally the first name in To, and the panel is built around them.
-
Check the panel to see who the add-in found.
What it found
What you get
The person
Their card: name, job title, photo, and their primary account, plus the CRM context below it
Several people with that email address
The candidates, with a count. Choose the right one and the panel continues as normal; you can go back to the list
A colleague
The panel says so and hands you the people in To and Cc. Open the right one to see their CRM information and to give the email its account. This is also what you get on an email you sent yourself
Nobody
The add-in looks for their company instead (see the next step). If neither a person nor an account is found, you see an empty state that offers to create a record so you can save the email
Fig. 2 Empty state, contact and account not resolved 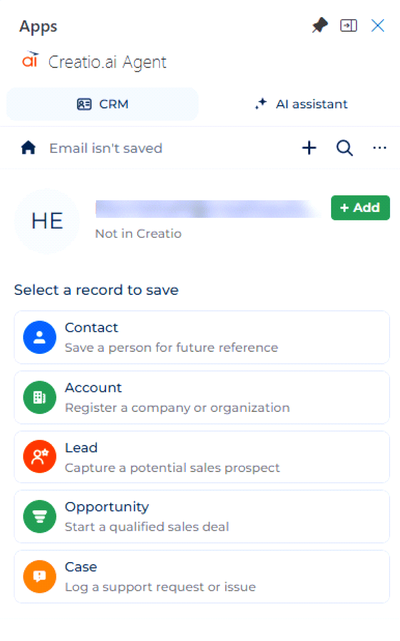
-
If no contact matches, check the account found from the sender's domain.
The add-in takes the company name out of the email address (
jane@acme.netgivesacme) and looks for accounts whose website contains it. If the sender is a colleague, this runs against the next participant instead (see the previous step).What it found
What you see
One account at the sender's own domain
That account. You still need to create a contact for the sender before you can file the email to it
Several at the same domain
A list to pick from, matching this domain
Only accounts sharing the company name, on a different domain
A list to pick from, matching this company name
Nothing
The usual create flow
The add-in never picks for you unless the domains match exactly. An account at
acme.comis offered to a sender atacme.net, but you confirm it, since the same name on a different domain can be a different company. Senders on public email domains, such asgmail.comoroutlook.com, are still matched to a contact, but their domain is never used to find an account. -
Review what is open with the contact.
Fig. 3 Contact card, contact resolved 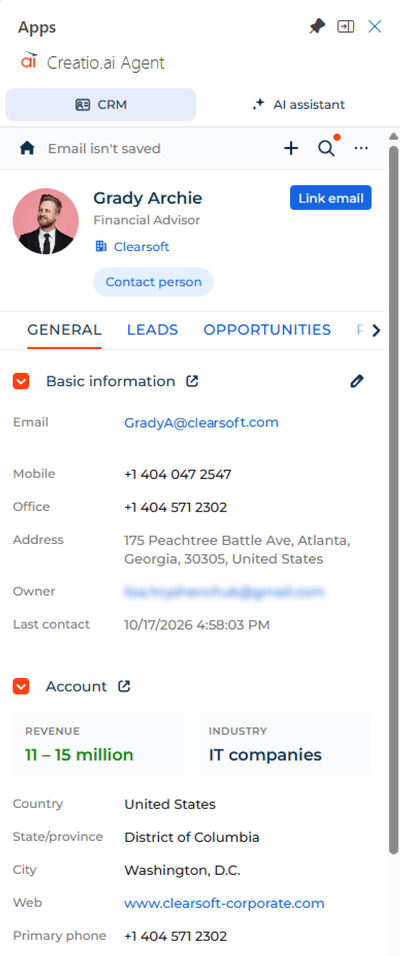
The panel shows their email, phone, mobile, address, owner, contact type, tags, and when you last had contact, along with their account and their leads, opportunities, and cases. Each related-record list is sorted with the newest record first, has a Show closed checkbox, off by default, and loads a page at a time with Load more.
-
Check who else is on the email.
Everyone in To and Cc is listed too, each already matched to a contact or flagged as new. Colleagues are deliberately left out of this list, since there is no CRM context to show for them, though saving the email still links it to them.
-
Correct any details that are wrong.
Email, mobile, phone, job title, contact type, the photo, and the account the person belongs to can all be corrected right in the panel. The account field is a searchable picker, so you can point the contact at the right account or clear it. Owner and address are shown but read-only, and the account's own details and related records cannot be edited here.
-
Click ⋯ → Refresh to reload the panel with the latest data. (Optional)
Use this if someone changed the record in Creatio while you were reading and the panel looks out of date.
As a result, you can see the CRM information for the person an email is about, their open records, and everyone else on the email, all without leaving Outlook. If neither a contact nor an account was found, you can create a record straight from the empty state to save the email.
Save an inbox email to Creatio
-
Open the email and let the add-in resolve the sender. Read more >>>
-
Click Link email on the sender's contact card to file the email against them and their account.
You can also go deeper: open a related lead, opportunity, or case, or another account, and use Link email there instead.
-
Check the status at the top of the panel to confirm the email is saved.
The status reads Email isn't saved, or Email is saved with the time it was filed. Hover over a saved status for a tooltip with the exact date and time it was linked, a link to the email in Creatio, and the records it carries.
Fig. 4 Email is saved tooltip 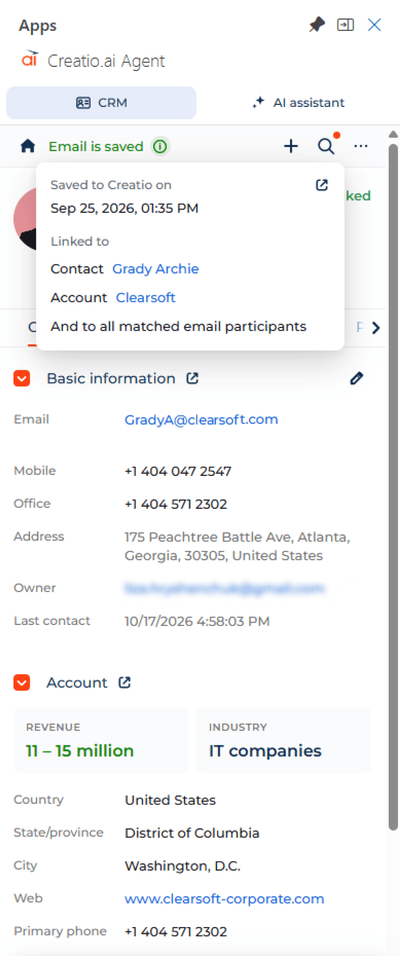
If the sender is not resolved, you can instead:
Situation
What to do
No contact yet
Create a contact. Read more >>>
The person exists in Creatio under another address
Search for the existing contact and save the email from that card; the new address is added to the contact you selected
The email is about a new deal or case
Create a new lead, opportunity, or case; a contact for the sender is created in the background
As a result, the email is saved to Creatio and linked to the sender's contact and account, to matched participants' contacts, and to the related record you specified, if any. A saved email is tagged with a Creatio label that Outlook shows in the message list, so you can tell what is filed without opening each message.
Compose and send email
-
Start a new message, a reply, or a forward, then select the Save email to Creatio when sent checkbox.
Fig. 5 Save email to Creatio when sent checkbox 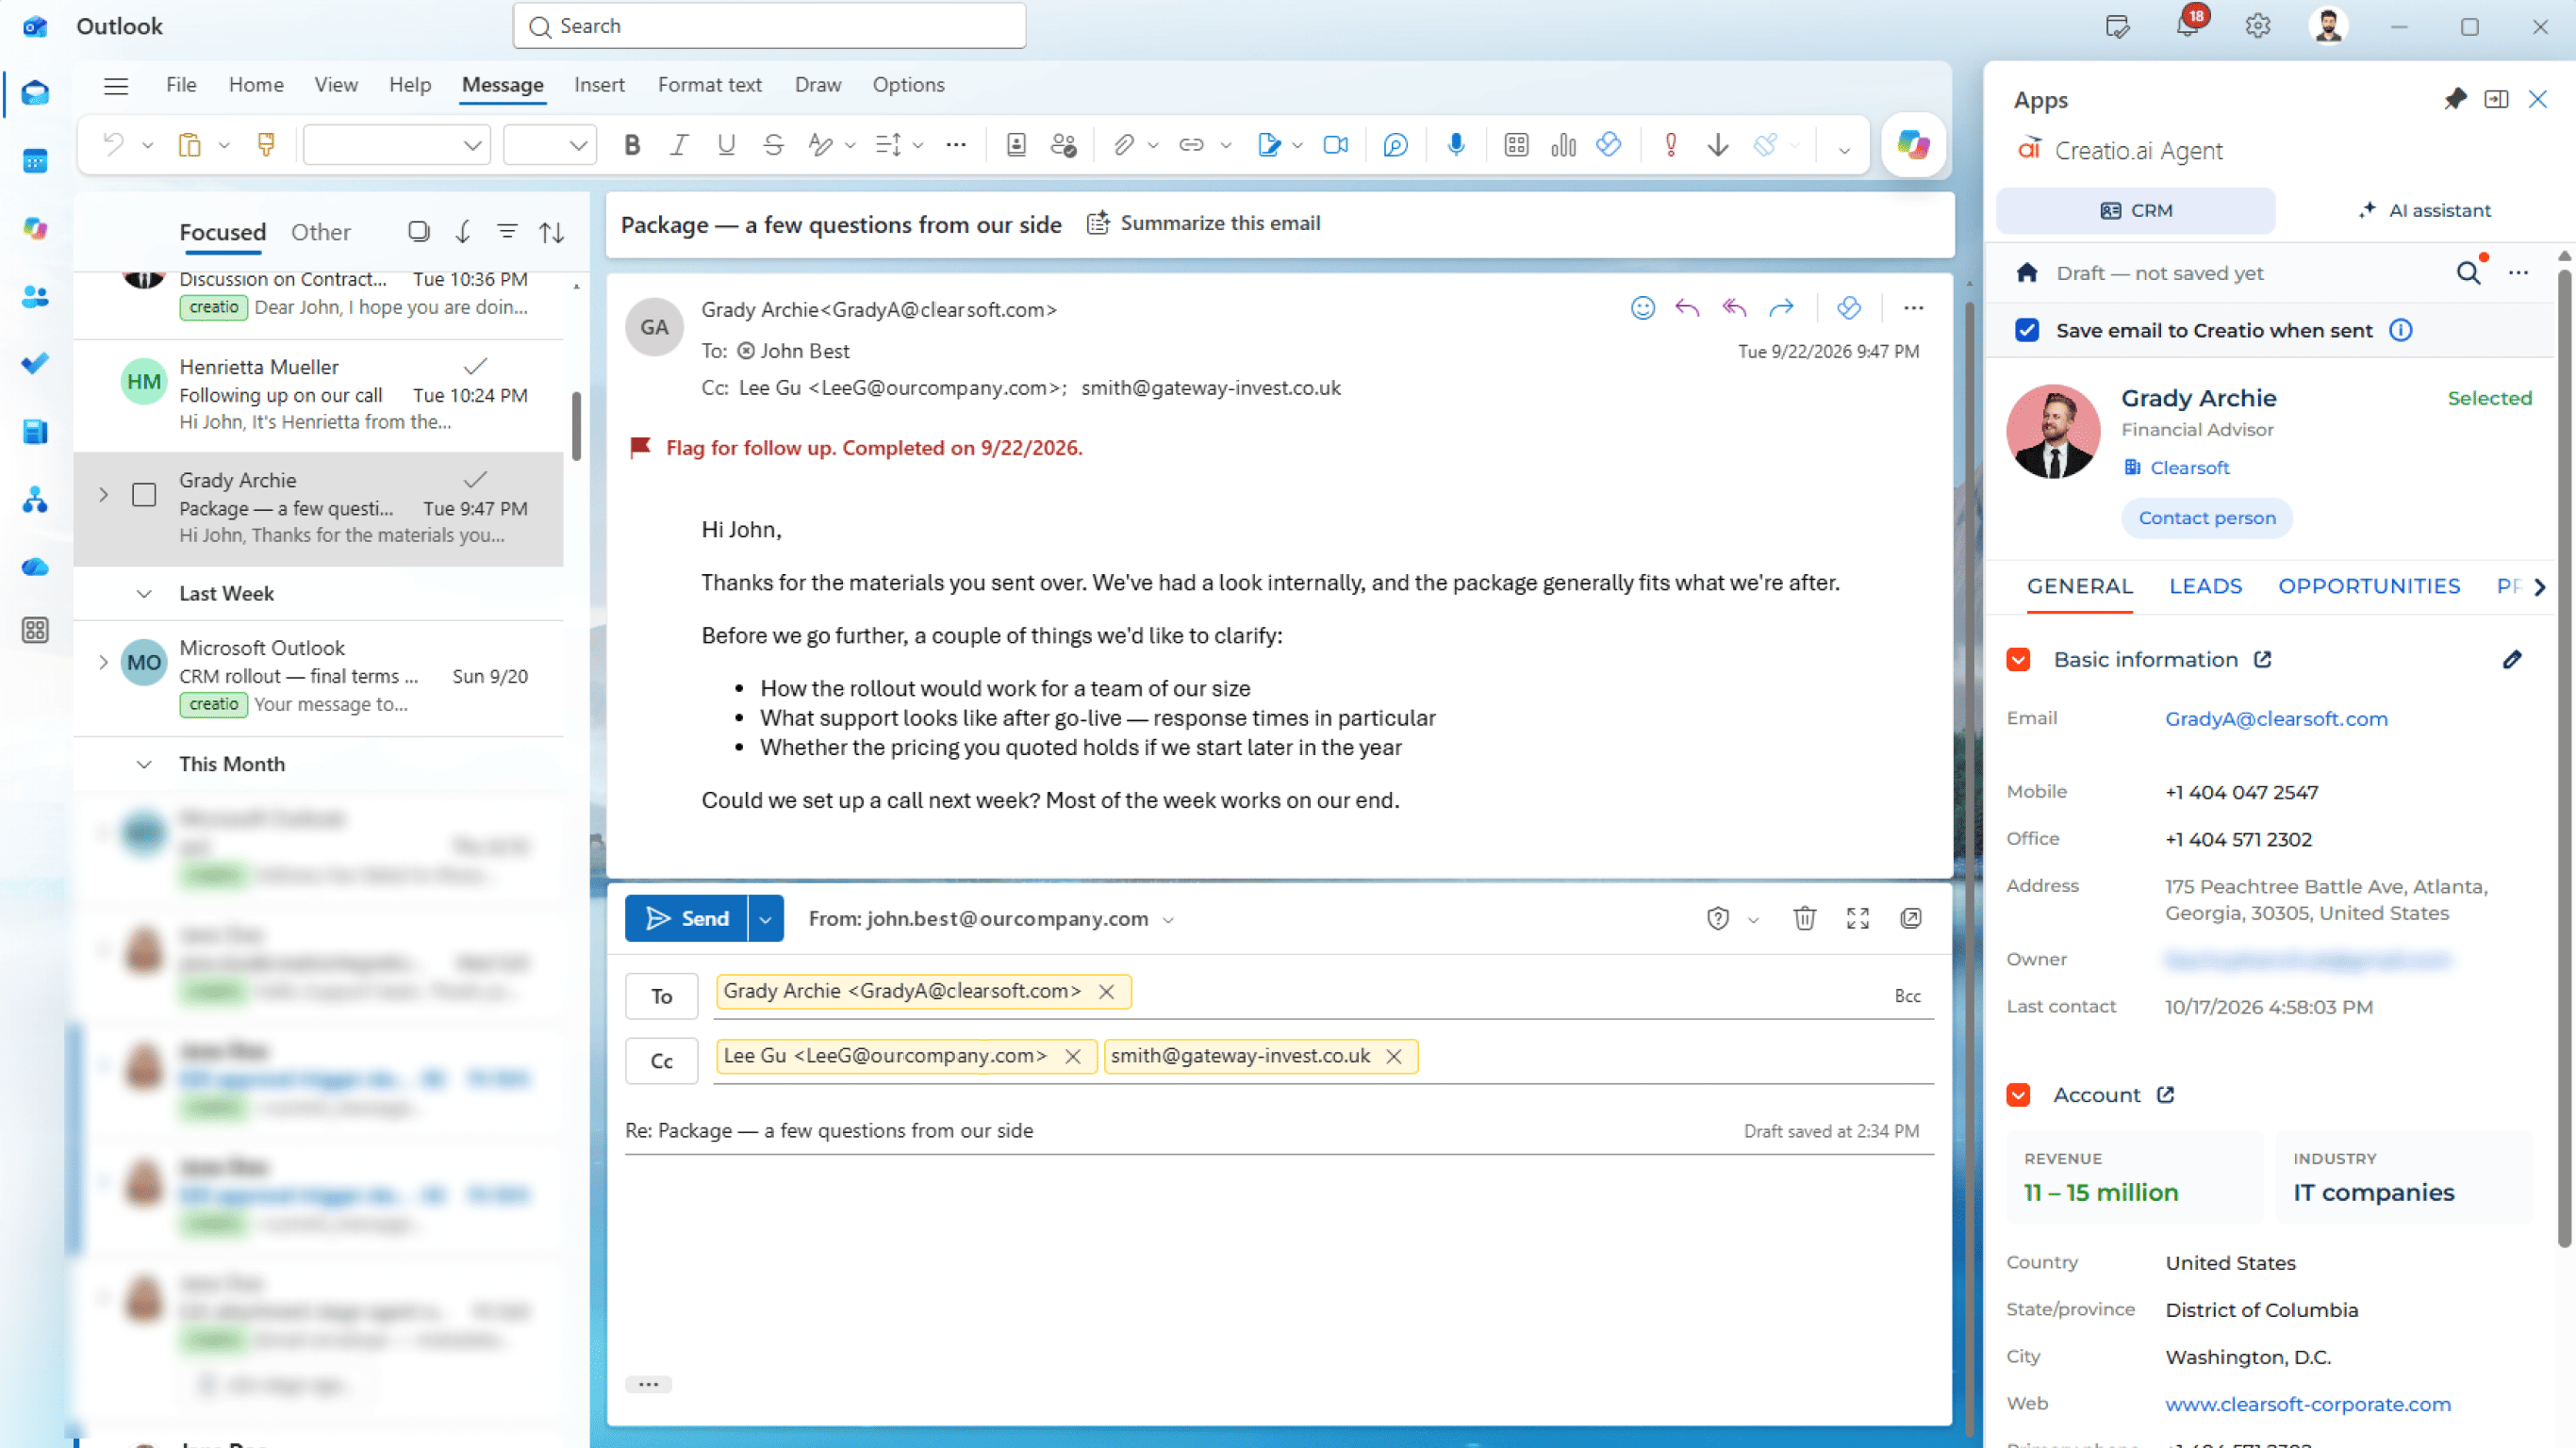
While you are writing, there is no email to attach a record to yet, so the panel offers this checkbox instead of Link email: the checkbox decides whether the message gets saved, and Select on a card decides what it carries. Leave it selected and the email is filed the moment you send it. A reply inherits what the original inbox email was filed against, so the usual job here is just to leave the checkbox selected and send.
-
Click the ⓘ next to the checkbox to see what the email is linked to.
Fig. 6 Save on Send info popup 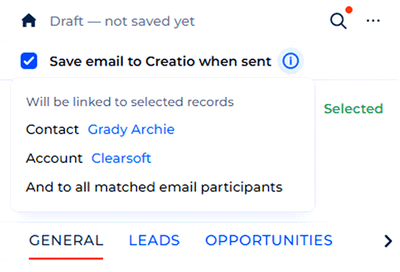
This opens a summary of the records the email carries, plus a note if it also links to all matched email participants.
-
Open a contact, account, lead, opportunity, or case in the panel and click Select to change what the email carries. (Optional)
As a result, the email is filed to Creatio as soon as you send it, carrying whatever the panel resolved or whatever you selected while writing. The checkbox is disabled when everyone on the email is a colleague and nothing is picked. If a filing fails after sending, the panel shows a banner that reads 1 email is not saved to Creatio and lists the affected subjects and send times; open each one from Sent Items and save it by hand.
Link the email to a related record
-
Open the sender's Leads, Opportunities, or Cases list, or find the record if it is not there. Read more >>>
Fig. 7 Related records, Opportunities list 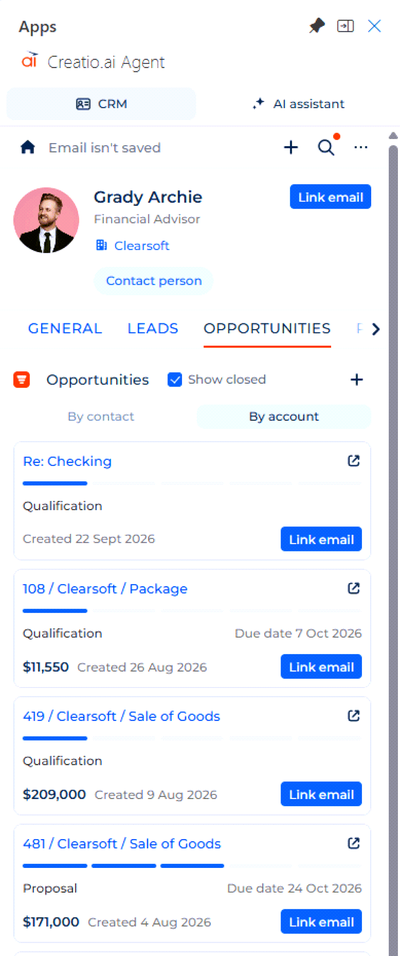
-
Click Link email on the record to file the email against it.
If the email was not saved yet, this saves it at the same time.
-
Click Unlink email next to a linked record in the list to release it, if you need to change which record the email carries. (Optional)
Fig. 8 Related records, Cases list with a linked case 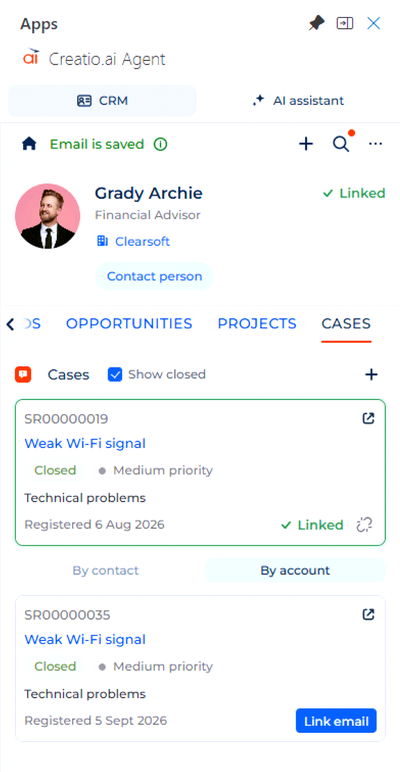
An email carries only one record of each kind: one lead, one opportunity, and one case.
As a result, the email is linked to the record you chose, in addition to the sender's contact and account.
Add people from the email as contacts
-
Find the sender or a To/Cc participant the add-in did not recognize, then click the add icon on their row to create their contact.
-
Add the missing people before you save the email, so a single save covers everyone. (Optional)
A saved email links only to participants already matched to a contact at that moment. Adding someone afterward does not link them retroactively; open their own card and use Link email to add them.
As a result, the person becomes a contact in Creatio, and their CRM context loads like any recognized contact. Adding the sender also files the email in the same step, since they are the person it belongs to. Adding someone from a To/Cc row creates the contact only; open their own card and use Link email to file the email to them as well.
Create a lead, opportunity, or case from the email
-
Click Create in the panel, then pick what the email has turned into: Lead, Opportunity, Case, or a new Account.
Fig. 9 Create dropdown menu 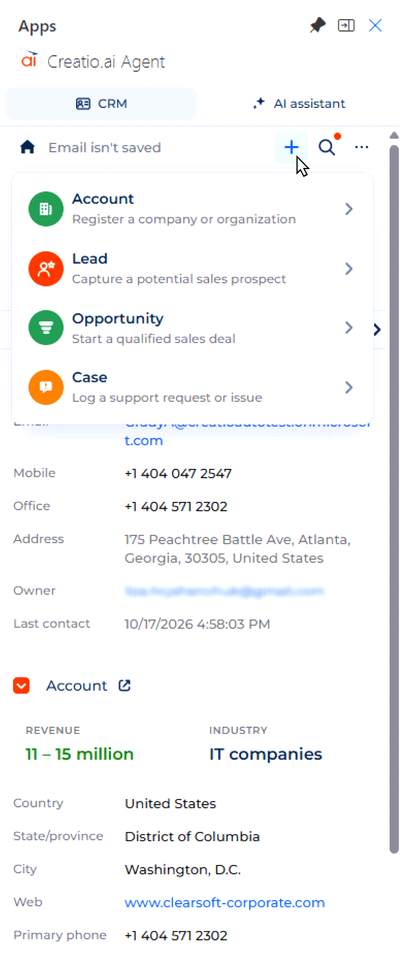
-
Review the pre-filled form.
Fig. 10 New opportunity popup, pre-filled form 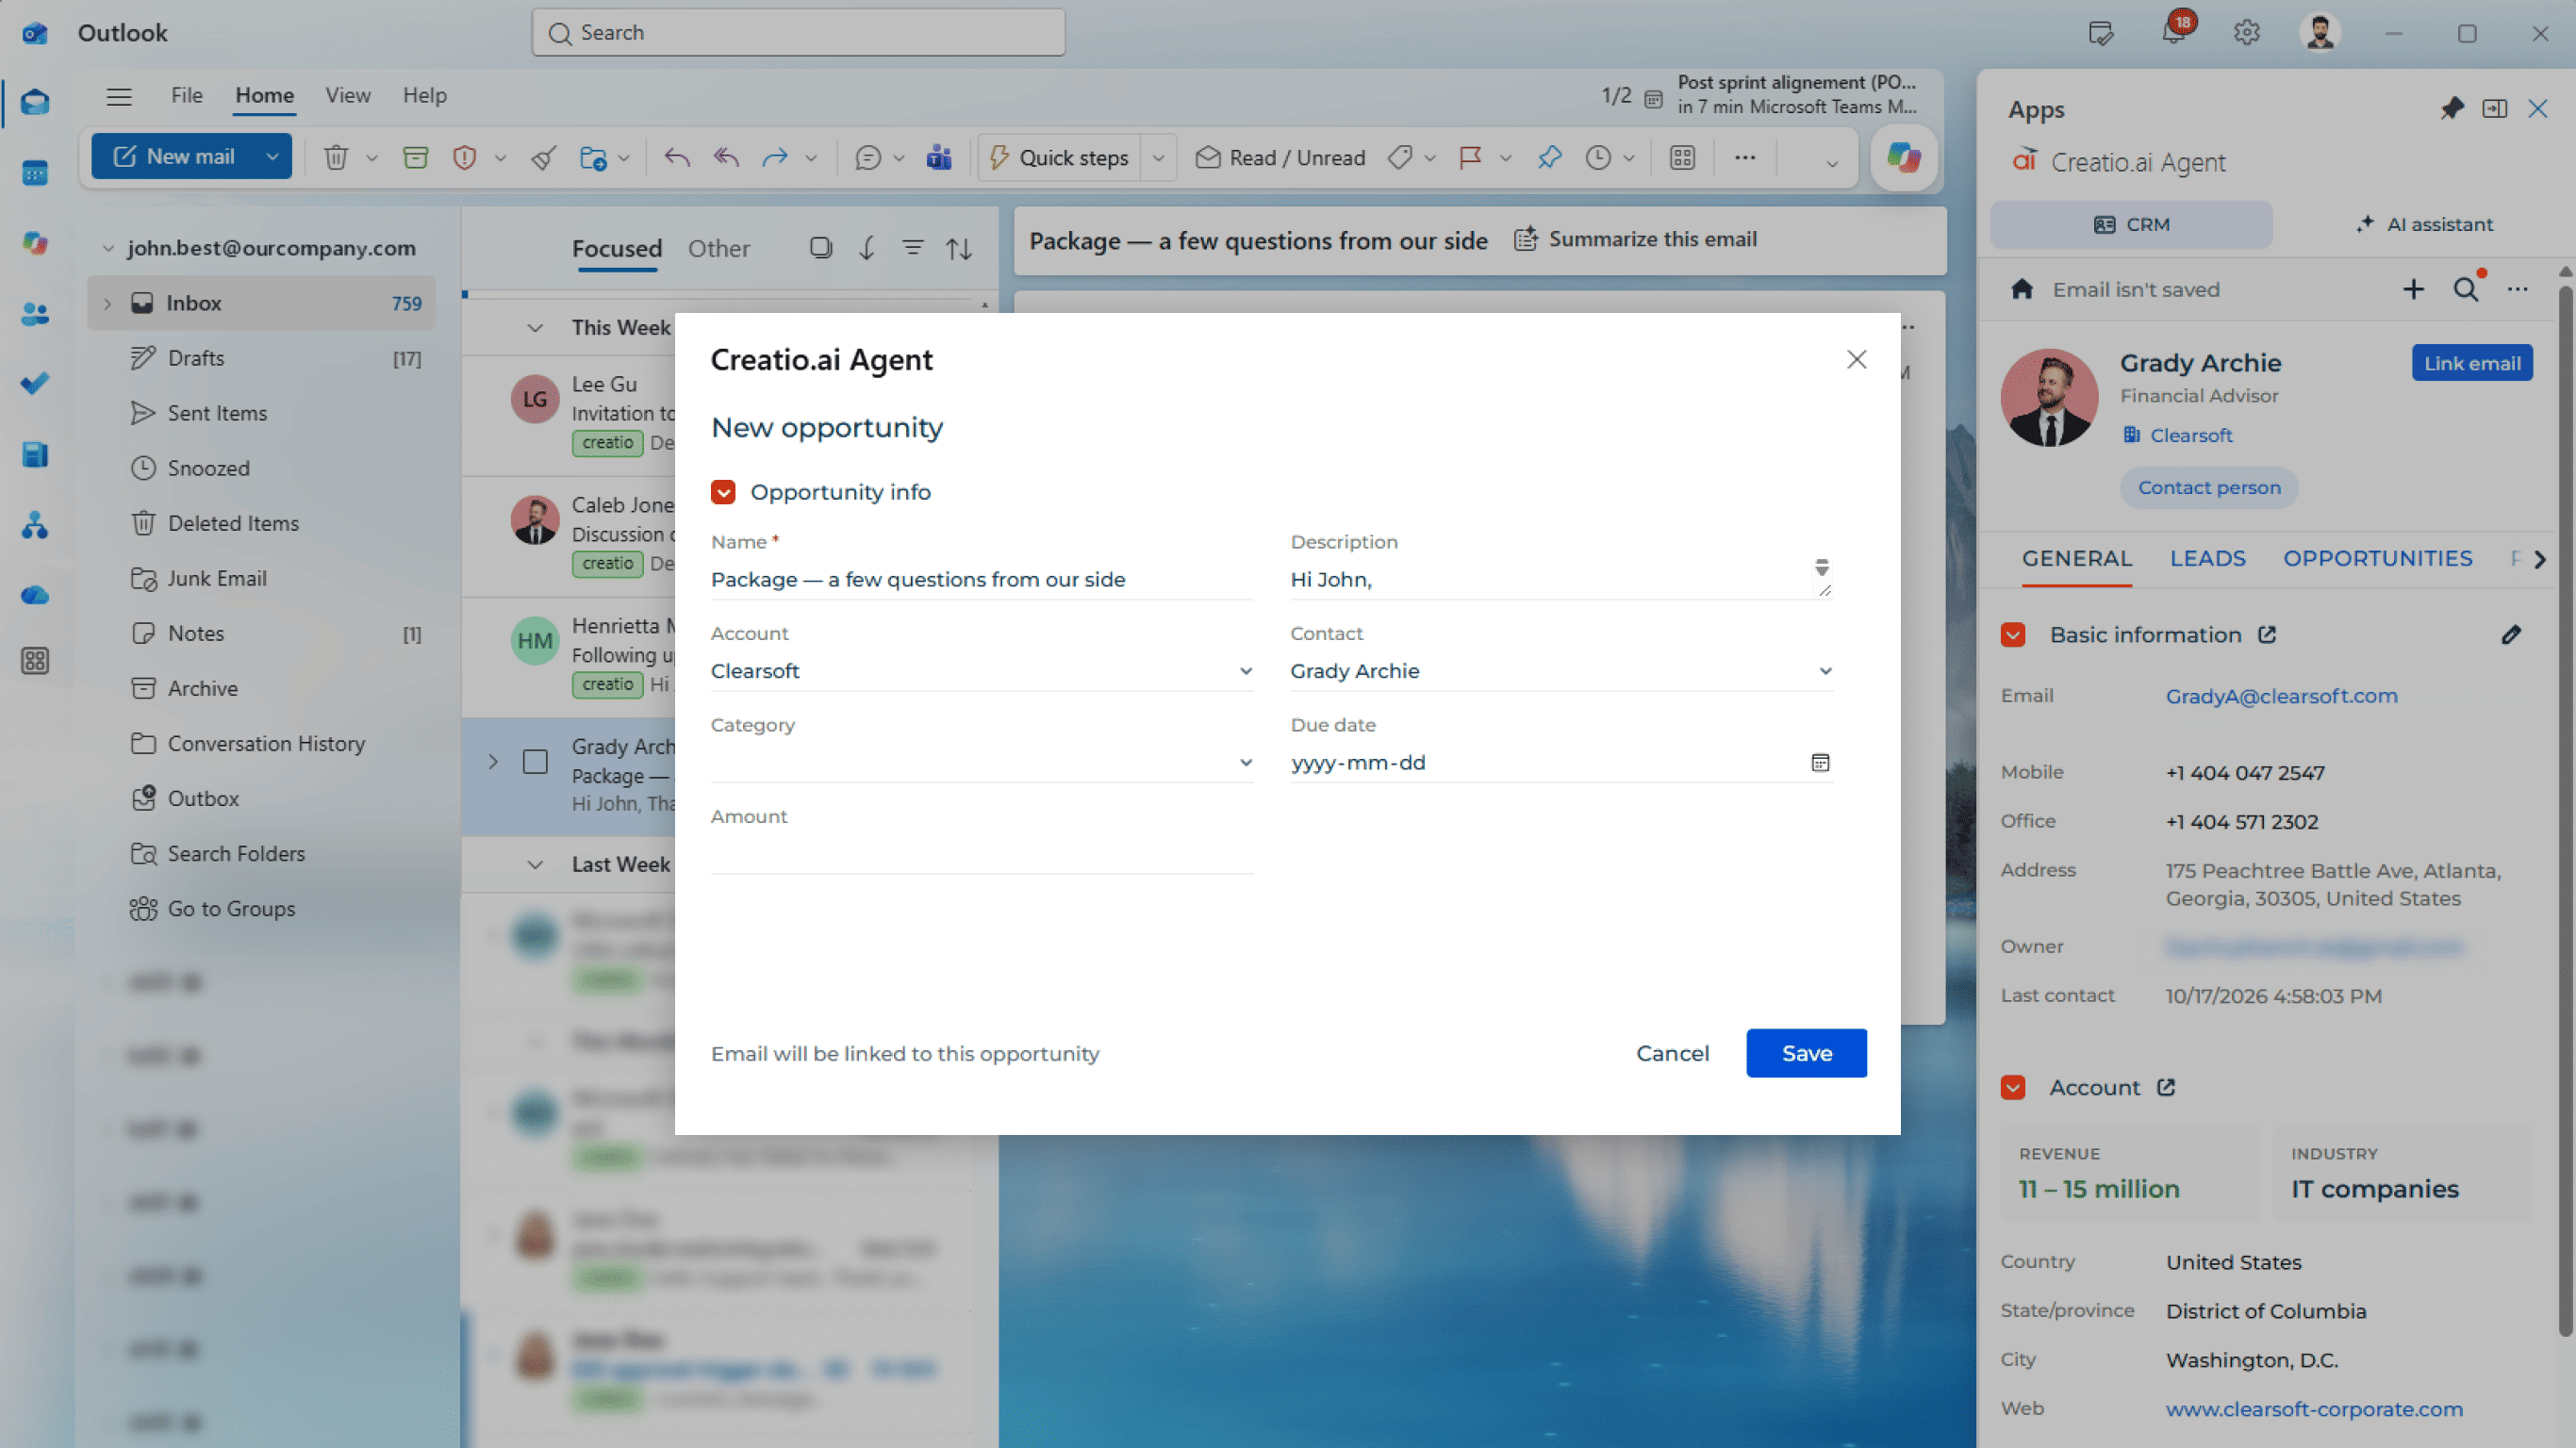
The add-in fills in the sender, the subject, the company it read from the message body, and the person and account already on screen.
-
Click Save to create the record and file the email in the same step.
You get a confirmation with a link into Creatio, and the new record appears in the panel.
As a result, the record is created and the email is filed to it. If the sender was not in Creatio yet, their contact is created in the background, and, for a company email address, their account is created or matched too; senders on free email domains get a contact only, with no account. If the record is created but the filing does not go through, you are told so directly; file the email afterward with Link email.
Find the right record, account, or contact
-
Open an email and check the search icon for a mark to see whether the add-in already found something.
The add-in searches Creatio for anything connected to the email as soon as you open it: contacts, accounts, leads, opportunities, and cases. If the sender is a colleague, this search runs around the next participant instead. Read more >>>
-
Click the search icon to see those results, or clear the box and type your own search terms to search across all five record types at once, including colleagues.
Results are not one combined list: each of the five record types appears as its own group, with a count of how many were found.
Fig. 11 Search results 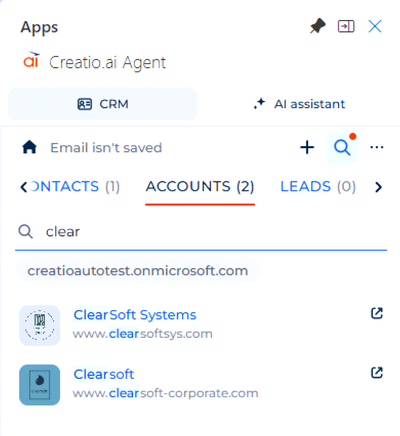
Leave the box empty to search around the sender again; clear your own text to go back to it. If the add-in has already resolved a contact for the email, a search result opens as a card, but you can file the email only to a contact, account, lead, opportunity, or case that was an actual participant, or their account; other results are for reference only. If no contact was resolved, you can file the email to any result you open.
-
Open a result to view it as a card in the panel.
Fig. 12 Search result opened as a record card 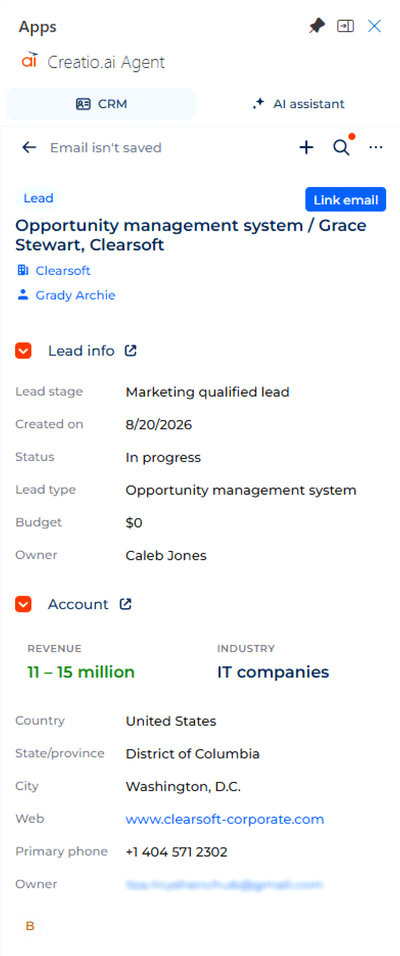
From there, you can read the record or, subject to the participant rule above, file the current email to it.
As a result, you find the record you need without leaving Outlook, and, subject to the participant rule, can file the current email to it directly from the search result.