Add a custom channel provider
Add a custom Test channel provider to Creatio on-site.
1. Add a custom channel provider to Creatio
- Click
 to open the System Designer.
 - Go to the System setup block → Lookups.
- Open the Channel provider lookup and add the "Test" value.
2. Set up storage of custom channel data
-
Create a database table and define its structure. The table structure depends on the provider and contains data to send and receive messages. Generally, providers use an authorization token to send messages. To do this, execute the SQL query below.
SQL query that creates the
[TestMsgSettings]table- MSSQL
- PostgreSQL
IF OBJECT_ID('TestMsgSettings') IS NULL
    BEGIN
    CREATE TABLE TestMsgSettings(
        Id uniqueidentifier NOT NULL DEFAULT (newid()),
        Token nvarchar(250) NOT NULL DEFAULT (''),
        UserName nvarchar(250) NOT NULL DEFAULT (''),
        CONSTRAINT PK_TestMsgSettings_Id PRIMARY KEY CLUSTERED (Id)
    )
END
CREATE TABLE IF NOT EXISTS public."TestMsgSettings" (
"Id" uuid NOT NULL DEFAULT uuid_generate_v4(),
"Token" character varying(250) COLLATE pg_catalog."default" NOT NULL DEFAULT ''::character varying,
"UserName" character varying(250) COLLATE pg_catalog."default" NOT NULL DEFAULT ''::character varying,
CONSTRAINT "PK_TestMsgSettings_Id" PRIMARY KEY ("Id")
);[TestMsgSettings]is a table that stores the custom channel data. Name the table based on the[SomeChannelProviderNameMsgSettings]template, whereSomeChannelProviderNameis the channel provider name. -
Register the custom channel in the database. To do this, add a record to the
[Channel]table. View the fields to fill out in the table below.[Channel]table fieldsField
Description
[Name]The channel name.
[ProviderId]The custom provider ID.
[MsgSettingsId]The record ID in the
[TestMsgSettings]table.[Source]The channel ID in the messenger, such as the Facebook page ID or Telegram client ID. Lets you identify the recipient by a messenger message.
3. Create a web service that receives messages
-
Create a Source code schema.
-
Open the Configuration section and select a custom package to add the schema.
-
Click Add → Source code on the section list toolbar.

-
Fill out the schema properties in the Source Code Designer.
- Set Code to "UsrTestOmnichannelMessagingService."
- Set Title to "TestOmnichannelMessagingService."
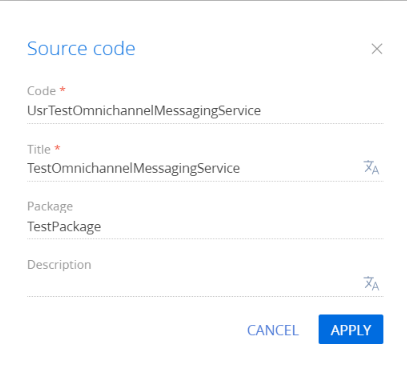
Click Apply to apply the changes.
-
-
Create a web service class.
- Go to the Schema Designer and add the
Terrasoft.Configuration.Omnichannel.Messagingnamespace. - Use the
usingdirective to import the namespaces whose data types are utilized in the class. - Add a class name to match the schema name (the Code property).
- Specify the
OmnichannelMessagingServiceclass that contains the basic methods as a parent class. - Add the
[ServiceContract]and[AspNetCompatibilityRequirements(RequirementsMode = AspNetCompatibilityRequirementsMode.Required)]attributes to the class.
- Go to the Schema Designer and add the
-
Implement a method (i. e., endpoint) of the web service class. To do this, add the
public void ReceiveMessage(TestIncomingMessage message)method to the class in the Source Code Designer. The messenger sends a message to thereceiveendpoint.View the source code of the
TestOmnichannelMessagingServicecustom web service below.TestOmnichannelMessagingServicenamespace Terrasoft.Configuration.Omnichannel.Messaging
{
using System;
using System.ServiceModel;
using System.ServiceModel.Activation;
using System.ServiceModel.Web;
using Terrasoft.Common;
using Terrasoft.Core;
using Terrasoft.Core.DB;
using Terrasoft.Web.Common.ServiceRouting;
#region Class: TestOmnichannelMessagingService
/* The service sends and receives messages from the messaging integration API. */
[ServiceContract]
[AspNetCompatibilityRequirements(RequirementsMode = AspNetCompatibilityRequirementsMode.Required)]
[DefaultServiceRoute]
public class TestOmnichannelMessagingService : OmnichannelMessagingService
{
#region Constructors: Public
public TestOmnichannelMessagingService() : base() {
}
/* Initialize a new instance of TestOmnichannelMessagingService. */
public TestOmnichannelMessagingService(UserConnection userConnection) : base(userConnection) {
}
#endregion
#region Methods: Private
private void GetChannelAndQueueBySource(MessagingMessage message) {
Select channelSelect = new Select(UserConnection)
.Top(1).Column("Id")
.Column("ChatQueueId")
.From("Channel")
.Where("Source").IsEqual(Column.Parameter(message.Recipient))
.And("IsActive").IsEqual(Column.Parameter(true)) as Select;
channelSelect.ExecuteReader(reader => {
message.ChannelId = reader.GetColumnValue("Id").ToString();
message.ChannelQueueId = reader.GetColumnValue("ChatQueueId");
});
}
#endregion
#region Methods: Public
/* Receive messages from the integration API. */
[OperationContract]
[WebInvoke(UriTemplate = "receive", Method = "POST", RequestFormat = WebMessageFormat.Json, BodyStyle = WebMessageBodyStyle.Bare, ResponseFormat = WebMessageFormat.Json)]
/* The message parameter is a test provider message. */
public void ReceiveMessage(TestIncomingMessage message) {
/* Convert the message. */
MessagingMessage messagingMessage = new MessagingMessage(TestIncomingMessageConverter.Convert(message));
/* Identify the channel using the [Source] field. */
GetChannelAndQueueBySource(messagingMessage);
/* Create a new chat if an open chat with this customer is not found. Otherwise, add a message to an existing chat.
If the customer contacts you for the first time, create a contact and fill out their credentials. Otherwise, bind the chat to an existing contact. */
InternalReceive(messagingMessage);
}
#endregion
}
#endregion
} -
Click Publish on the Source Code Designer’s toolbar to apply the changes to the database level.
4. Implement the conversion of an incoming message
To handle an incoming message, implement the TestIncomingMessageConverter class that converts a message with the TestIncomingMessage type (messenger format message) to the unified Creatio format (the MessagingMessage class).
To create a converter class:
-
Open the Configuration section and select a custom package to add the schema.
-
Click Add → Source code on the section list toolbar.
-
Fill out the schema properties in the Source Code Designer.
- Set Code to "UsrTestIncomingMessageConverter."
- Set Title to "TestIncomingMessageConverter."
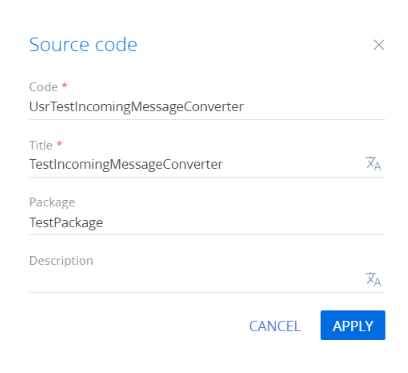
Click Apply to apply the changes.
-
Add the source code in the Source Code Designer. View the source code of the
TestIncomingMessageConverterconverter class below.TestIncomingMessageConverternamespace Terrasoft.Configuration.Omnichannel.Messaging
{
using OmnichannelProviders.Domain.Entities;
using System;
using System.Collections.Generic;
public class TestIncomingMessage : UnifiedMessage
{ }
public static class TestIncomingMessageConverter
{
#region Methods: Public
public static MessagingMessage Convert(TestIncomingMessage message) {
var messageType = MessageType.Text;
var messageId = Guid.NewGuid();
var result = new MessagingMessage {
Id = messageId,
Message = message.Message,
/* The message recipient is the ID of the page or client added to the [Channel] table (the [Source] field). */
Recipient = message.Recipient,
/* The ID of the message sender in the messenger. The sender is bound to the contact via the [ContactIdentity] decoupling table. */
Sender = message.Sender,
Timestamp = message.Timestamp,
/* The channel ID in Creatio, the [MsgSettingsid] object field. */
ChannelId = message.ChannelId,
MessageDirection = MessageDirection.Incoming,
MessageType = messageType,
/* Specify the channel source (third-party developers). */
Source = ChannelType.ThirdParty,
/* The provider name. Serves as the provider ID further. */
ChannelName = "Test"
};
if (messageType != MessageType.Text) {
/* The [Attachments] block is populated based on the file access format that the messenger provides. It is the download link in this case. You can pass the [FileId] in the message to make the file available for download. */
result.Attachments = new List<MessageAttachment>();
foreach (var attachment in message.Attachments){
result.Attachments.Add(new MessageAttachment {
MessageId = messageId,
UploadUrl = attachment.UploadUrl,
FileType = attachment.FileType
});
}
}
return result;
}
#endregion
}
} -
Click Publish on the Source Code Designer’s toolbar to apply the changes to the database level.
5. Implement retrieval of user profile data
Messengers provide an API to retrieve data from clients that send messages. To retrieve user profile data, create a class that implements the IProfileDataProvider interface.
To create a class that retrieves user profile data:
-
Open the Configuration section and select a custom package to add the schema.
-
Click Add → Source code on the section list toolbar.
-
Fill out the schema properties in the Source Code Designer.
- Set Code to "UsrTestProfileDataProvider."
- Set Title to "TestProfileDataProvider."
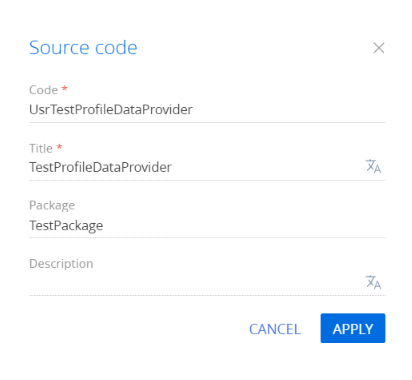
Click Apply to apply the changes.
-
Add the source code in the Source Code Designer.
- The class sends a request to the
https://graph.test.com/address to retrieve data in theTestProfileDataformat (a hypothetical messenger format). - The class converts the received response into the internal
ProfileDataformat. - The class adds the retrieved data, for example, first name, last name, and photo, to the internal format when creating a contact. If the request is unsuccessful or data is invalid, the class creates a contact named
[New Contact][Channel Name]-[Messenger Client ID].
View the source code of the
TestProfileDataProviderclass below.TestProfileDataProvidernamespace Terrasoft.Configuration.Omnichannel.Messaging
{
using Newtonsoft.Json;
using OmnichannelProviders.Domain.Entities;
using OmnichannelProviders.Interfaces;
using System.IO;
using System.Net;
using Terrasoft.Core;
public class TestProfileData {
public string first_name { get; set; }
public string last_name { get; set; }
}
#region Class: TestProfileDataProvider
/* Retrieve the profile data from the Test provider. */
public class TestProfileDataProvider : IProfileDataProvider
{
#region Properties: Private
private readonly string _testProviderApiUrl = "https://graph.test.com/";
#endregion
#region Constructors: Public
/* Initialize a new instance of FacebookProfileDataProvider. */
public TestProfileDataProvider(UserConnection userConnection) {
}
#endregion
#region Methods: Public
/* Retrieve the profile data from Facebook.
The "profileId" parameter is the Facebook profile ID.
The "channelId" parameter is the channel from which to send the request.
Return the contact ID. */
public ProfileData GetProfileDataByProfileId(string profileId, string channelId) {
var requestUrl = string.Concat(_testProviderApiUrl, profileId);
WebRequest request = WebRequest.Create(requestUrl);
try {
using (var response = request.GetResponse()) {
using (Stream stream = response.GetResponseStream()) {
using (StreamReader sr = new StreamReader(stream)) {
var testProfile = JsonConvert.DeserializeObject<TestProfileData>(sr.ReadToEnd());
return new ProfileData {
FirstName = testProfile.first_name,
LastName = testProfile.last_name,
};
}
}
}
}
catch {
return new ProfileData();
}
}
#endregion
}
#endregion
} - The class sends a request to the
-
Click Publish on the Source Code Designer’s toolbar to apply the changes to the database level.
6. Implement ability to download attachments
To download attachments, create the class that implements the IAttachmentsLoadWorker interface:
-
Open the Configuration section and select a custom package to add the schema.
-
Click Add → Source code on the section list toolbar.
-
Fill out the schema properties in the Source Code Designer.
- Set Code to "UsrTestAttachmentLoadWorker."
- Set Title to "TestAttachmentLoadWorker."
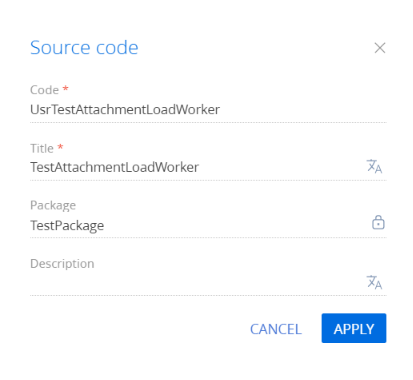
Click Apply to apply the changes.
-
Add the source code in the Source Code Designer. The
AttachmentsDownloaderinternal class downloads the attachment via a link and saves the attachment to the[OmnichannelMessageFile]database table.View the source code of the
TestAttachmentLoadWorkerclass below.TestAttachmentLoadWorkernamespace Terrasoft.Configuration.Omnichannel.Messaging
{
using OmnichannelProviders;
using OmnichannelProviders.Domain.Entities;
using OmnichannelProviders.MessageConverters;
using Terrasoft.Core;
#region Class: TestAttachmentLoadWorker
/* The class that loads attachments from the Test provider. */
public class TestAttachmentLoadWorker : IAttachmentsLoadWorker
{
#region Properties: Protected
protected UserConnection UserConnection;
protected AttachmentsDownloader AttachmentsDownloader;
#endregion
#region Constructors: Public
/* Initialize a new instance of the TestAttachmentLoadWorker class. */
public TestAttachmentLoadWorker(UserConnection userConnection) {
UserConnection = userConnection;
AttachmentsDownloader = new AttachmentsDownloader(userConnection);
}
#endregion
#region Methods: Public
/* Load the attachments.
The incomeAttachment parameter is the attachment from the messenger.
The "message" parameter is the source message. */
public void Load(MessageAttachment incomeAttachment, UnifiedMessage message) {
incomeAttachment.FileName = FileUtilities.GetFileNameFromUrl(incomeAttachment.UploadUrl);
incomeAttachment.FileId = AttachmentsDownloader.Load(incomeAttachment);
}
#endregion
}
#endregion
} -
Click Publish on the Source Code Designer’s toolbar to apply the changes to the database level.
7. Implement message sending
To send messages, create a class that implements the IOutcomeMessageWorker interface:
-
Open the Configuration section and select a custom package to add the schema.
-
Click Add → Source code on the section list toolbar.
-
Fill out the schema properties in the Source Code Designer.
- Set Code to "UsrTestOutcomeMessageWorker."
- Set Title to "TestOutcomeMessageWorker."
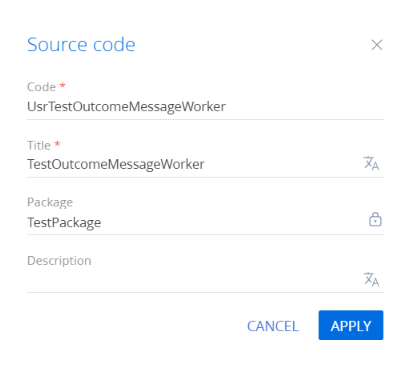
Click Apply to apply the changes.
-
Add the source code in the Source Code Designer. The
TestOutcomeMessageWorkerclass converts the message to messenger format and sends it using the messenger API. The class can send the message using a token. Store the token in the[TestMsgSettings]database table.UserConnectionpassed in the constructor provides access to the table. The class sends a message to thehttps://graph.test.com/address using the internalHttpRequestSenderclass.View the source code of the
TestOutcomeMessageWorkerclass below.TestOutcomeMessageWorkernamespace Terrasoft.Configuration.Omnichannel.Messaging
{
using Newtonsoft.Json;
using Newtonsoft.Json.Serialization;
using OmnichannelProviders.Application.Http;
using OmnichannelProviders.Domain.Entities;
using OmnichannelProviders.MessageWorkers;
using Terrasoft.Core;
#region Class: TestOutcomeMessageWorker
/* The class that sends messages to the Test provider. */
public class TestOutcomeMessageWorker : IOutcomeMessageWorker
{
#region Properties: Protected
protected UserConnection UserConnection;
private readonly string _testProviderApiUrl = "https://graph.test.com/";
#endregion
#region Constructors: Public
/* Initialize a new instance of the TestOutcomeMessageWorker class. */
public TestOutcomeMessageWorker(UserConnection userConnection) {
UserConnection = userConnection;
}
#endregion
#region Methods: Public
/* Send the message to the Test provider.
The "message" parameter is the UnifiedMessage message. */
public string SendMessage(UnifiedMessage unifiedMessage, out bool success) {
var serializerSettings = new JsonSerializerSettings();
serializerSettings.ContractResolver = new CamelCasePropertyNamesContractResolver();
var json = JsonConvert.SerializeObject(unifiedMessage, serializerSettings);
var requestUrl = string.Concat(_testProviderApiUrl, json);
var result = new HttpRequestSender().PostAsync(requestUrl, json).Result;
success = true;
return result;
}
public string PassControlToPrimaryReceiver(UnifiedMessage message) {
return string.Empty;
}
#endregion
}
#endregion
} -
Click Publish on the Source Code Designer’s toolbar to apply the changes to the database level.
8. Link the interfaces
To link the interfaces, create a class.
To create a class:
-
Open the Configuration section and select a custom package to add the schema.
-
Click Add → Source code on the section list toolbar.
-
Fill out the schema properties in the Source Code Designer.
- Set Code to "UsrTestAppEventListener."
- Set Title to "TestAppEventListener."
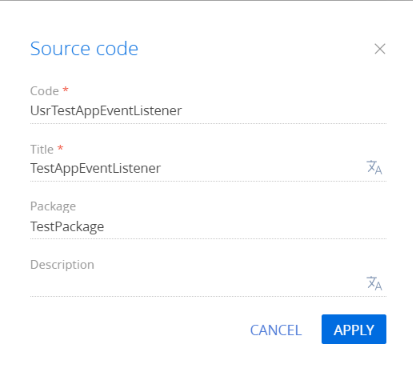
Click Apply to apply the changes.
-
Add the source code in the Source Code Designer. Specify the
AppEventListenerBaseclass as a parent class. TheTesttag links the created classes. Specify the tag in theChannelNamefield on step 4. Creatio uses a tag to identify the files required to retrieve profile data, upload attachments, and send messages.View the source code of the
TestAppEventListenerclass below.TestAppEventListenernamespace Terrasoft.Configuration.Omnichannel.Messaging
{
using Common;
using Core;
using OmnichannelProviders;
using OmnichannelProviders.Interfaces;
using OmnichannelProviders.MessageWorkers;
using Terrasoft.Core.Factories;
using Web.Common;
#region Class : TestAppEventListener
/* The class that runs prerequisites for OmnichannelMessaging on app start. */
public class TestAppEventListener : AppEventListenerBase
{
#region Fields : Protected
protected UserConnection UserConnection {
get;
private set;
}
#endregion
#region Methods : Protected
/* Retrieve the user connection from the app event scope.
The "context" parameter is the app event scope.
Returns user connection. */
protected UserConnection GetUserConnection(AppEventContext context) {
var appConnection = context.Application["AppConnection"] as AppConnection;
if (appConnection == null) {
throw new ArgumentNullOrEmptyException("AppConnection");
}
return appConnection.SystemUserConnection;
}
protected void BindInterfaces() {
ClassFactory.Bind<IAttachmentsLoadWorker, TestAttachmentLoadWorker>(ChannelType.ThirdParty.ToString());
ClassFactory.Bind<IProfileDataProvider, TestProfileDataProvider>(ChannelType.ThirdParty.ToString());
ClassFactory.Bind<IOutcomeMessageWorker, TestOutcomeMessageWorker>(ChannelType.ThirdParty.ToString());
}
#endregion
#region Methods : Public
/* Handle the app start.
The "context" parameter is the app event scope. */
public override void OnAppStart(AppEventContext context) {
base.OnAppStart(context);
UserConnection = GetUserConnection(context);
BindInterfaces();
}
#endregion
}
#endregion
} -
Click Publish on the Source Code Designer’s toolbar to apply the changes to the database level.