How to create custom verification action page
Glossary Item Box

Introduction
Verification action is a confirmation that the data in the application form corresponds to the requirements of the application. The verification action is performed to check the data provided by the clients when they fill out their application forms.
When creating a custom verification action page, for example, in the Approve application business process, you can select the [Preconfigured verification page].
Fig. 1 Selecting the verification page

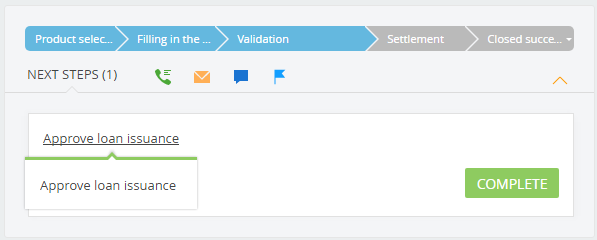
The page is displayed after clicking the [Complete] button of the [Approve loan issuance] activity that is created when the application is moved to the [Validation] stage (fig. 2).
Fig. 2 Activity on the [Validation] stage
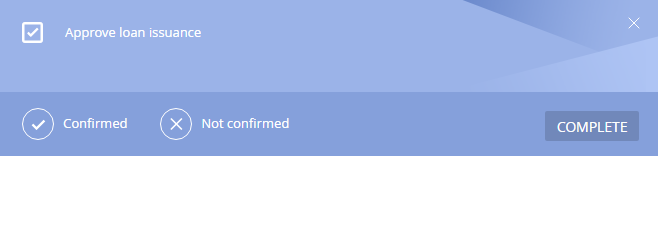
Preconfigured verification page contains (Fig. 3):
- Buttons for selecting the result of the verification action.
- The [Comment] field – comments to the verification action.
- The [Conversation script] detail – contains a hints for the verifiers who call customers in the process of verification. Read only.
- The [Attachments] detail – contains files and links attached to the validation stage. Read only.
- The [Checklist] detail – contains control questions and answers to them.
ATTENTION
If a detail has no attached data, it will not be displayed to save page space.
Fig. 3 Verification page
You can create custom verification pages, inheriting them from the preconfigured page. To create a custom page:
- Create a custom schema of the verification action page.
- Use the schema created in the business process.
Case description
Create a verification action page where the [Comment] field is hidden.
Case implementation algorithm
1. Create a schema of the verification action page
To do this, go to the [Configuration] section and select a custom package. Then execute the [Add] > [Schema of the Edit Page View Model] command. The process of creating custom schema of the view model is covered in the "Creating a custom client module schema” article.
You need to assign the following properties for the created schema (Fig. 4):
- [Title] – Verification page without comments.
- [Name] – UsrCommentlessAppValidationPage.
- [Package] – Custom (or another custom package).
- [Parent object] – Preconfigured verification page of the FinAppLending package.
Fig. 4 Schema properties of the view model page

Add the following source code to the [Source code] tab:
define("UsrCommentlessAppValidationPage", [], function() {
    return {
        entitySchemaName: "AppValidation",
        diff: [{
            "operation": "remove",
            "name": "CommentContainer"
        }]
    };
});
The [Comment] field is removed from the parent element in the diff array.
Save the schema to apply the changes.
2. Use the schema created in the business process.
To use the created schema, specify it in the [Execute on page] field of the [Validation item] item of the business process. This schema can be used in both new and existing business processes, such as Approve application (Fig. 5).
Fig. 5 Specifying the custom verification page

Save the business process to apply the changes.
ATTENTION
Restart the application in IIS for the changes to take effect.
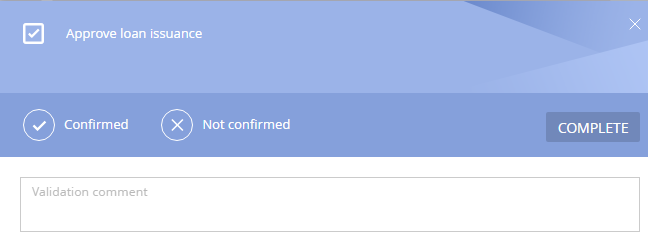
After the changes are applied, the previous verification page (Fig. 3) will be replaced with a custom page that does not contain the [Comment] field (Fig. 6).
Fig. 6 Verification page without the [Comment] field.