


Before you start using the consultation panel, you need to set up the list of blocks, groups and themes of consultations. You can customize the rules for searching clients by name or phone number, as well as rules for displaying clients' noteworthy events.
How to set up consultation blocks and themes
When communicating with the client using the consultation panel, the manager can select consultation themes.
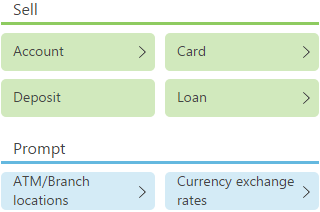
The consultation themes are displayed as buttons grouped by blocks. For example, the [Sell] block contains themes that are connected with selling bank products. Similar themes can be combined into groups. Groups of themes can be identified by the [>] character on the right (Fig. 1). Click a theme group to open the list of themes that are combined in the group.
Fig. 1 Displaying themes for conducting consultation
To set up how the consultation theme blocks and consultation themes are displayed in the consultation panel:
1.Open the system designer and click the [Lookups] link in the [System setup] navigation block.
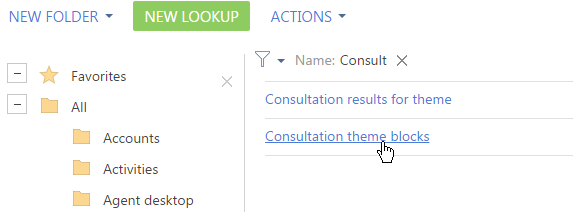
2.Select the [Consultation theme blocks] lookup and click [Open] (Fig. 2).
Fig. 2 Setup of the [Consultation theme blocks] lookup
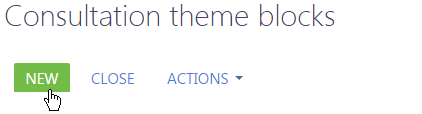
3.Click the [Add] button to create a new consultation theme block (Fig. 3).
Fig. 3 Adding a new consultation theme block
4.On the consultation theme block page (Fig. 4):
Fig. 4 Filling out the page of the consultation theme block
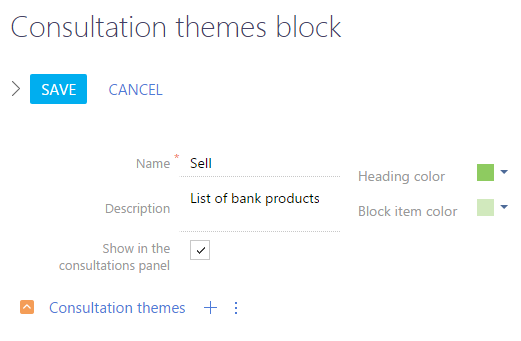
a.Enter the name of the consultation block.
b.Select the [Show on the consultation panel] checkbox.
c.Select the color for the title of the block and its items.
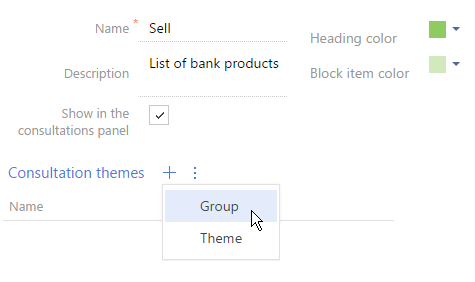
5.Select the [Group] command in the menu of the [Consultation themes] detail (Fig. 5).
Fig. 5 Adding a new consultation theme group
6.On the [Consultation theme group] page, enter the consultation theme name and description. Click the [Save] button.
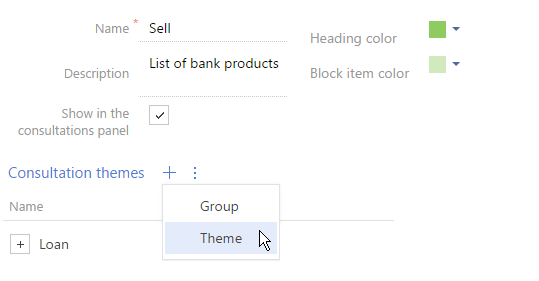
7.On the [Consultation themes] detail, select the [Theme] command (Fig. 6).
Fig. 6 Adding a new consultation theme
8.Fill out the [Consultation theme] page (Fig. 7):
Fig. 7 Consultation theme page
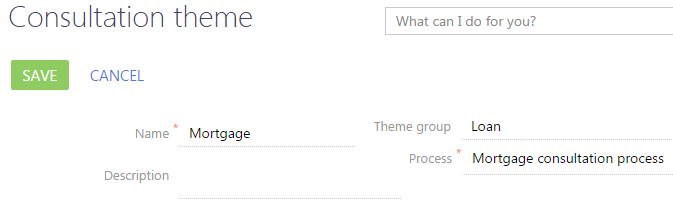
a.Enter the name and a description of the consultation theme.
b.Select a group for the consultation theme in the [Theme group] field.
Note
Leave the field empty to display the consultation theme in the block, rather than in a group.
c.Select the business process that will launch automatically when theme is selected during the consultation.
Note
You will need to set up business processes for custom consultation themes separately in the Process Designer. Read more
d.Click the [Save] button.
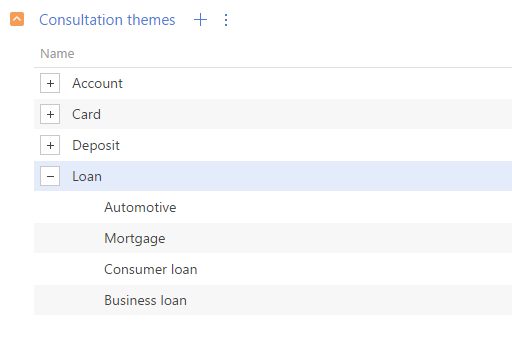
9.Add remaining groups and consultation themes to the block (Fig. 8).
Fig. 8 Example of complete list of groups and consultation themes
10.Save the consultation theme block
11.Use the same procedure to add the remaining blocks with groups and themes to the consultation panel.
How to set up client search in the consultation panel
Before starting a consultation, the manager must find the individual for whom the consultation is initiated. You can configure minimum number of characters that the manager must enter in the search fields for the search to work.
To set up search conditions in the consultation panel:
1.Go to the System Designer and click the [System settings] link.
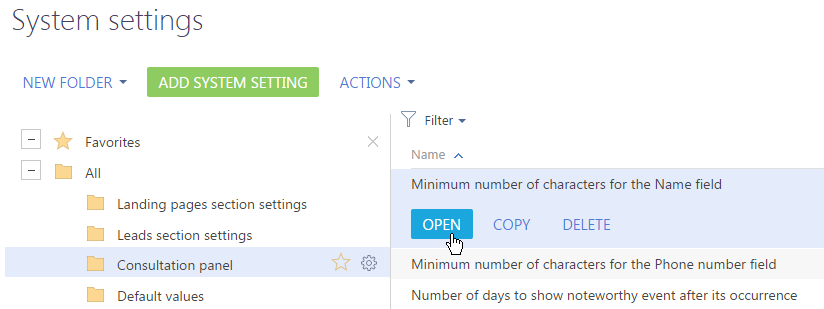
2.Select the [Minimum number of characters for the Full name field] (Fig. 9).
Fig. 9 Selecting the [Minimum number of characters for the Name field] system setting
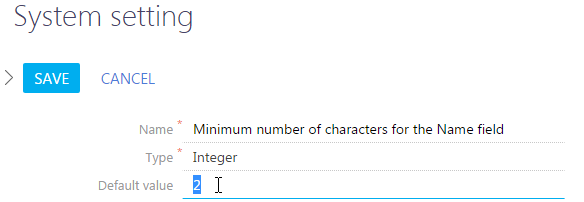
3.Specify the number of characters for the [Full name] field in the [Default value] field of the system setting page (Fig. 10).
Fig. 10 Setting minimum number of characters for the Name field
4.Click the [Save] button to save the changes.
5.Similarly, enter default value for the [Minimum number of characters for the Phone number field] system setting.
6.Click the [Save] button.
How to set up conditions for displaying noteworthy events
You can set up display of the noteworthy events of your clients in the consultation panel during consultation.
To set up the noteworthy events display on the consultation panel:
1.Go to the System Designer and click the [System settings] link.
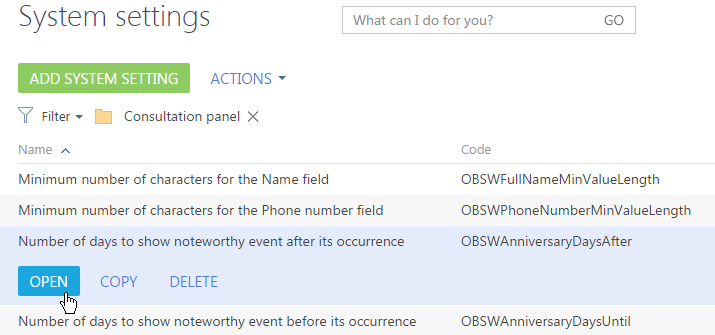
2.Select the [Number of days to show noteworthy event after its occurrence] (Fig. 11).
Fig. 11 Selecting the [Number of days to show noteworthy event after its occurrence]
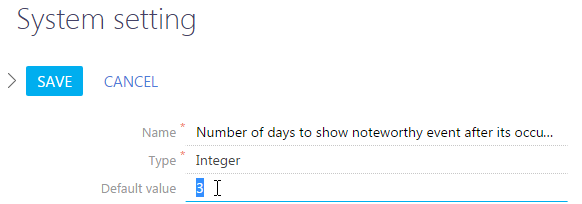
3.Enter the number of days, during which noteworthy events of your clients will be displayed in the consultation panel after they have occurred (Fig. 12).
Fig. 12 Setting the number of days to show noteworthy event after its occurrence
4.Click the [Save] button.
5.Specify the default value for the [Number of days to show noteworthy event before its occurrence] system setting.
6.Click the [Save] button.
See also