


Email account individual settings
Email accounts are added with default parameters. For each added email account, you can configure:
-
email downloading parameters
-
email sending parameters
-
email message signatures.
Note
If you have configured the synchronization with the MX Exchange mailbox, the [Meetings and tasks] and [Contacts] tabs will be displayed at the email account settings page. Here you can configure parameters of synchronization of MS Exchange calendar and contacts. Read more >>>
You can go to the mailbox settings directly from the mailbox registration notification or by selecting the account in the [Edit email accounts] menu of the  button.
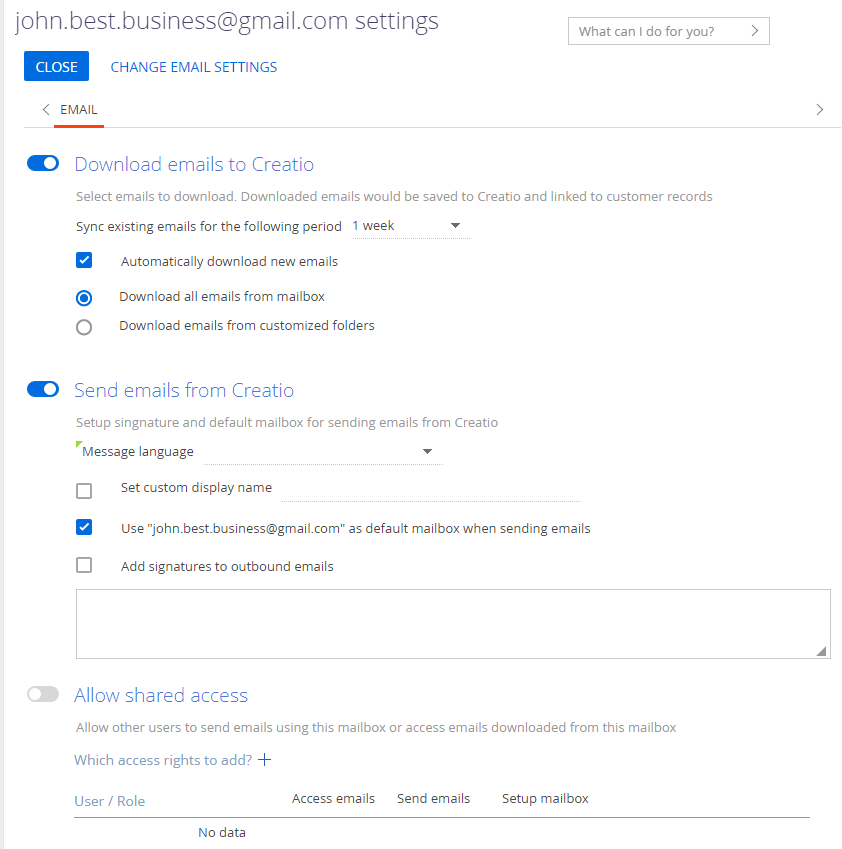
Fig. 1 Edit page of the email account settings
Contents
•Configure signature in the emails
1.To receive emails from the mailbox enable the [Download mail for period] switch and specify the time interval (for example, day, week, month) for which emails will be downloaded to the system at the first synchronization.
Note
The periodicity of automatic mailbox synchronization is set in the [Mailbox synchronization interval] system setting.
2.Select the [Automatically download new emails] checkbox to download incoming emails automatically.
3.Select the [Download all emails from mailbox] option to download all messages from the mailbox, or the [Download emails from customized folders] option to download messages from specific folders only.
4.To download emails from specific folders only, select the [Download emails from customized folders] option, click the [+] button to display the folders of the specified account and select folders from which you need to receive emails (Fig. 2).
Fig. 2 Specifying synchronization folders

5.Save the changes.
Note
If you select only a parent folder for downloading emails, the messages from the nested folders will not be downloaded to the Creatio. Select the nested folders to download emails from them.
To reply to emails directly from Creatio, set up sending of emails. To do this:
1.Enable the [Send emails using this mailbox] switch to use the mailbox for sending the emails. If the switch is disabled, the mailbox will not be available for selection on the email edit page, as well as in the corresponding business process and case elements.
2.Select the [Set "email address" as default sender address] checkbox to use the mailbox by default. The mailbox address will be specified by default in the [From] field for new emails.
3.Save the changes.
Configure signature in the emails
To add a signature to the outgoing emails, select the [Add signatures to outbound emails] checkbox and add the signature text in the input area below (Fig. 3). Save the changes.
Fig. 3 Adding signatures in outgoing emails

Note
You can copy a signature from your mail client and paste it to the text area.
In some browsers, only one image can be copied to the signature template at a time from the clipboard. If your signature contains several images, the remaining images must be added one by one.
See also
•How to set up a personal mailbox