


Add a new MS Word report in Creatio
Adding a new report involves the following general steps:
1.Add a new report record. Read more >>>
2.Set up the report data fields and tables. Read more >>>
3.If necessary, you can add Boolean fields, such as the [Do not use phone] checkbox, to your report. Use special macros to set up how Boolean fields display in the report. See the following articles for more information: “Basic macros in the MS Word reports” and “How to create macros for a custom report in Word”.
Case
Let’s have a look at setting up a “Meeting minutes” report in the [Activities] section.
Add a new MS Word report record in Creatio
1.Log in to Creatio as an administrator and open the System Designer, e.g., by clicking  .
.
2.Go to the [System setup] block and click [Report setup]. The [Report setup] section opens.
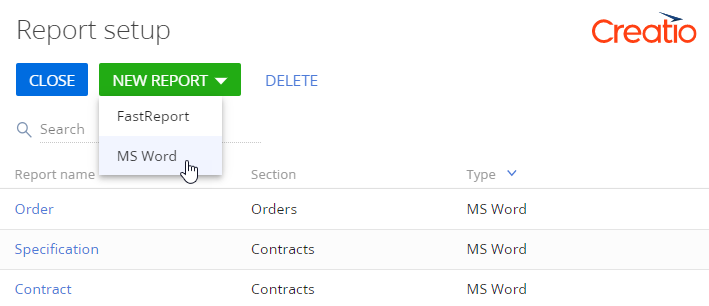
3.Click [New report] -> [MS Word] (Fig. 1).
Fig. 1 Adding an MS word report
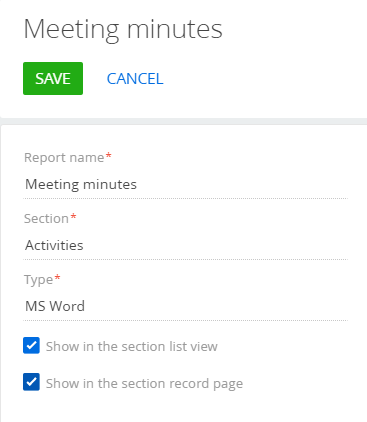
4.Enter the new report name.
5.In the [Section] field, select a section where the report should be available. For example, to add a report in the [Activities] section, specify “Activities” in the [Section] field.
6.Select the [Show in the section list view] and [Show in the section record page] checkboxes, depending on where exactly the report should be available (Fig. 2).
Fig. 2 Adding a “Meeting minutes” report
Proceed to configure the report data fields and tables.
Set up the report data fields and tables
You can add simple data, such as a contact name or activity date, as well as table data, such as a list of tasks for a specific contact.
Set up the report fields
1.Open an MS Word report record in the [Report setup] section. For example, open the “Meeting minutes” report created earlier.
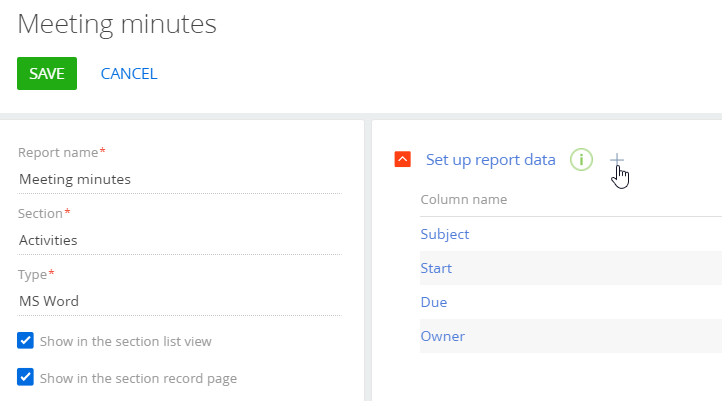
2.On the report page, under [Set up report data], click  .
.
3.A column selection window opens. Select all columns that hold the data required for the report (Fig. 3). For example, select the [Subject] column to be able to display the activity (i.e., the meeting) name in the report. To display the activity time frame, add the [Start] and [Due] columns.
As a result, the columns will become available in the Creatio MS Word plug-in.
Set up the report tables
Tables display several records that are linked to the primary report record. For example, the primary record of the “Meeting minutes” report is an activity. Using tables, you can add a list of activity participants (records from the “Activity participant” object that are linked to the corresponding activity:
1.Open an MS Word report record in the [Report setup] section. For example, open the “Meeting minutes” report in the [Activities] section, created earlier.
2.On the report page, under [Set up report tables], click  .
.
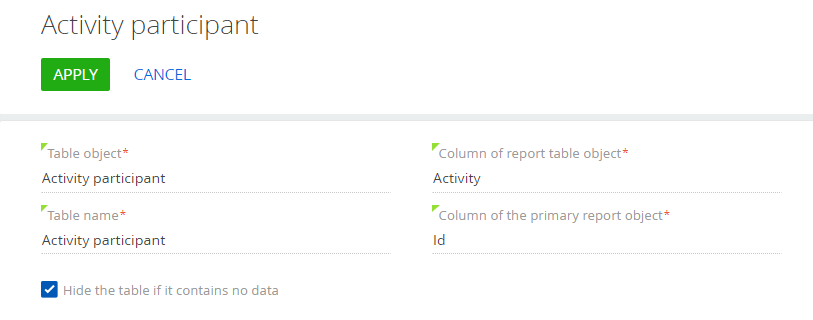
3.Populate the fields on the report table page (Fig. 4):
a.In the [Table object] field, select an object whose data will be used to create a table. For example, select the “Activity participant” object to add a table containing the list of the meeting participants.
b.In the [Table name] field, specify the table title that will display in the Creatio MS Word plug-in.
c.In the [Column of report table object] field, specify the column that will link the records in the table object to the primary report’s record. Creatio will apply a filter to the table records by this column.
d.In the [Column of the primary report object] field, specify the column of the report section, whose value will be used to filter the table records. Usually, the [Column of report table object] matches the name of the report object (e.g., “Activity”), and the [Column of the primary report object] is the “Id” column. These fields determine which Creatio records will provide data for the report table rows.
e.Select the [Hide the table if it contains no data] checkbox to avoid displaying empty tables in the report.
Fig. 4 General report table settings
4.On the [Table parameters] tab, set up the list of report table columns. Click  and select the column to add it to the list. For example, to create a list of activity participants with their names and roles, add the [Participant] and [Role] columns.
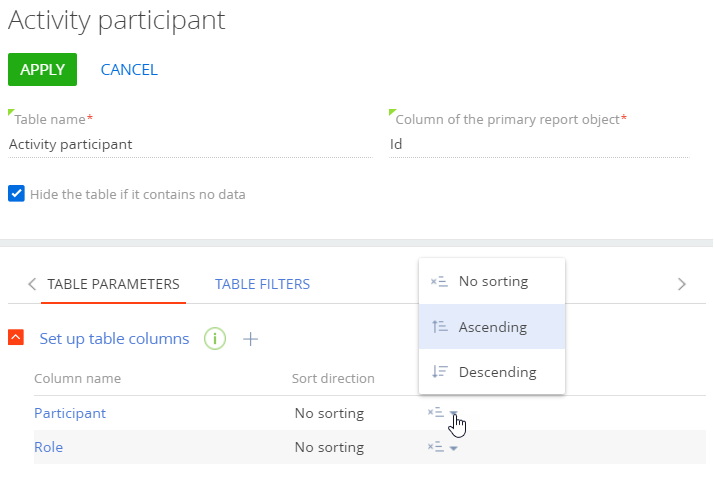
5.Set the sorting order of the table records. Click  next to a column and select [Ascending] or [Descending] in the menu to sort the table records based on the values in that column. For example, set the [Ascending] sorting order for the [Participant] column to sort the list of participants alphabetically, by name (Fig. 5).
Fig. 5 Sorting the report table records
Note
To sort the table rows in the report by multiple columns, make sure that your MS Word template includes all the report table columns that are involved in the sorting rules. For more on adding report tables to the report templates, please see the “Design report layout via the Creatio MS Word plug-in” article.
You can sort table records by several columns. In this case, the column that is higher in the [Set up table columns] list will have a higher sorting priority.
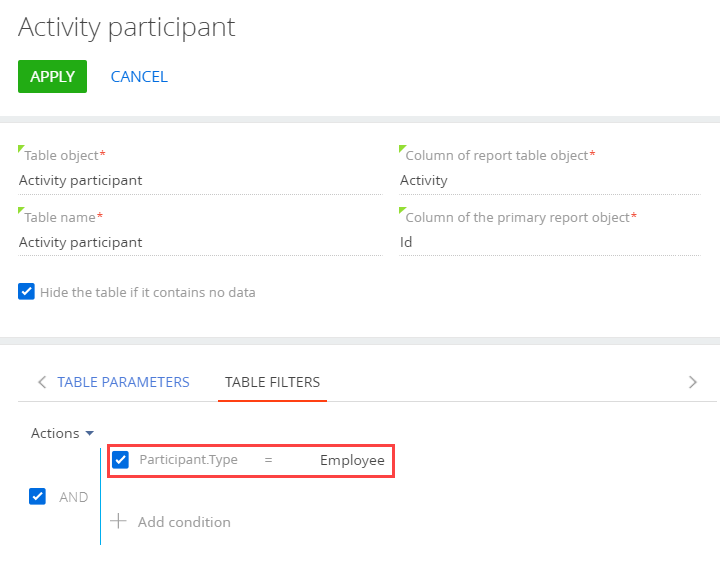
6.Go to the [Table filter] tab and set up an additional filter whose conditions will define which records should be included appear in the report table. For example, you can display only those participants who are the company employees with the following filter: “Participant.Type = Employee” (Fig. 6).
Fig. 6 Filtering records in a report table
7.Click [Apply] to save the report table settings. Click [Save] on the report setup page.
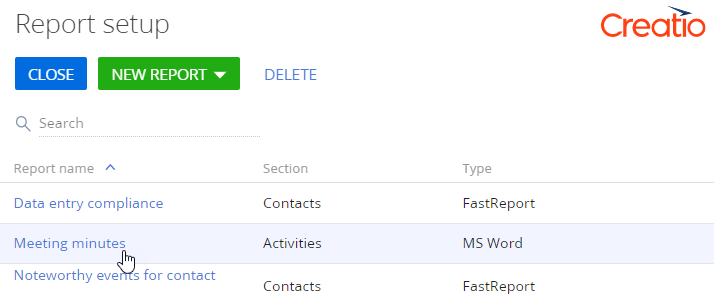
As a result, a new report will appear in the [Report setup] section (Fig. 7).
Fig. 7 Custom “Meeting minutes” report in the [Report setup] section
See also
•Design report layout via the Creatio MS Word plug-in
Video tutorials