


When working with Creatio, you may need to view the changes made to your data, as well as who made these changes and when. For example, you can check who and when deleted support cases or changed a contract sum.
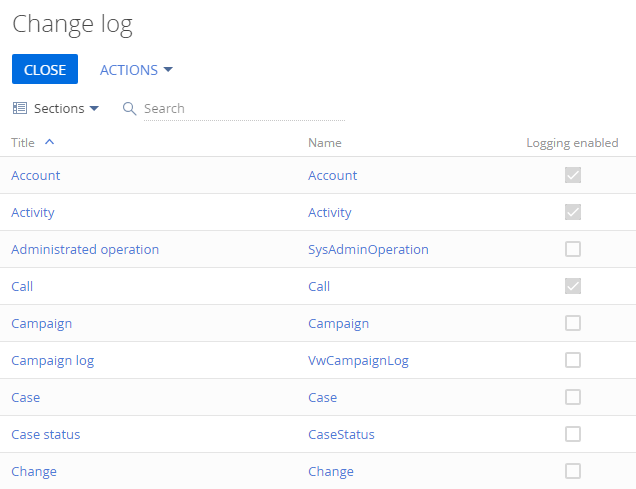
The data change history is available in the [Change log] section (Fig. 1).
Fig. 1 The [Change log] section view
The change log contains information about adding, modifying, and deleting records (entries) in the database tables for Creatio objects. This includes sections, details, lookups, as well as other objects. Creatio can log changes on two levels:
-
Record level – adding, modifying, or deleting Creatio records (e.g., adding specific accounts or contacts).
-
Column level – adding, modifying, or deleting values in the fields of record pages (e.g., edit a contact name or change the type of an account).
Contents
•Set up the [Change Log] section
Set up the [Change Log] section
You can open the [Change log] section:
-
From the System Designer by clicking [Change log] under [Users and administration].
-
From the section, lookup, or detail by clicking [Actions] -> [Change log setup] in the section, lookup, or detail list..
Case
Set up logging of changes in contacts’ phone numbers and emails.
Emails, mobile and work phones are available in the contact profile, so logging must be enabled in the [Contacts] section on the column level.
Method 1. Set up logging in the [Change log] section
1.Open the System Designer, e.g., by clicking  .
.
2.Under [Users and administration], click [Change log].
Note
To work with the [Change Log] section, the users require permission to the following system operation: [Access to "Change log" section] (CanManageChangeLog).
Learn more about using system operations in the “System operation permissions” article.
3.In the list of objects, find the needed object of the section, detail, or lookup. For example, set the “Sections” filter to display only section objects (Fig. 2).
Fig. 2 Setting the filter to select the object for logging

Note
If you need to log the detail data, select the “All objects” filter.
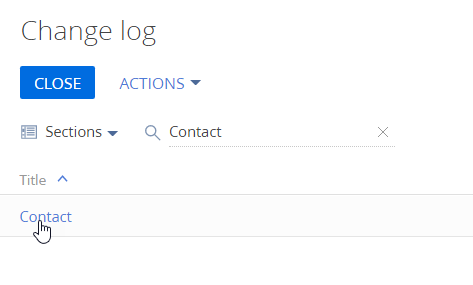
4.Select the section from the list or find it using the search bar (Fig. 3). Click the title of the needed object. In this case, it is the “Contact” object.
Fig. 3 Searching for a section to set up logging
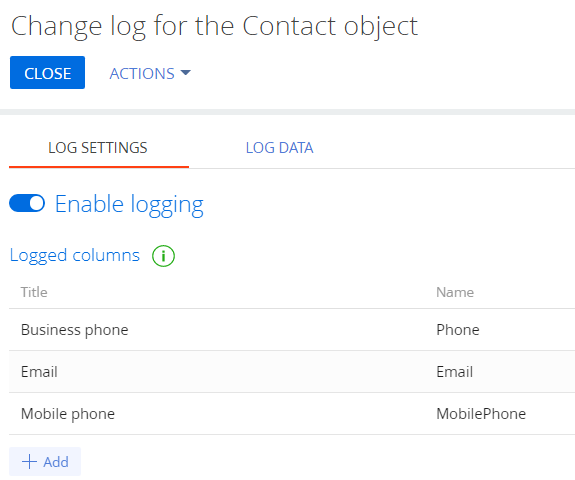
5.On the page that opens, enable logging via the corresponding switch.
Note
If you click [Apply], Creatio will start logging according to the current settings, i.e., it will record the events of creating, modifying, and deleting records.
6.Set up the list of columns for logging when a record is changed. For example, use the [Email], [Mobile phone] and [Business phone] columns (Fig. 4).
Click [Add] to add a new column. To delete an added column, hover the cursor over the column title and click  .
.
Fig. 4 Setting up column logging
Note
We recommend setting up the logging only for columns, whose values you need to track. With big databases, the logging of multiple objects and columns might affect Creatio performance.
7.Save the settings by clicking [Apply].
After you save the settings, Creatio will start monitoring the changes and recording them in the [Change log] section.
Method 2. Set up logging in a section, lookup or detail
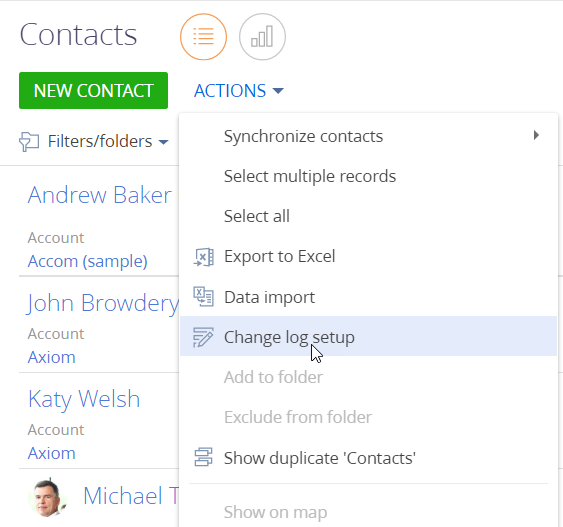
1.Open the needed section, lookup or detail. In our example, we use the [Contacts] section.
2.Click [Actions] -> [Change log setup] (Fig. 5).
Fig. 5 Setting up the change log from a section
Note
If you cannot see [Change log setup] in the action list, make sure you have permission to the [Access to "Change log" section] (CanManageChangeLog) system operation.
Learn more about using system operations in the “System operation permissions” article.
If you click the [Change log setup] action, the “Change log for the Contact object” page will open. To complete the setup, perform steps 5–7, described above in Method 1.
There are two ways you can open a change log for viewing its records:
-
Open the change log of a specific record directly from the record page.
-
Open the [Change log] section from the System Designer and select an object to view its logs.
Method 1. Viewing the record changes from the change log
Case
View the contact records that were changed last month.
1.Open the System Designer, e.g., by clicking  .
.
2.Under [Users and administration], click [Change log].
Note
To view the changes, make sure you have the [Access to "Change log" section] (CanManageChangeLog) system operation permission.
Learn more about using system operations in the “System operation permissions” article.
3.Set the filter - for our example, select “Sections”.
4.Find the needed object using the search bar or manually. In our example, we use the “Contact” object. Click the object title to open the change log page.
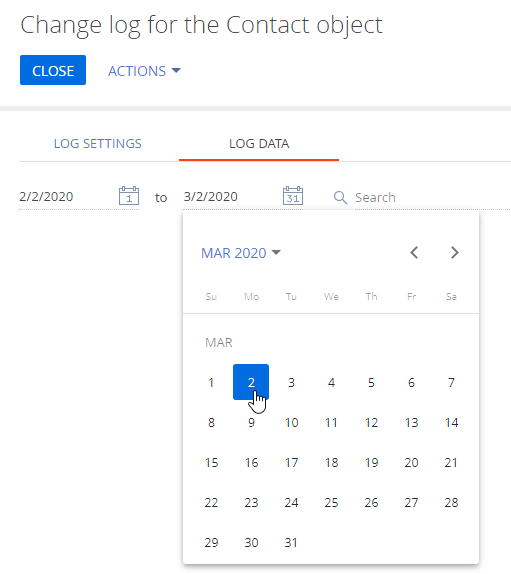
5.Click the [Log data] tab and set the date filter (Fig. 6). In our example, it is the time period from February 2nd to March 2nd, 2020.
Fig. 6 Filtering changes by date for the “Contact” object
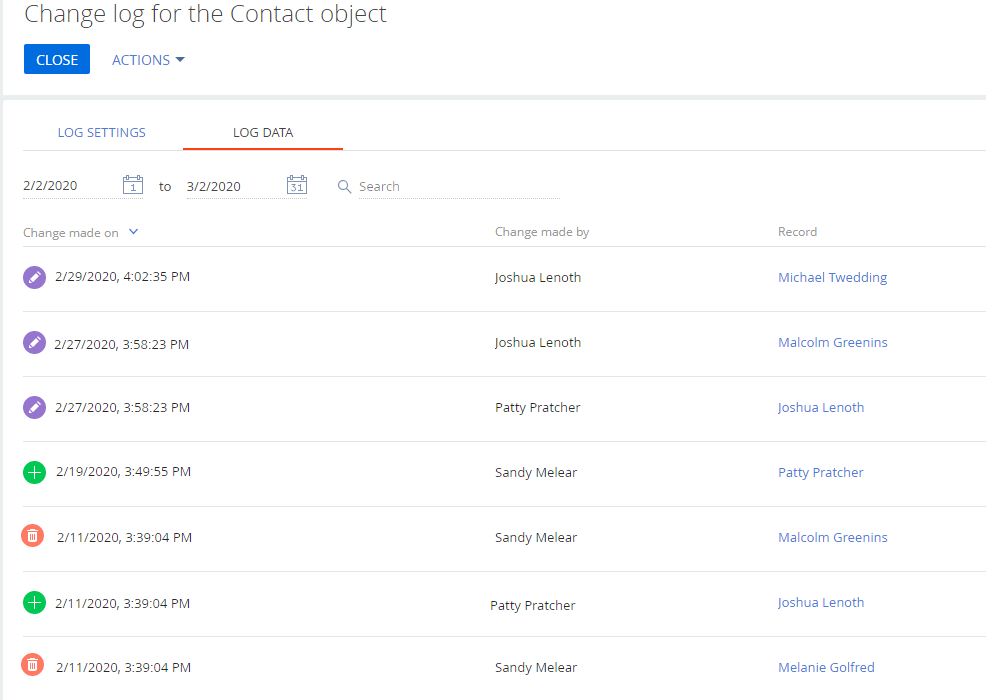
As a result, the list of records that were changed within the specified period will be displayed (Fig. 7). The icons next to dates display the type of the performed operations: deleting, adding or editing.
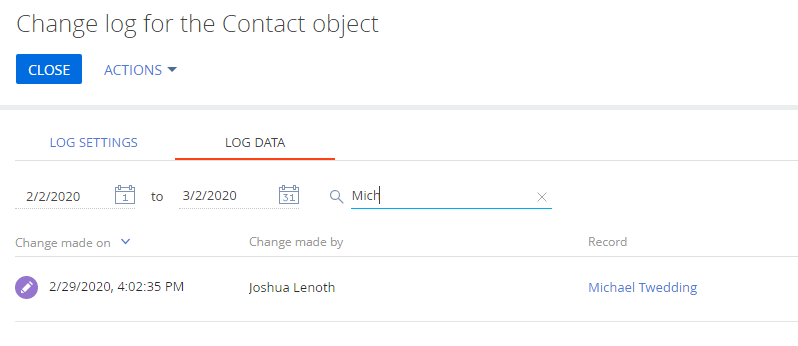
6.Use the search bar to quickly find the needed record by title. In our case - by the contact’s full name (Fig. 8). To learn the details of the performed changes, click the name in the [Record] column.
Fig. 8 Quick search by record name
Method 2. View logs of a specific record directly from the record page
Case
See the change log of the field values on the page of a specific contact for the last month.
1.Open the page of the needed record.
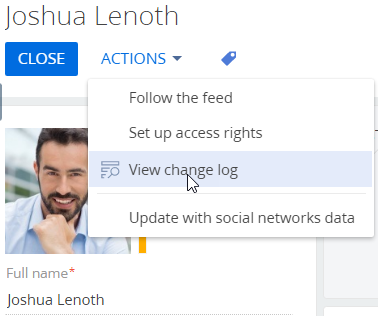
2. Click [Actions] -> [View change log] (Fig. 9).
Fig. 9 The [View change log] action
Note
If you cannot see the [View change log] command in the [Actions] menu, make sure you have permission to the [View change log] (CanViewChangeLog) system operation.
Learn more about using system operations in the “System operation permissions” article.
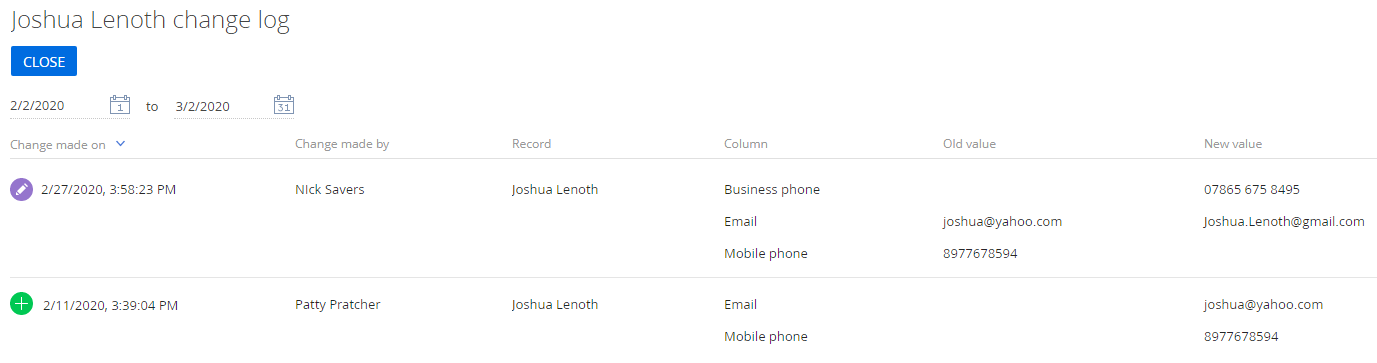
3.The page that opens will display information about the selected record:
•dates of the changes
•authors of the changes
•record name
•list of the changed columns
•values before the change
•values after the change
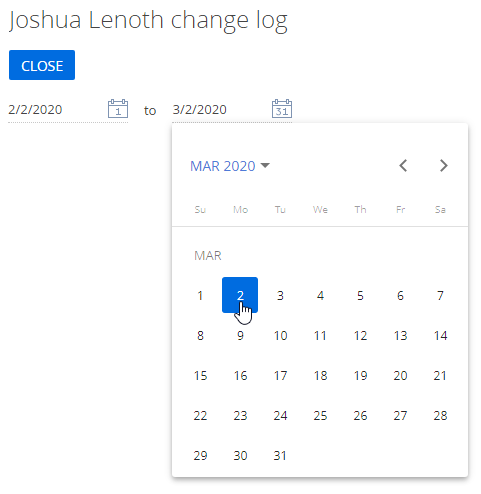
4.Set the date filter to display only the changes for the last month. (Fig. 10). In our example, it is the time period from February 2nd to March 2nd, 2020.
Fig. 10 Filtering changes by date for the log of a specific record
As a result, you will see the changes that were made in the logged fields within the specified period (Fig. 11).
We recommend clearing the change log regularly to avoid storing outdated records in Creatio.
1.Open the System Designer, e.g., by clicking  .
.
2.Under [Users and administration], click [Change log].
3.Click [Actions] –> [Clear log].
Note
Deleting records in the change log requires permission to the [Can clear change log] (CanClearChangeLog) system operation permission.
Learn more about using system operations in the “System operation permissions” article.
4.Select the objects whose log records must be cleared and specify the period for which to clear the record. Click [Clear] (Fig. 12) to delete the specified log records.
Fig. 12 Clearing record in the change log
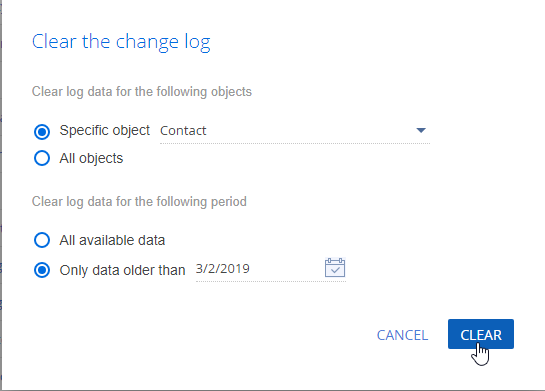
As a result, the selected records will be deleted.
See also