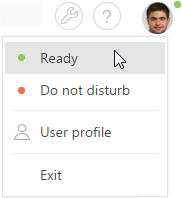
Available Webitel base phone integration settings
Webitel phone integration is a built-in service and is available for internal calls without the need for additional setup. To make and receive external calls in Webitel, you will need to install the Webitel connector from the Creatio marketplace and set up the phone integration. More information about installation of the marketplace applications is available in the separate article.
Note
If you purchase Webitel Call Manager cloud, all setup will be performed by Webitel support. If you purchase Webitel Call Manager on-site, you can order setup service from Webitel or study the requirements and perform the setup according to the Webitel setup guide.
A green indicator at the top right corner of the application indicates that phone integration runs correctly in Creatio (Fig. 1).

To be able to work with the service, populate the “Webitel users” lookup. You have to register your company's employees in Creatio to enable them to make internal calls directly from the application.
Note
See more details on how to register Creatio users in the “How to add a new user in Creatio” article.
When adding a Creatio user, the system will automatically assign a Webitel extension number. It will be displayed on the [Communication options] detail of the contact page. By default, the phone number assignment starts from 100. Upon the next user registration, the following ordinal numbers will be assigned, for example, 101, 102, 103 etc.
Note
The telephone number is generated automatically based on the specified template. You can change the auto-numbering using the "Webitel user number mask" system setting.
Setting up Webitel internal phone parameters
1.Open the user profile page by clicking the [Profile] image button on the main page of the application.
2.Click the [Call Center parameters setup] button.
3.Select or remove the required checkboxes:
a.[Disable Contact Center integration] – this checkbox allows you to disable a built-in Webitel integration. The call button will not be displayed on the communication panel of the application.
b.[Enable debugging] – this checkbox allows you to display troubleshooting information within the browser console. This troubleshooting information can be used when the phone integration runs into problems and the customer addresses the service team.
c.[Use Web phone] – this checkbox allows you to use a web phone. Clear the checkbox if you need to use the down-line phone.
d.[Use video] – this checkbox allows to make video calls on internal numbers.
4.Click the [Save] button on the page.
5.Refresh the browser page to apply the changes.
See also


