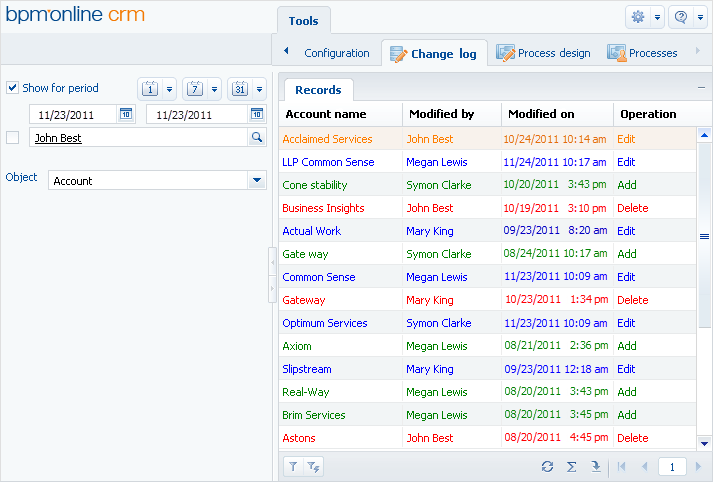
By using the [Change log] section, you can track changes in the system database tables. To view the change log:
1.Open the system designer by clicking the  button in the top right corner of the application window.
2.In the [Admin area] block, click the [Advanced settings] link.
3.In the opened window, click the [Change log] tab (Fig. 1).
Fig. 1 The [Change log] section

The structure of the [Change log] section is not standard. There are no details and folder area in this section, but there is a filter block.
Using the filter block, you can set a time period to view the changes made over that time. Additionally, you can filter and view the changes in the system objects that were made by a certain employee.
In the [Object] field, select a system object to view the history of the changes made in it. Columns in the list of the [Change log] section vary based on the selected object. For example, for the [Accounts] section, the following columns are displayed: [Account name], [Modified by], [Modified on] and [Operation].
The color of each record in the change log vary according to the operation performed in this record:
-
green – new record was added;
-
blue – one of the logged columns was modified in the record;
-
red – the record was deleted.
The main operations in the section are performed using the actions.
You can set up the list of objects for which the history of changes will be tracked using the [Setup log] action. To view all modifications made to a certain record in the section, use the [View all changes in selected record] action. Use the [Clear log] action to delete the extra log data.
Contents
•The [Setup log] action in the [Change log] section
•The [View all changes in selected record] action in the [Change log] section


