Example of using base tile
Level: advanced
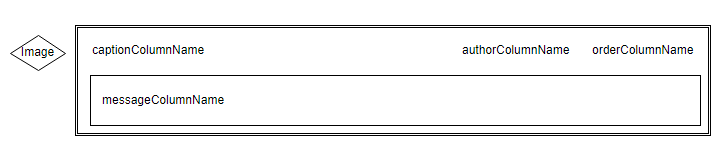
To start using the timeline in a section, perform base tile configuration. The base tile compound elements:
- icon;
- caption;
- author;
- date (sorting);
- message.
Example
Add the Contract tile to the Accounts section page. Sorting should be performed according to the StartDate column; the caption values, author and tile messages should be derived from the Number, Owner and Notes columns correspondingly.
Example implementation algorithm
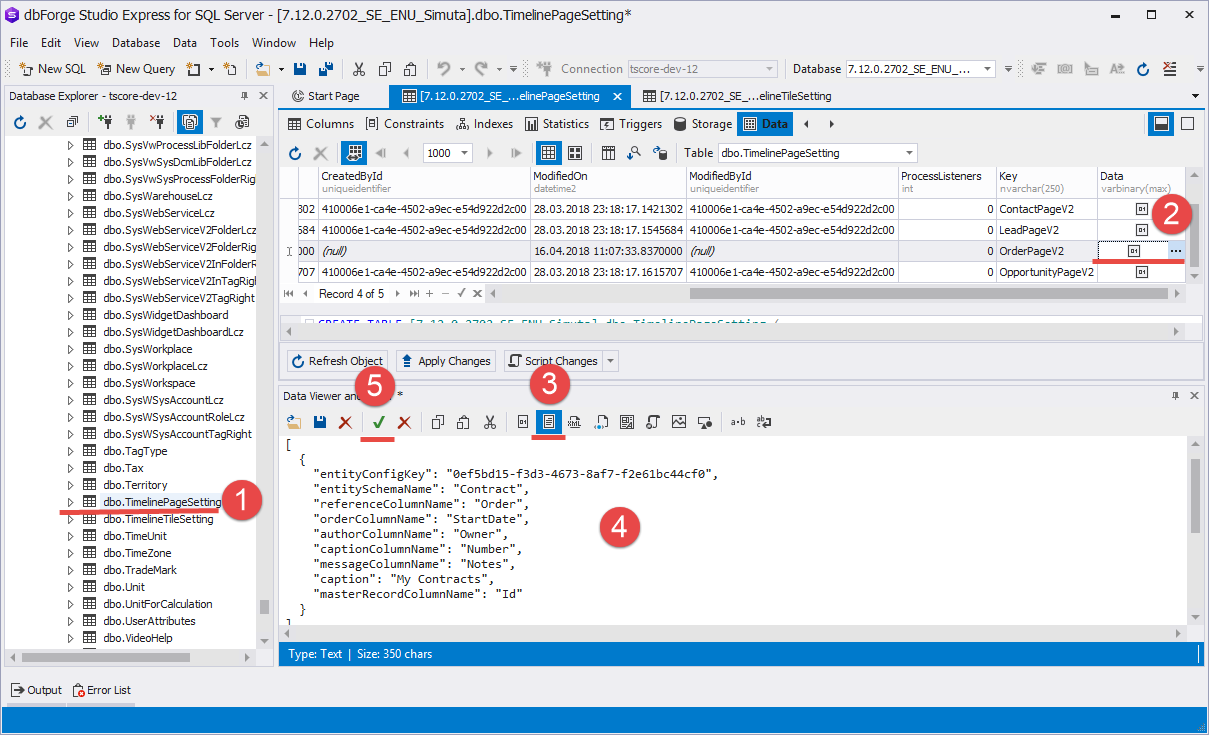
- Add a new record (or update an existing record) in the
TimelinePageSettingtable. - Set the "AccountPageV2” value for the
Keycolumn and populate theDatacolumn with the following JSON object:
JSON object
[
  {
    "entityConfigKey": "0ef5bd15-f3d3-4673-8af7-f2e61bc44cf0",
    "entitySchemaName": "Contract",
    "referenceColumnName": "Order",
    "orderColumnName": "StartDate",
    "authorColumnName": "Owner",
    "captionColumnName": "Number",
    "messageColumnName": "Notes",
    "caption": "My Contracts",
    "masterRecordColumnName": "Id"
  }
]
The Orders base tile is used in the following case. This tile has a record in the [TimelineTileSettings] table with the 0ef5bd15-f3d3-4673-8af7-f2e61bc44cf0 Id.
Important
As the data in the Data column are stored in the varbinary(max) form, use specific editor (such as dbForge Studio Express for SQL Server) to modify them. To do this:
- Select a table.
- Select the necessary column of the record and click the edit button.
- Enter the text data display mode in the data editor.
- Add necessary data.
- Save the changes in the data editor.
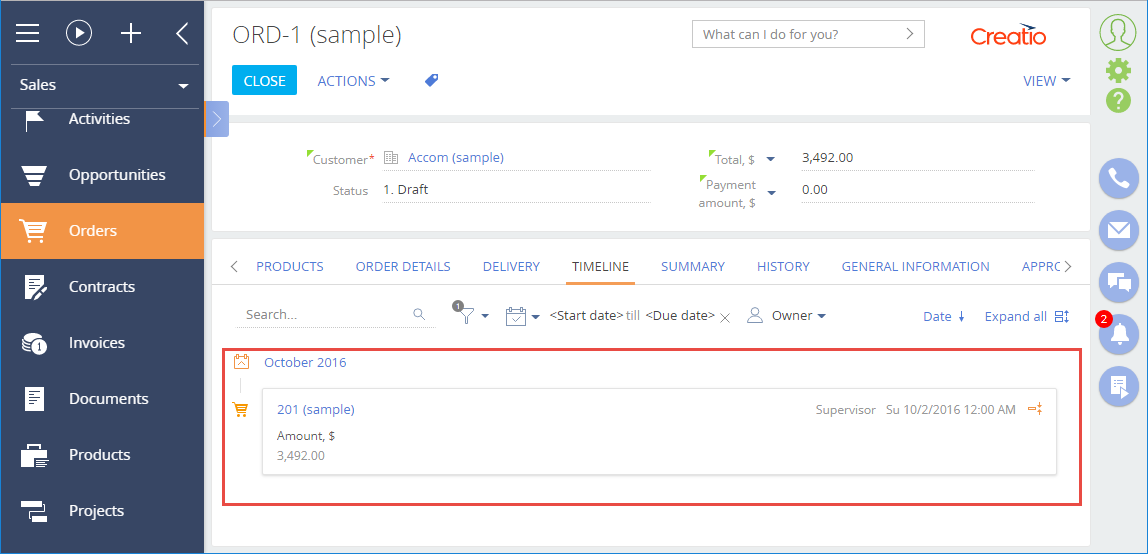
The result of the base tile usage on the Timeline tab in the Accounts section: