Run the business process that receives parameters from a client module
Add the Receive parameters custom action to the account page and Accounts section list. The action must run the Result parameters custom business process. The action must be active if the account has a primary contact, i. e., the Primary contact field of the account page is filled out. Pass the primary contact of the account to the business process as a parameter. Display the job title and age of the account’s primary contact as resulting parameters in the business process dialog.
1. Implement the Result parameters custom business process
-
Open the Configuration section and select a custom package to add the business process.
-
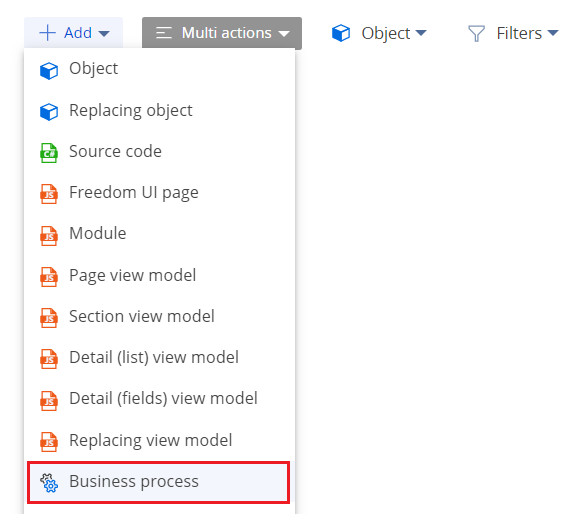
Click Add → Business process on the section list toolbar.
-
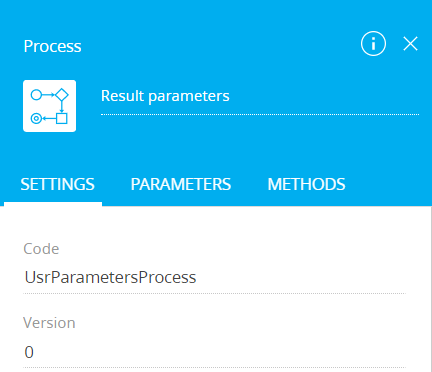
Fill out the business process properties.
- Set Title to "Result parameters."
- Set Code to "UsrParametersProcess."
Use default values for the other properties.
-
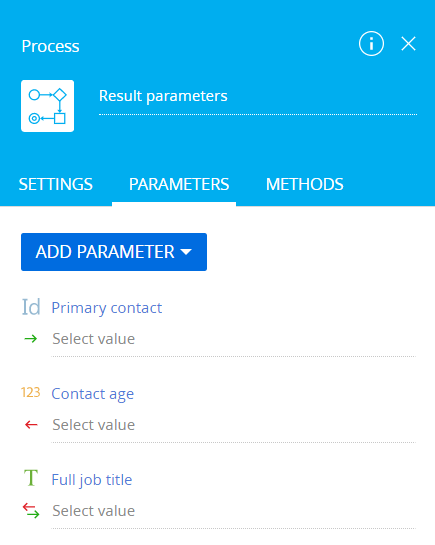
Add business process parameters.
View the process parameters values to fil out in the table below.
Process parameters values
Title
Code
Data type
Direction
"Primary contact"
"ProcessSchemaContactParameter"
"Unique identifier"
"Input"
"Contact age"
"ProcessContactAge"
"Integer"
"Output"
"Full job title"
"ProcessFullJob"
"Text (500 characters)"
"Output"
-
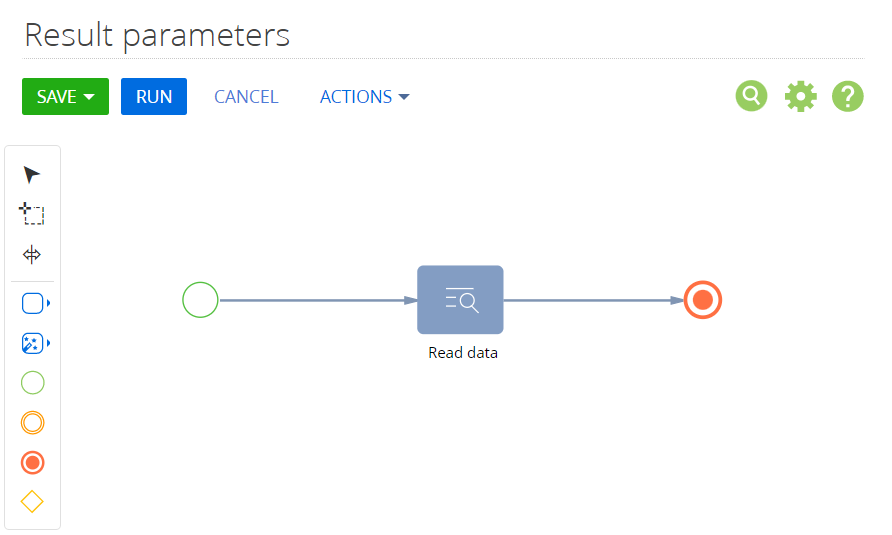
Implement data reading.
-
Add the Read data element to the Process Designer workspace.
-
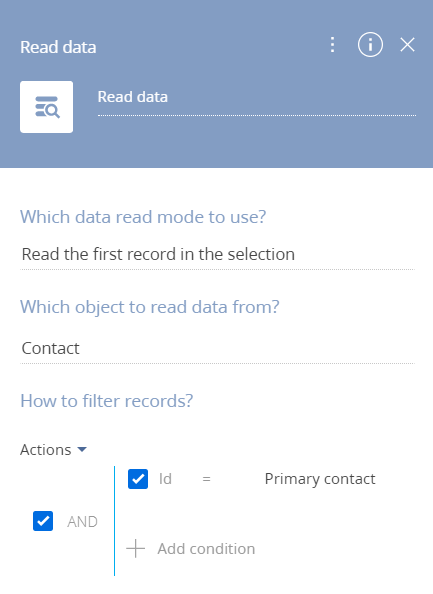
Fill out the element properties.
- Set Which data read mode to use? to "Read the first record in the selection."
- Set Which object to read data from? to "Contact."
- Set the filter by the Id column in the How to filter records? property. Set the value of the "Primary contact" incoming parameter as the column value.
-
-
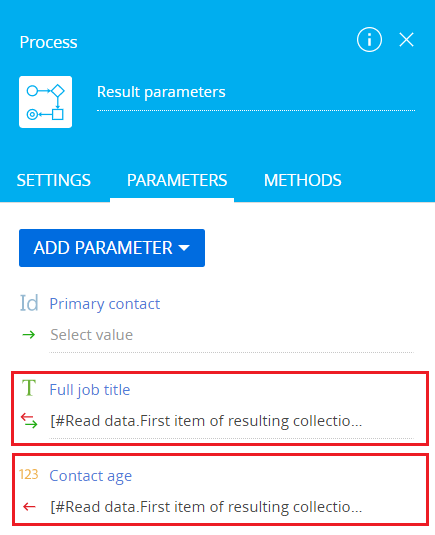
Add the values of the outgoing parameters.
- Go to the Parameters tab.
- Enter "[#Read data.First item of resulting collection.Full job title#]" in the Value field for the
Full job titleparameter. - Enter "[#Read data.First item of resulting collection.Age#]" in the Value field for the
Contact ageparameter.
-
Click Save on the Process Designer’s toolbar.
2. Create a replacing view model schema of the account page
-
Open the Configuration section and select a custom package to add the schema.
-
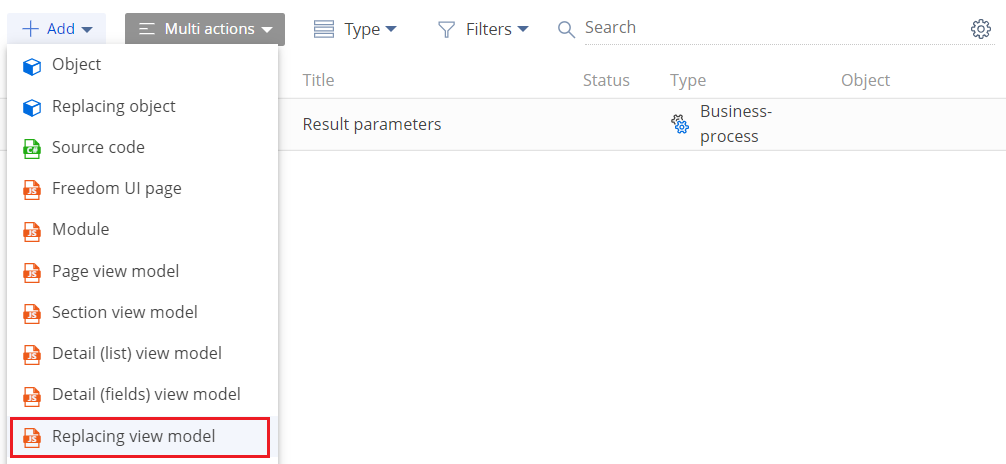
Click Add → Replacing view model on the section list toolbar.
-
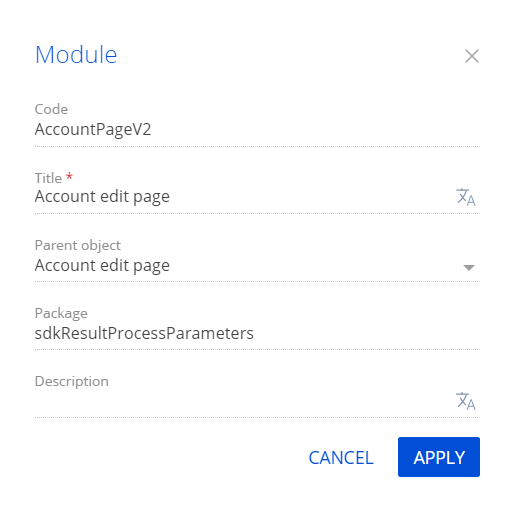
Fill out the schema properties.
- Set Code to "AccountPageV2."
- Set Title to "Account edit page."
- Set Parent object to "AccountPageV2."
-
Add a localizable string that contains the menu item caption.
-
Implement the menu item logic.
Implement the following methods in the
methodsproperty:isAccountPrimaryContactSet(). Checks whether the primary contact of the account is filled out and defines the visibility of the menu item.callCustomProcess(). Action handler method. Runs the business process and displays the values of the resulting parameters in the dialog.getActions(). An overloaded base method. Returns the action collection of the replacing page.
View the source code of the replacing view model schema of the account page below.
AccountPageV2define("AccountPageV2", [], function() {
return {
/* The name of the record page object’s schema. */
entitySchemaName: "Account",
/* The methods of the record page’s view model. */
methods: {
/* Check the [Primary contact] field of the account is filled out to define the visibility of the menu item. */
isAccountPrimaryContactSet: function() {
/* Return true if the primary contact is filled out, return false otherwise. */
return this.get("PrimaryContact") ? true : false;
},
/* Overload the base virtual method that returns the collection of record page actions. */
getActions: function() {
/* Call the parent method implementation to retrieve the collection of base page’s initialized actions. */
var actionMenuItems = this.callParent(arguments);
/* Add a separator line. */
actionMenuItems.addItem(this.getActionsMenuItem({
Type: "Terrasoft.MenuSeparator",
Caption: ""
}));
/* Add a menu item to the action list of the record page. */
actionMenuItems.addItem(this.getActionsMenuItem({
/* Bind the menu item caption to the localizable schema string. */
"Caption": {
bindTo: "Resources.Strings.CallProcessParametersCaption"
},
/* Bind the action handler method. */
"Tag": "callCustomProcess",
/* Bind the property of the menu item visibility to the value returned by the isAccountPrimaryContactSet() method. */
"Visible": {
bindTo: "isAccountPrimaryContactSet"
}
}));
return actionMenuItems;
},
/* The action handler method. Run the business process and display the values of the resulting parameters in the dialog. */
callCustomProcess: function() {
/* Receive the ID of the account’s primary contact. */
var contactParameter = this.get("PrimaryContact");
/* Create an object of the Terrasoft.RunProcessRequest class. */
const runProcessRequest = Ext.create("Terrasoft.RunProcessRequest", {
/* The process schema code. */
"schemaName": "UsrParametersProcess",
/* The ID of the process diagram. */
"schemaUId": "9ff60fa7-314e-4b9e-b9fc-57f91b8b2e21",
/* Incoming process parameters. */
"parameterValues": {
"ProcessSchemaContactParameter": contactParameter.value
},
/* Outgoing process parameters. */
"resultParameterNames": [
"ProcessContactAge",
"ProcessFullJob"
]
});
/* Run the custom business process. */
runProcessRequest.execute(function(response) {
/* If the process is executed successfully, display the values of the resulting parameters in the dialog. */
if (response.isSuccess()) {
var job = response.resultParameterValues["ProcessFullJob"];
var age = response.resultParameterValues["ProcessContactAge"];
Terrasoft.showInformation("Full job title: " + job + " Age: " + age);
}
}, this);
}
}
};
}); -
Click Save on the Module Designer’s toolbar.
/scr_add_button.png) button in the context menu of the Localizable strings) node.
button in the context menu of the Localizable strings) node.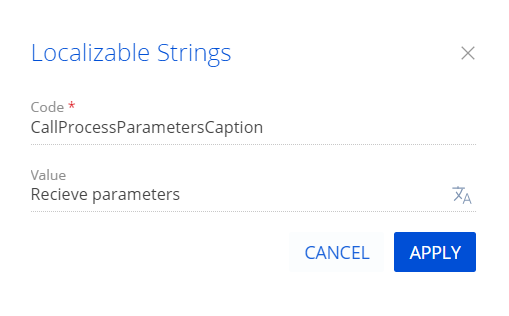
Creatio does not display the custom account page action in combined mode.
3. Create a replacing view model schema of the section page
-
Open the Configuration section and select a custom package to add the schema.
-
Click Add → Replacing view model on the section list toolbar.
-
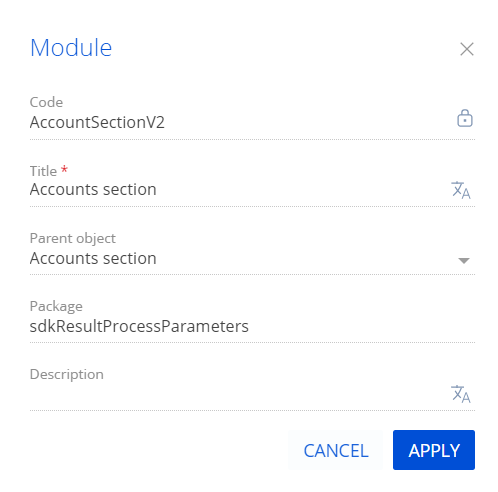
Fill out the schema properties.
- Set Code to "AccountSectionV2."
- Set Title to "Accounts section."
- Set Parent object to "AccountSectionV2."
-
Add a localizable string that contains the menu item caption. To do this, take step 4 of the procedure to create a replacing view model schema of the account page.
-
Implement the menu item behavior. To do this, implement the
isAccountPrimaryContactSet()method in themethodsproperty. The method checks whether the primary contact of the account is filled out and defines the visibility of the menu item.View the source code of the replacing view model schema of the section page below.
AccountSectionV2define("AccountSectionV2", [], function() {
return {
/* The name of the section page schema. */
entitySchemaName: "Account",
/* The methods of the section page’s view model. */
methods: {
/* Check whether the [Primary contact] field of the account is filled out. */
isAccountPrimaryContactSet: function() {
/* Define the active record. */
var activeRowId = this.get("ActiveRow");
if (!activeRowId) {
return false;
}
/* Retrieve the data collection of the section list’s list view. Retrieve the model of the account by the specified primary column value. */
var selectedAccount = this.get("GridData").get(activeRowId);
if (selectedAccount) {
/* Receive the [Primary contact] model property. */
var selectedPrimaryContact = selectedAccount.get("PrimaryContact");
/* Return true if the primary contact is filled out, return false otherwise. */
return selectedPrimaryContact ? true : false;
}
return false;
}
}
};
}); -
Click Save on the Module Designer’s toolbar.
Outcome of the example
To view the outcome of the example:
- Refresh the Accounts section page.
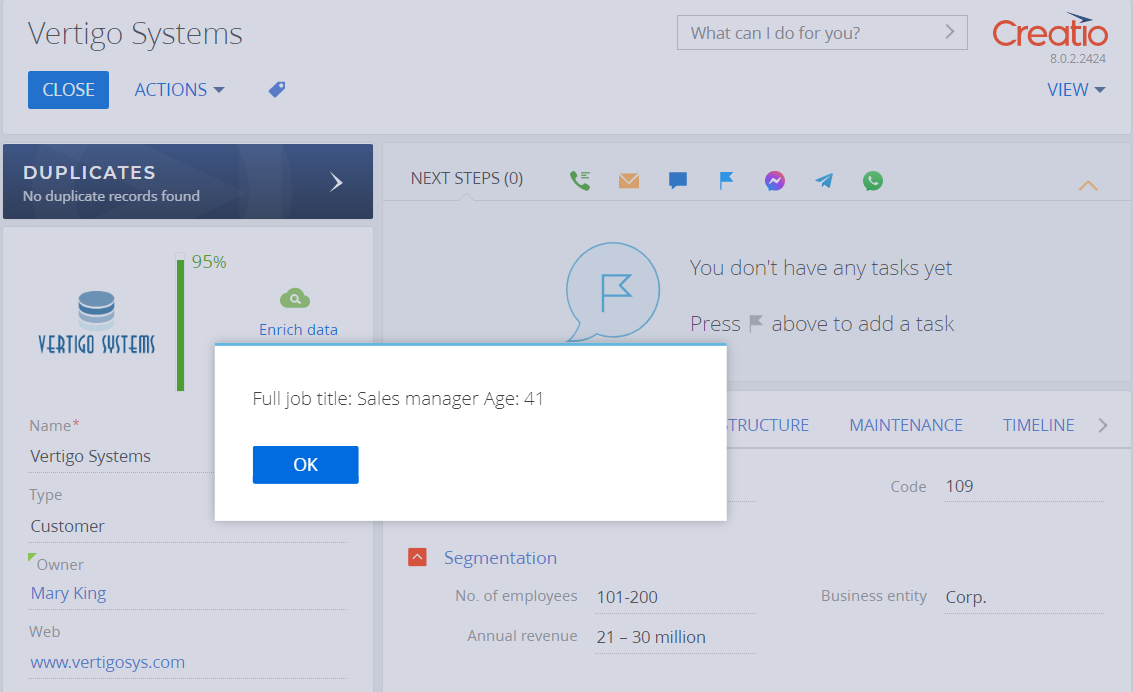
- Open an account page, for example,
Vertigo Systems.
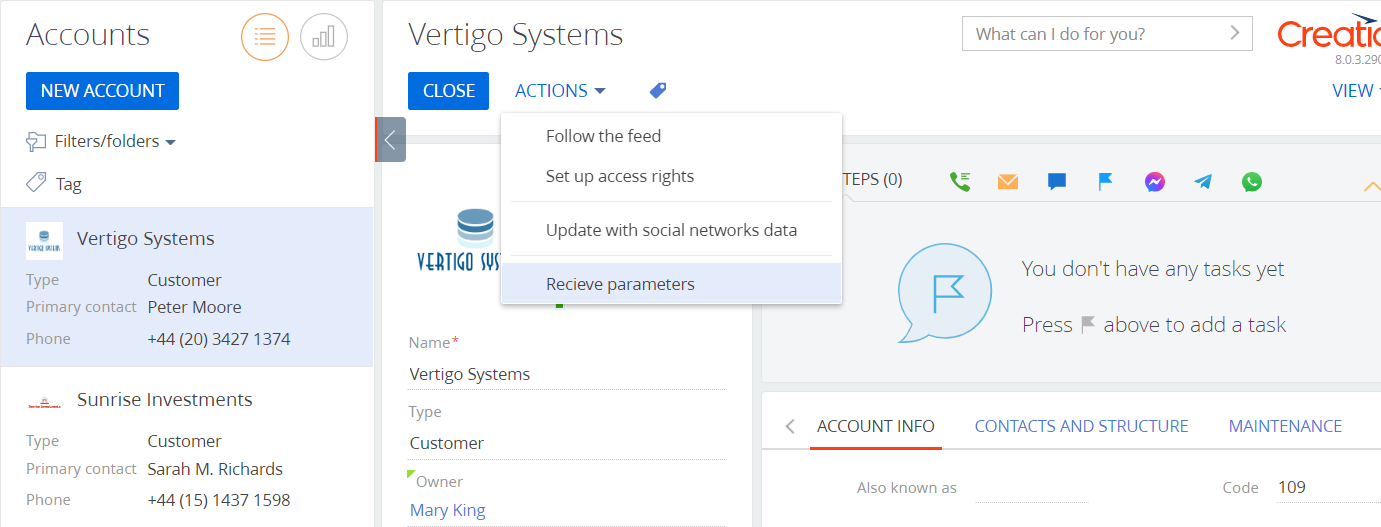
As a result, Creatio will add the Receive parameters action to the account page.
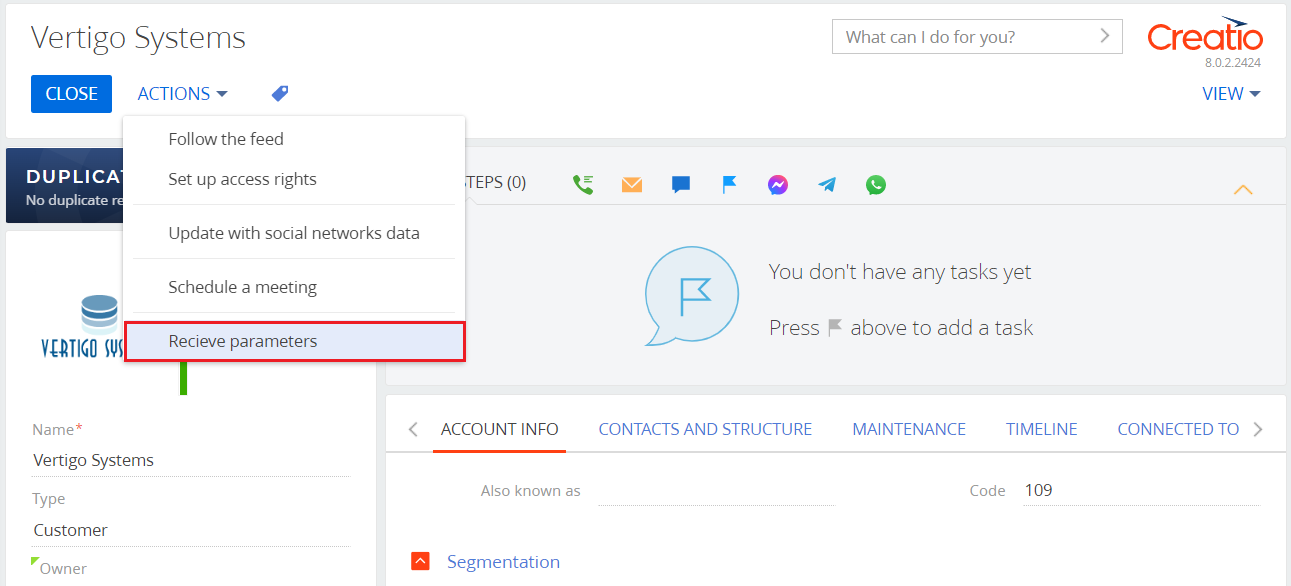
Click the Receive parameters action to run the Result parameters business process. The primary contact of the account will be passed to the business process as a parameter. The job title and age of the account’s primary contact will be displayed as the resulting parameters of the business process.
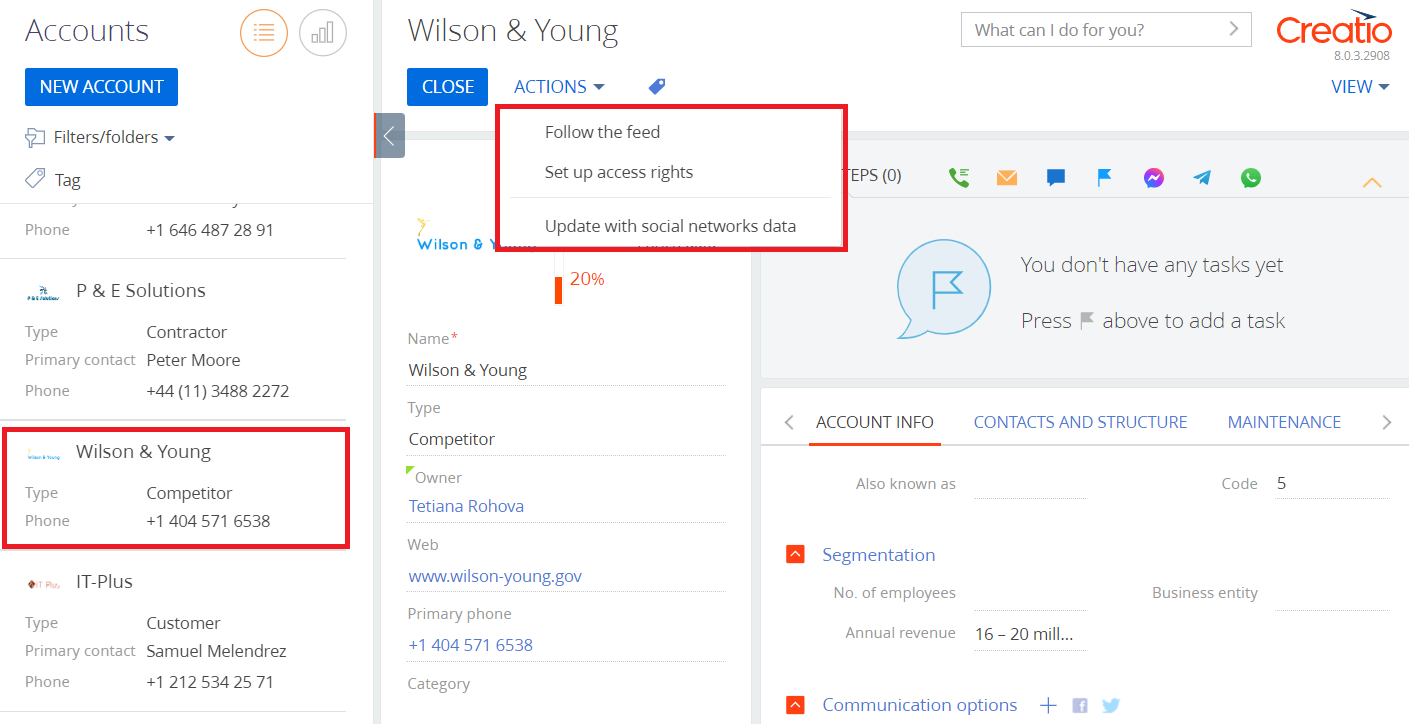
The action will be active if the account has a primary contact, i. e., the Primary contact field of the account page is filled out. For example, the action is inactive for the Wilson & Young account.
The Receive parameters custom action will be displayed on the Accounts section page and active for the selected account that has a primary contact.