1. Create a new section
On the previous step, we have configured a development package and set it as the current Creatio package. On this step, set up the new section’s interface using the built-in no-code tools.
Set up the section
Use the Section Wizard to set up a section.
To do this:
-
Click
 to open the System Designer.
 -
Click Section wizard in the System setup block.
-
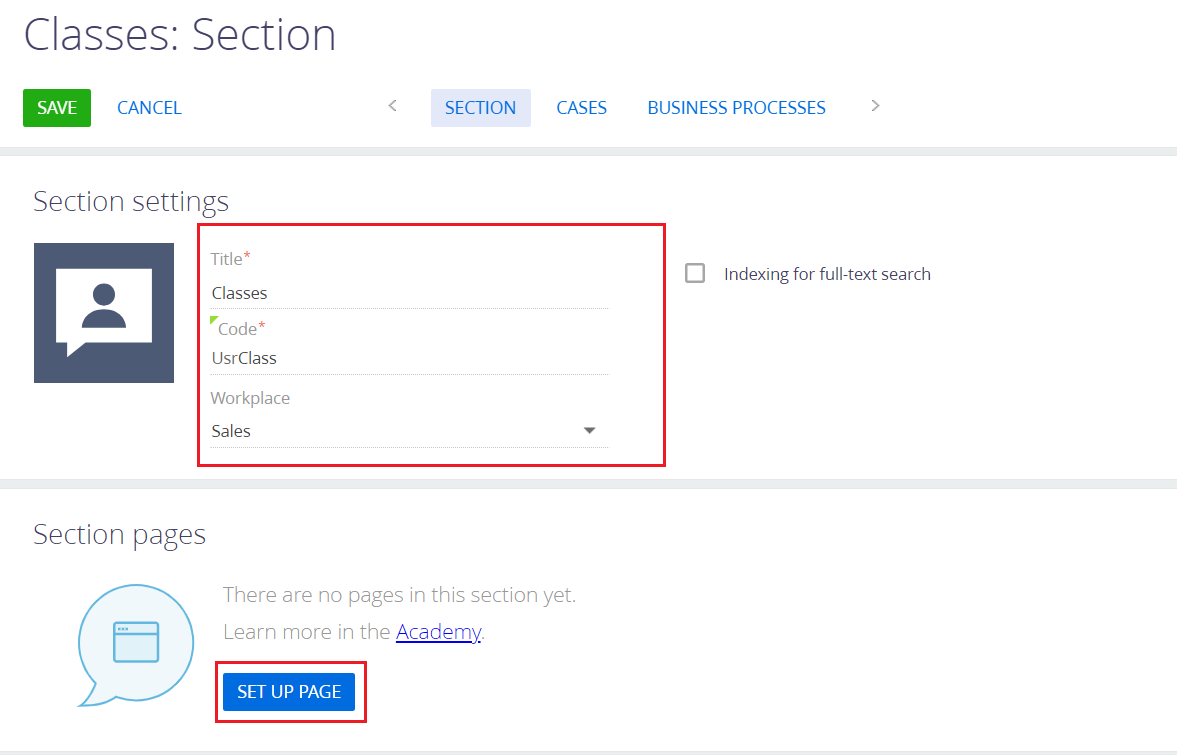
Fill out the fields for a new section.
- Set Title to "Classes".
- Set Code to "UsrClass".
- Set Workplace to "Sales".
-
Click Set up page to set up a section page.
-
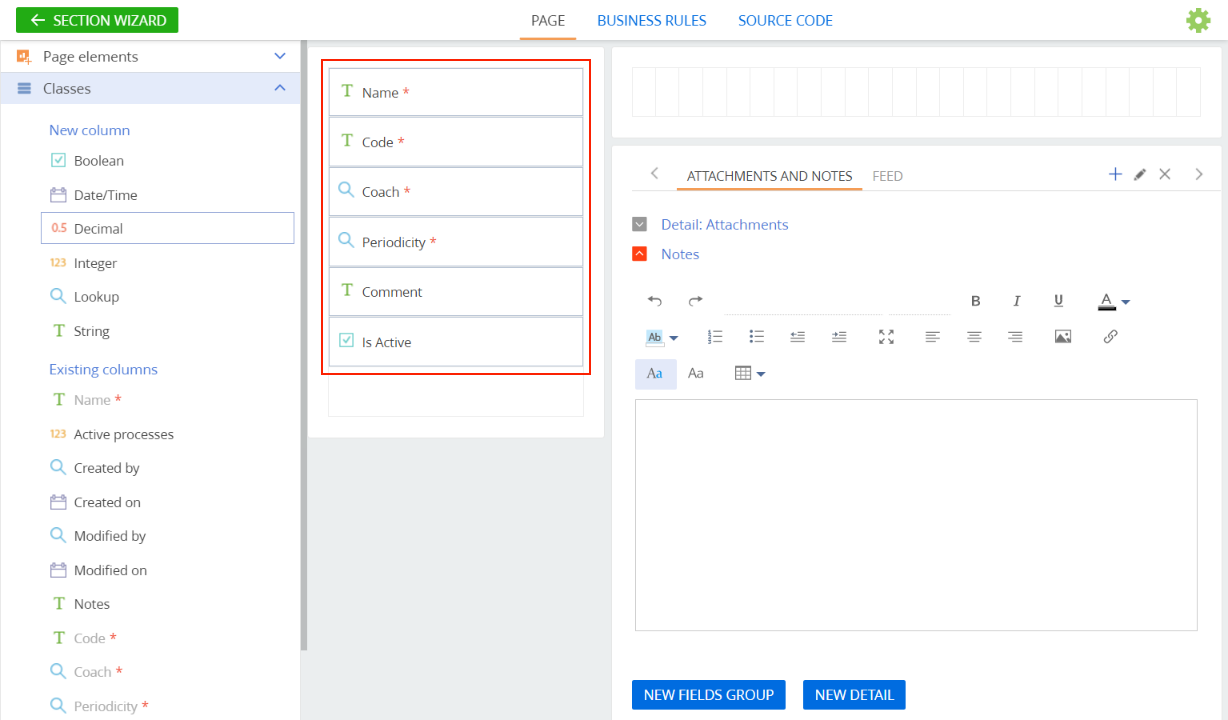
Add fields to the page:
-
Select a field of the desired type in the menu on the left.
-
Drag&drop the field to the page.
-
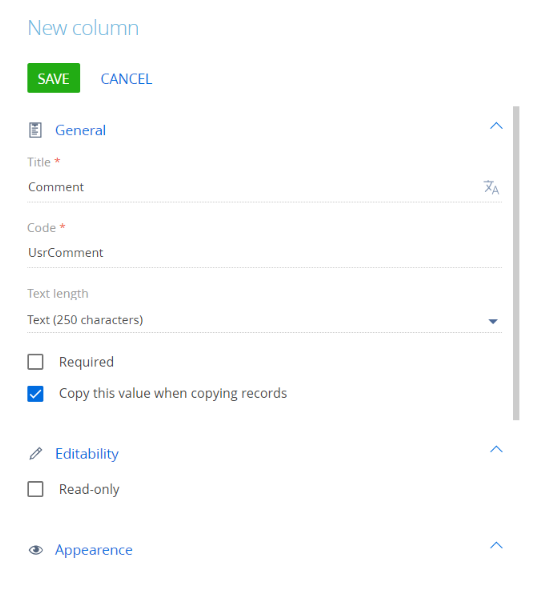
Fill out the properties of the field:
Add these fields to the page:
Title
Code
Data type
Required
Name
UsrName
String
Required
Code
UsrCode
String
Required
Coach
UsrCoach
The existing "Employee” lookup
Required
Periodicity
UsrPeriodicity
A new “Periodicity” lookup
Required
Comment
UsrComment
String
Optional
Is Active
UsrIsActive
Boolean
Optional
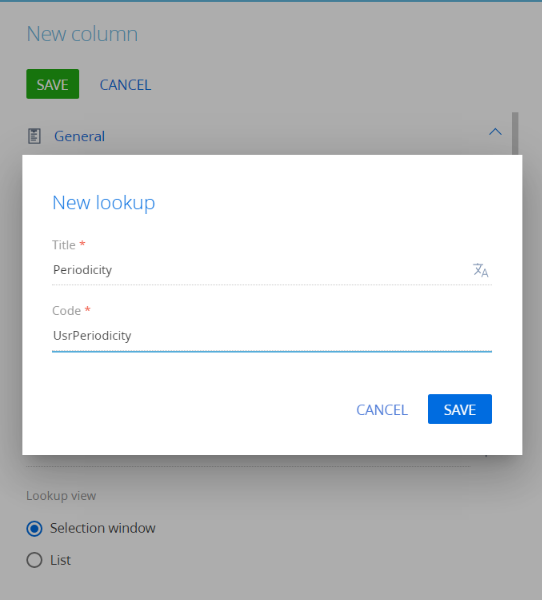
To add a new lookup for the "Periodicity” field:
- Click Add new lookup.

-
-
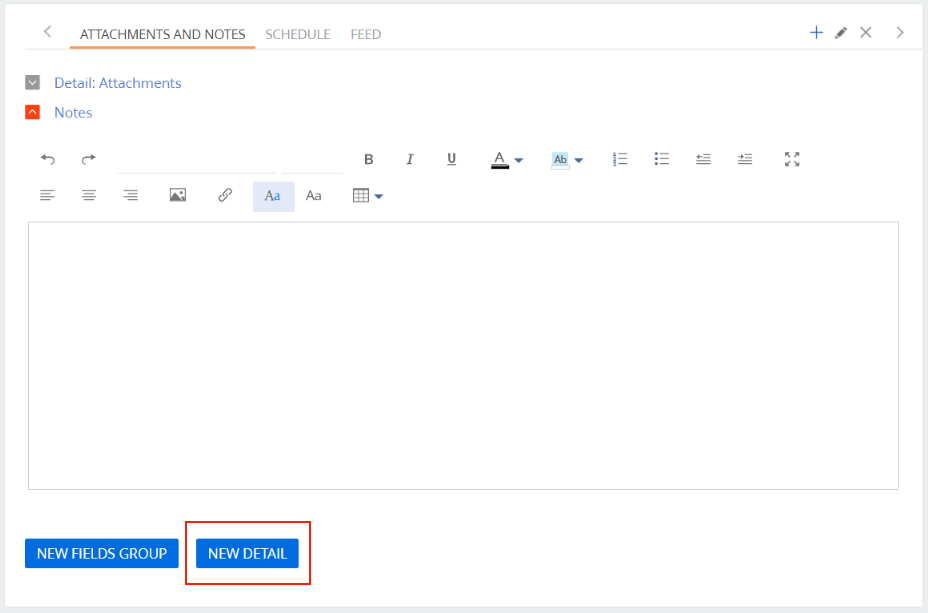
Aside from the fields, the section page will also contain the class exercise schedule. Add a new detail (using the New detail button) to display group classes on the section page.
Click Add new detail → Add using new object.
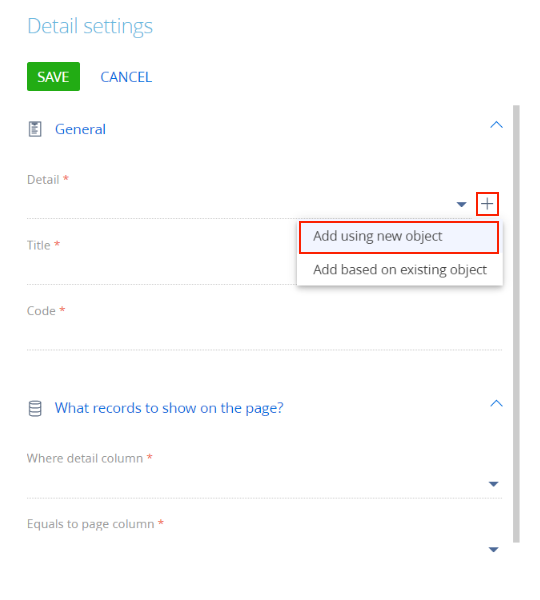
Fill out the detail’s properties:
- Set Object title to "Group training".
- Set Detail title to "Group trainings".
- Set Code to "UsrGroupTraining".
- Set Make the list editable to yes.
- Set Connect by lookup to "Classes".
- Set Lookup column title to "Class".
- Set Lookup column code to "UsrClass".
-
Save the section. At this point, the section is already available in Creatio.
-
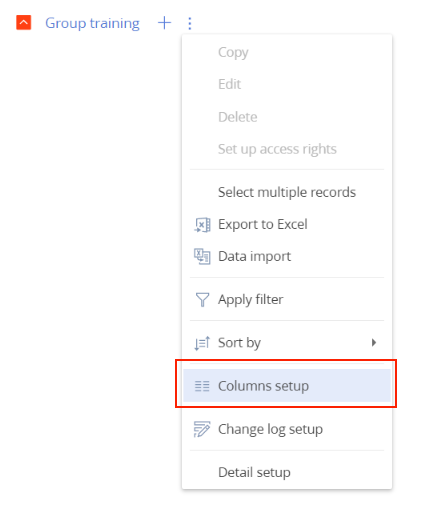
Set up the way the columns on the section record list are displayed separately.
- Open the section list.
- Click View → Select fields to display in the toolbar.
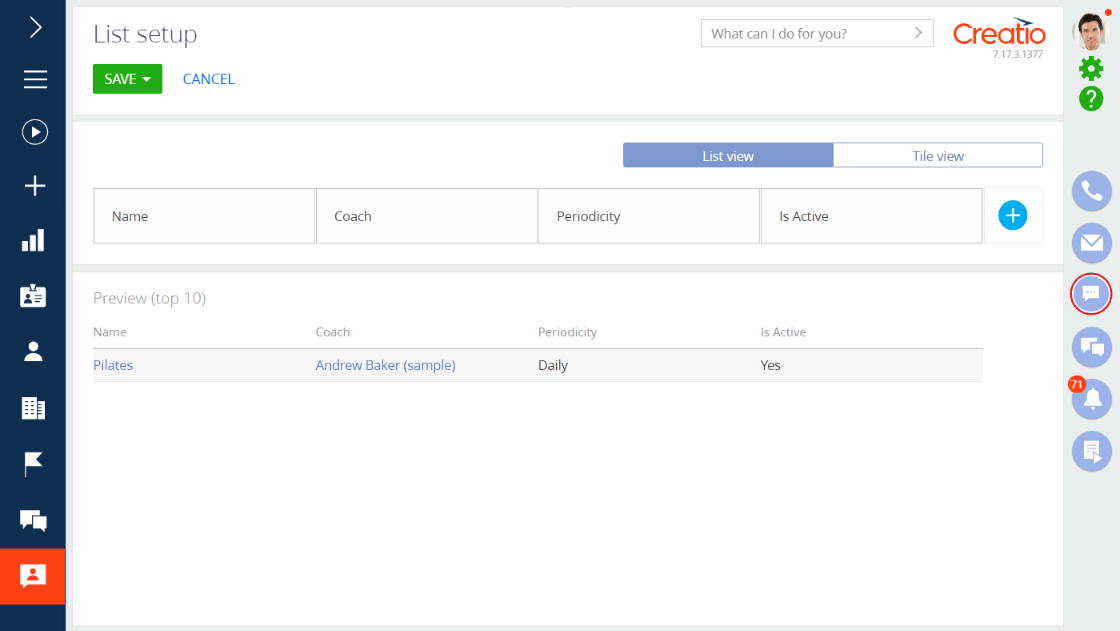
- Click Save.
Set up a detail
Set the group exercise schedule for the section as the final step in creating a new section by adding the details' required fields and choosing how they should appear in the detail list. You can do this directly on the class’s page.
-
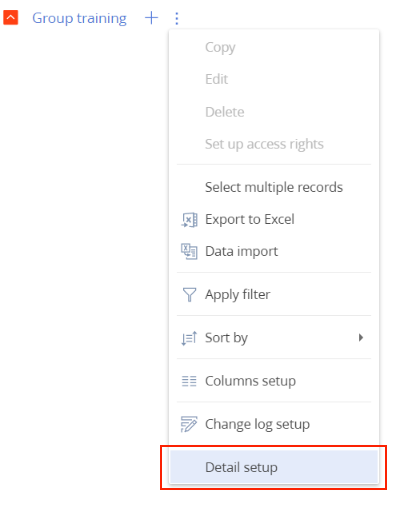
Click New to create a new record in the Classes section’s list. On the page that opens, go to the "Group exercise" detail and open the Detail Wizard. Select Detail setup in the detail’s menu.
-
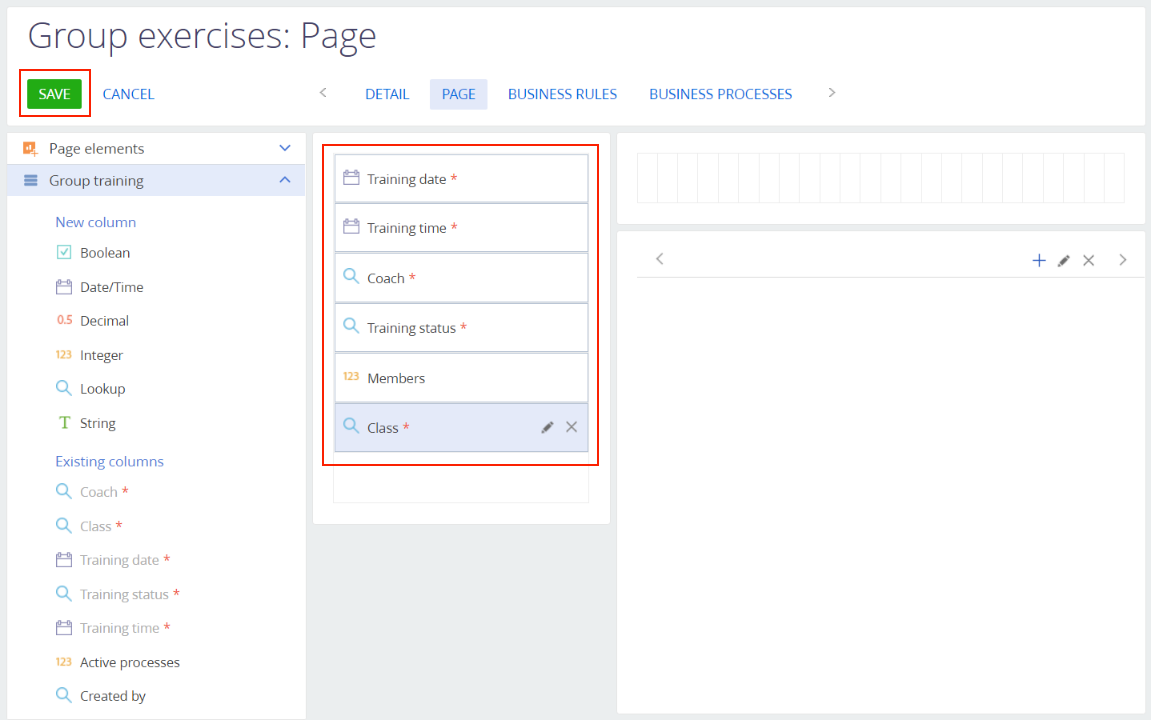
Use the Detail Wizard to set up the detail’s fields on the Page tab. Note that Creatio adds a required field “Class” when creating a detail in the Section Wizard. You should just drug&drop this field to the page.
Title
Code
Data type
Required
Training date
UsrTrainingDate
Date
Required
Training time
UsrTrainingTime
Time
Required
Coach
UsrCoach
The existing "Employee” lookup
Required
Training status
UsrTrainingStatus
A new “Training status” lookup
Required
Members
UsrMembers
Integer
Optional
Class
UsrClass
The existing "Classes” lookup
Required
To add a new lookup for the “Training status” field:
-
Click Add new lookup.
-
Fill out the lookup’s properties:
- Set Title to "Training status".
- Set Code to "UsrTrainingStatus".
-
Save the detail page.
-
-
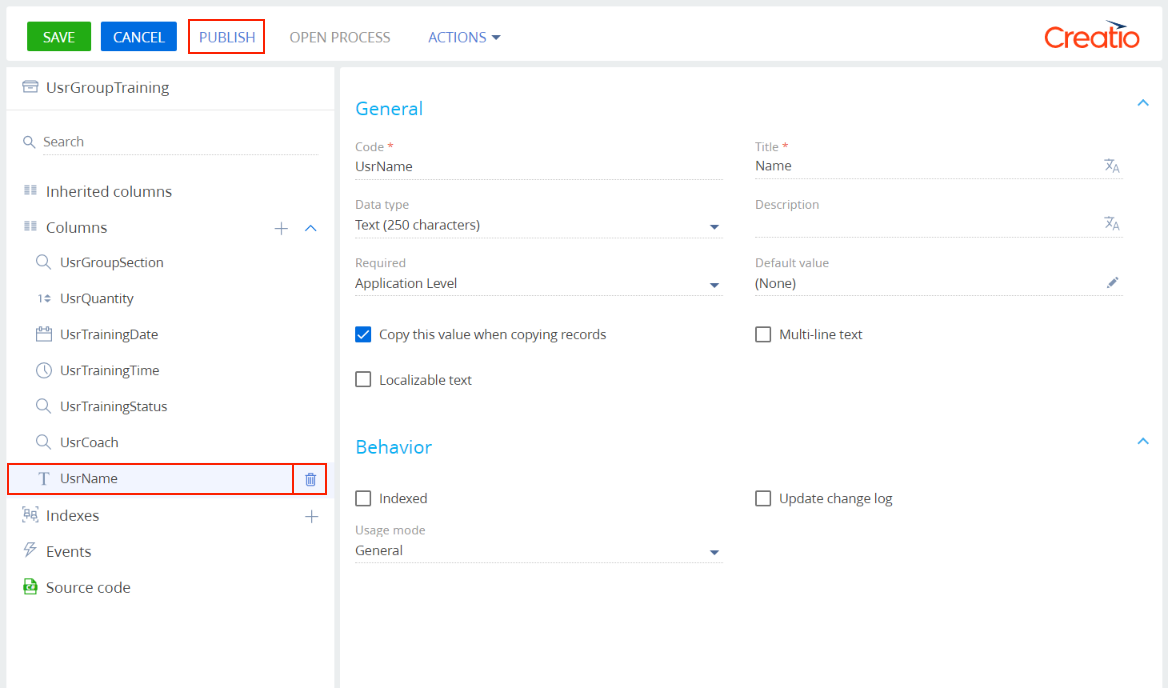
Note that Creatio adds a required field “Name” when creating a detail in the Section Wizard. This field is not required for this example. Delete it.
- Go to the Configuration section.
- As a result, the Section and Detail Wizard will create a set of required schemas and attached data in the “TryItPackage.” Select the "
UsrGroupTraining” schema. This is the schema of the object on which the "Group trainings" detail is based. - Double-click the schema.
- Delete the "UsrName" column from the object’s column list.
- Click Publish to publish the schema.
-
The timetable detail is almost finished. Set up the detail’s columns as the final step.

As a result, we have fully configured the new section's interface. On the next step:
- fill out the new lookups.
- add the gym number system setting.
- attach the new data to the development package.