Sort queue elements
You can customize the display order of the queue records by applying sorting values for one or more columns of the queue object. For example, you can configure the cases to display in the ascending order of the registration date. The queue priority also influences the way records are sorted.
You can customize queues:
- By queue priority (if an agent works with multiple queues that have the same queue object).
- By sorting parameters specified in the object. The parameter configuration applies to all queues generated for the current object.
Learn more: Contact Center app overview.
Display high priority cases that were created earlier in the Agent Inbox panel. To do this, set up the sorting conditions for the cases by priority and then by registration date.
To change the sort order, use the  and
and  buttons.
-
Go to the Queues section.
-
Click
 to open the Queues settings view.
 -
Click Actions → Queue sorting setup.
-
Select the "Case" object → Settings (Fig. 1). This opens a window.
Fig. 1 Select the object in the lookup 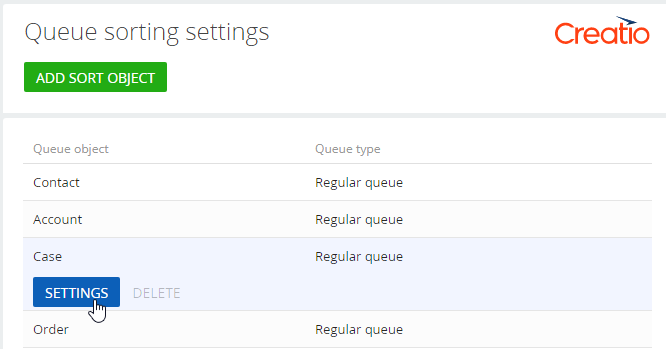
-
Click
 to add a case column for sorting. For this example, add the "Priority" column.
 -
Select the "Ascending" sorting order to display high-priority cases first. Creatio will sort the records in alphabetical order. To sort the records by origin in a specific order, add a number before each entry in the Case sources lookup. For example, "1. Critical", "2. High."
-
Save the settings (Fig. 2).
Fig. 2 Add sorting fields 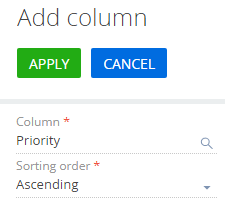
-
Add the "Registration date" column in a similar way. Use the ascending sorting order.
-
Specify the priority of the columns by which to sort the records. The sorting is first performed by the column that has a higher position. In this case, Creatio sorts the records by the Priority column first, then by the Registration date column (Fig. 3).
Fig. 3 Sorting order 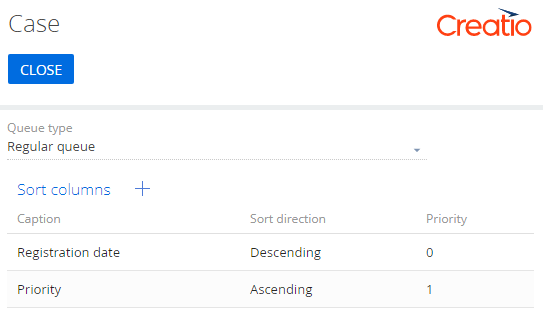
-
Click Close.
As a result, the Agent Inbox panel will display critical records first, then high-priority records, and so on. The earliest records will be displayed before the latest records of the same priority.
See also
Get started with the Contact Center app